250 Cookbooks: Sunset Recipe Annual, 1992 Edition

Cookbook #96: Sunset Recipe Annual, 1992 Edition, Sunset Publishing Corporation, Menlo Park, CA, 1992.
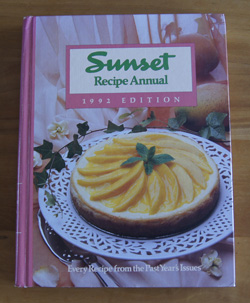
Sunset Recipe Annual 1992January 1, 2015. A new year! And what to cook? Something for New Year’s Day, something a little less calorie-laden than the last two weeks of slight overindulgence. I pull several cookbooks from the shelf, but as soon as I open Sunset Recipe Annual, I know I’ve found the book I want!

Southwestern accents, lots of vegetables and fruits, light and practical . . . hey, I’ve written about this cookbook before! A quick search of my own blog pulls up Sunset All-Time Favorite Recipes, an entry I made in 2012 for a quite-similar Sunset cookbook published in 1993. Like for that book, I want to try at least half of the recipes. Nuff said. I’ll keep this cookbook out for a while and sample some of its attractive recipes.

I settle on “Supper Nachos” for this blog. This recipe is in the “January” chapter, and quite appropriate for New Years Day, casual and tasty, great for serving while the football games play. And lower in fat than most nacho recipes.

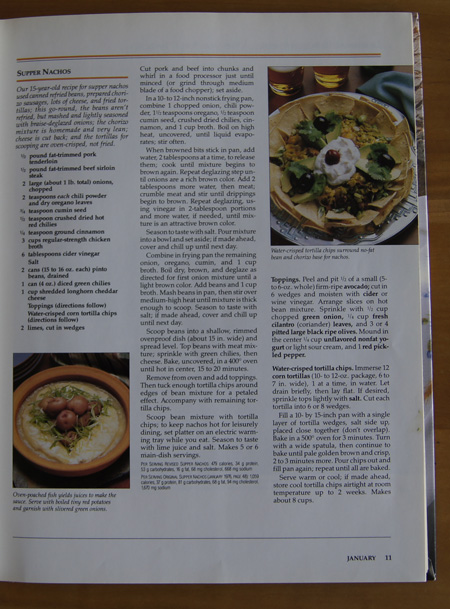
Supper Nachos Recipe

This cookbook has a pleasing layout. Note the lengthy directions for Supper Nachos.

This recipe utilizes the technique of “braise-deglaze” to bump up the flavor while eliminating cooking oil (and associated calories). Briefly, the vegetables (onions in this case) are mixed with a little broth or water and cooked over high heat until the liquid evaporates and brown bits begin to stick to the pan. More liquid is added in small amounts and the process repeated until the vegetables have a rich brown color. I am familiar with this technique, but don’t use it a whole lot, and usually only with wine as the deglazing liquid.

Calories are reduced by using pork tenderloin and lean beef instead of store-purchased hamburger. These meats are mixed with the cooked onions and spices to make a chorizo-like mixture. (Chorizo is a Mexican sausage available nearly everywhere here in Colorado. I have found that each brand I purchase is different, but most are pretty fatty. Sometimes it is formed into sausages, sometimes sold in bulk.)

Calories are further reduced by substituting mashed, seasoned pinto beans for traditional refried beans. And, instead of bagged tortilla chips, I will be baking wedges cut from tortillas.

I changed a few things (beef broth instead of chicken, less cider vinegar, more spices); my version is below.

Light Nachos with Homemade Chorizo
serves about 4 as a meal

for the chorizo:

  • 1/2 pound pork tenderloin (trim off any visible fat)
  • 1/2 pound lean beef (trim off any visible fat)
  • 1 onion, chopped
  • 2 teaspoons chile powder
  • 1 1/2 teaspoons oregano (use Mexican oregano if you have it)
  • 1/2 teaspoon cumin
  • 1/2 teaspoon hot chile flakes
  • 1/4 teaspoon cinnamon
  • 1 cup chicken or beef broth
  • 2 tablespoons cider vinegar

for the beans:

  • 2 cans pinto beans (15-16 oz.), drained
  • 1 onion, chopped
  • 1 teaspoon oregano (Mexican if possible)
  • 1/2 teaspoon cumin
  • 2 cups chicken or beef broth

for the chips:

  • 12 corn tortillas

for putting the baked nachos together:

  • 1 4-oz. can diced green chiles
  • 1 cup grated cheddar cheese

for toppings:

  • avocado, chopped
  • chopped green onion
  • fresh cilantro
  • black olives
  • prepared salsa
  • tomatoes
  • low-fat sour cream or plain yogurt

Directions: chorizo

Chop the pork and beef into big chunks and process in a food processor until just minced. (Do not grind it to a pulp, you want some texture.) Set aside.

Combine the onion, spices, and broth in a pan. I suggest a stainless steel pan rather than a non-stick pan (see my discussion below). Stirring a lot, heat the onion mixture over fairly high heat, uncovered, until the liquid evaporates and brown bits stick in the pan. Then, add a couple tablespoons of water and cook until the mixture begins to brown again. Repeat adding water and boiling it off – “deglazing” – until the onions are a rich brown color.
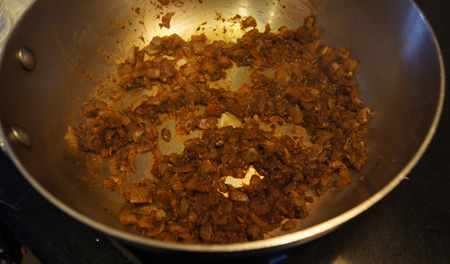
braised onionsAdd the minced meat mixture and a couple tablespoons water and stir until the liquid is again evaporated and the meat is beginning to brown. Deglaze once with 2 tablespoons cider vinegar and then several times with water until the mixture is an “attractive brown color”.
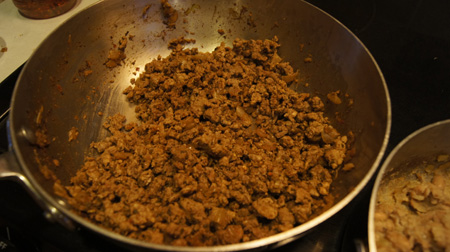
cooked chorizo mixtureCheck the seasoning of the chorizo mixture, adding salt and/or additional seasonings to your own taste. Set aside. The chorizo mixture can be prepared ahead and stored refrigerated or frozen.

Directions: beans

Combine the onion, oregano, cumin, and 1 cup of broth and boil dry, brown, and deglaze as directed for the chorizo onion mixture until the onions are a light brown color. Add the pinto beans and another cup of broth to the onion mixture. Mash the beans in the pan, then stir and heat until the mixture is as thick as refried beans. Check the seasonings, add salt to taste. These beans can be prepared ahead and stored refrigerated or frozen.

Directions: chips

Dip each corn tortilla in water and drain briefly. Lay all the water-dipped tortillas out flat on your work surface and sprinkle the tops with salt. Cut each tortilla into 6 wedges.

Heat your oven to 500˚.

Lay the tortilla wedges on a half-sheet pan or cookie sheet. (I lined my pan with parchment for easy clean-up.) Put them in a single layer – you may need two pans to do this, or, bake in batches.

Bake the tortilla wedges for 3 minutes in a 500˚ oven. Turn with a spatula, then put them back in the oven for another 2-4 minutes, until the chips are “pale golden brown and crisp”. Watch carefully so that they don’t burn. (These will sit for about 15 minutes while the nachos bake. If you want to serve them warm, put them back in the oven with the nachos during the last minute or two of baking.)

Directions: baking the nachos

Turn the oven down to 400˚.

Put the beans on a large, ovenproof dish. Mound them a bit in the center. Top the beans with the chorizo mixture, then the green chiles and the cheese. Bake at 400˚ for 15-20 minutes, until the beans and meat are hot and the cheese melted.

Serving

Arrange the tortilla wedges around the baked nachos. Top the beans with avocado, green onions, tomatoes, salsa, olives, and sour cream. Feel free to experiment!

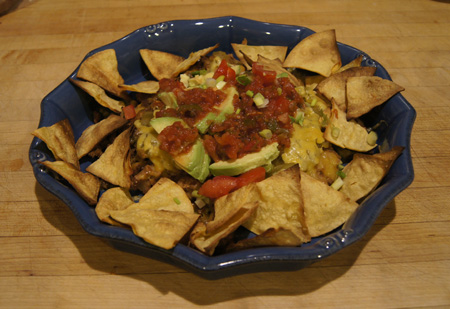
nachosComments

These took a lot of time to make. In the midst of all the preparation, I thought, what the heck did I get myself into so much work for! Well, the answer came when we ate them. They were yummy. Definitely. The meat mixture was especially good. And the chips.

I made a full recipe of the meat mixture for the two of us and I froze half of it for a future meal. I made a half recipe of the beans and the amount was perfect for two people as a meal.

The beans were good, but they really didn’t “stand out”. The main advantage to this bean recipe is the low-calorie aspect. To save time, I suggest canned low-fat refried beans. Don’t get me wrong, the beans in this recipe tasted fine, it’s just not really worth the time to make them unless you are in the mood.

The chips? They were very good. They taste better than any of the bagged “baked” tortilla chips that I have purchased. I will make them again!

In summary, the chorizo is the star of this dish. The finished nachos are excellent because they are baked in the oven; the presentation is special because I served them on a pretty platter with the chips and toppings.

A note on pan choice

I started cooking the onions for the chorizo in a non-stick pan, specifically, a Zwilling J.A. Henckels Sol Thermolon sauce pan. Total disaster. When the first broth boiled off, the onion-spice mixture stuck in a film to the bottom of the pan. It started to blacken to a dark tar and I quickly transferred the mixture to a stainless all-clad pan.

You could try the deglazing in a different type of non-stick pan, it might work. But the all-clad worked great, and clean-up was easy.

I love-hate the Henckels Thermolon pans. I had to send my first Thermolon frying pan back for replacement because after a year, everything stuck to it and it was impossible to clean. I do praise the customer service at Henckels. They responded quickly and told me that I should never have this pan at a temperature higher than medium. Well heck, it’s a frying pan! I often browned meats in this pan over medium-high heat.

Nothing sticks to my newly replaced Thermolon frying pan, but I treat it with the utmost care, never heating it on a burner that is set higher than medium. (I guard this pan!) My Thermolon sauce pan that I used briefly in this recipe needs to be replaced.)

250 Cookbooks: The Cooking of China

Cookbook #93: The Cooking of China, Emily Hahn and the Editors of Time-Life Books, Time-Life Books, NY, 1968. Foods of the World series; fifth printing, revised 1976.

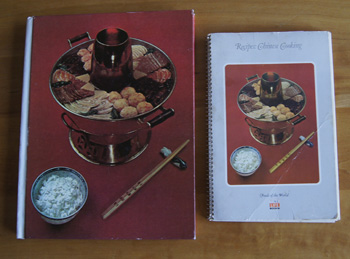
The Cooking of China cookbookMickey was a young woman from Missouri living in Shanghai in the late 1930s. She had an affair with a Chinese poet, took her pet gibbon to dinner parties, became addicted to opium (“though I had always wanted to be an opium addict, I can’t claim that as the reason I went to China”), moved to Hong Kong in 1940 and had an affair with the local head of British Army Intelligence. Way before all those happenings, she was the first American woman to earn a degree in engineering, a pursuit she chose only after being refused permission to take a chemistry class. After college graduation she drove across the US with a woman friend, and they were both disguised as men. All during her adventures, she was writing: 52 books and nearly 200 articles and stories.

And who was Mickey? Emily Hahn, the author of this book! The statements above are all from an article about her on Wikipedia. I am so intrigued that I am going to search the University library for one of her books – China to Me: A Partial Autobiography.

The writing in The Cooking of China reads like a gathering of stories. It is fascinating. At the end of each chapter are recipes, written by Florence Lin and Grace Chu, teachers at the China Institute in New York. The Foods of the World series editor Michael Field was responsible for recipe and food presentation. Michael Rougier, a Life photographer, did the stunning photos in this cook book.

The main theme of this book is the Chinese people’s reverence for good food. “Food is not only pleasurable but a good deal more. It is a truism that food is life, but with the Chinese it is also health and a symbol of other good things such as luck and prosperity. Heaven loves the man who eats well. At each meal a Chinese adds to his virtue, strengthening resistance to the ills of body and mind, curing ailments or, possibly, rendering himself capable of better work. He is also, of course, staving off death, but so are we all.”

Emily Hahn covers the history of Chinese cuisine and the different cooking styles of the main four regions. She presents diverse cooking ingredients and methods, supported by photographs. Her opinion of the Red Guards who appeared in the late 1960s is quite clear. And she describes great dinner parties, ones she attended or imagined ones from the past.

I love this book. It’s been my reference for Chinese cooking for over thirty years. Granted, some of the recipes are just too much work to follow, and some of the ingredients are difficult to find (bird nests? shark fins?). But to me, it is the source for Chinese cuisine. Now that I discovered Emily Hahn’s personal story, I like the book even more.

The Cooking of China is actually a set of two books: the large hardcover book, and an accompanying spiral bound collection of the recipes. I counted these as one book in my database. The recipe that I have used the most is the one for Pearl Balls. For this blog, I decide to try Steamed Buns with Roast Pork Dumplings. I have wanted to make steamed buns ever since a graduate student from China brought them to a dinner party way back in the seventies. But: the work! Now I have the time and experience to try these. It involves making the roast pork, the yeast dough, and finally assembling the rolls and steaming them. And since it’s a Chinese meal, I will also be making pearl balls and egg rolls as well as a soup and rice. So it will be a project. I look forward to this adventure in my kitchen!

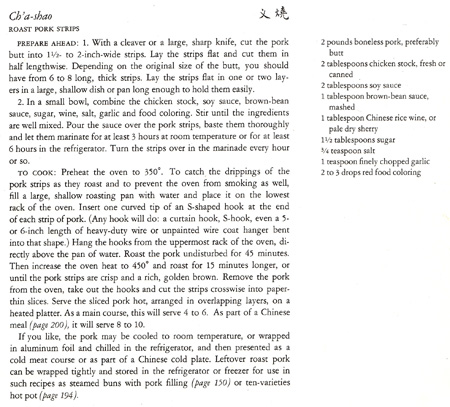
To make the dinner-day easier, I prepare the roast pork a couple days ahead. Here is the original recipe for Roast Pork Strips.

roast pork strips recipeI don’t have brown bean sauce, only hot bean sauce (see my Asian ingredients reference). A trip to the Asian Seafood Market! I have to ask the lady in the market, and she assures me that “bean sauce” is what I want.

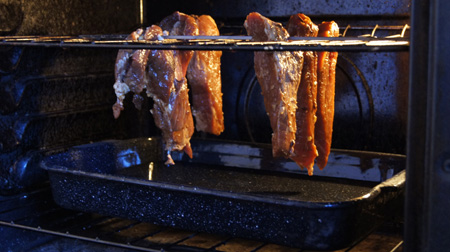
The marinade step is easy, but roasting? They direct me to hang thick pork slices off hooks in the oven above a pan of water. Well, I did that, using skewers, and it worked. But I think it could be cooked on a rack in any roasting pan instead. I’ll include both methods in my version of this recipe.

Roast Chinese Pork Strips

  • pork butt roast, boneless, 2-3 pounds
  • 2 tablespoons chicken stock
  • 2 tablespoons soy sauce
  • 1 tablespoon bean sauce, mashed (substitute with a tablespoon of soy sauce or hoisin sauce if you don’t want to search the stores for bean sauce)
  • 1 tablespoon dry sherry (use Chinese rice wine if you have it)
  • 1 1/2 tablespoons sugar
  • 1 teaspoon minced garlic
  • a few drops red food coloring

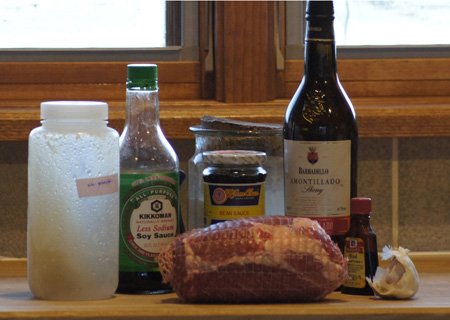
I gather my ingredients:

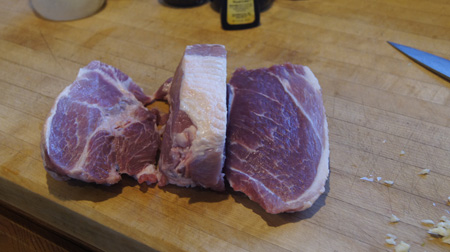
roast pork ingredientsCut the roast lengthwise into 3 or 4 thick slices (1 1/2-inch – 2-inch slices).

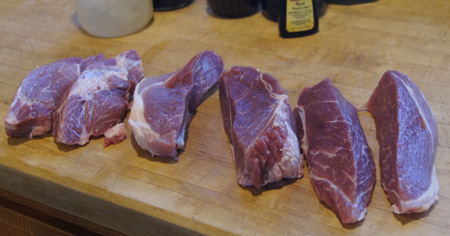
pork stripsThen cut each slice in half lengthwise so that you have 6 or 8 long, thick slices.

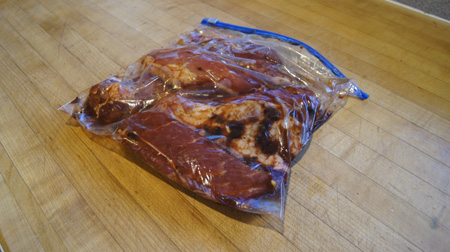
pork stripsCombine the marinade ingredients in a bowl. Put the meat and marinade in a large ziplock-style bag and carefully close it, eliminating as much of the air as you can.

marinading the roast pork stripsSet in the refrigerator for at least 6 hours. If  you remember, turn it over from time to time.

To cook the roast strips, you can probably place them on a rack over a parchment or foil lined pan, or a pan with a couple inches of water in it, and bake first for 45 minutes at 350˚, then for 15 minutes at 450˚.

I cooked it more according to the original recipe. If you want to try my way, set a large flat pan of water, a couple inches deep, in a cold oven. Thread one end of a pork strip on a long metal skewer. Hold the skewer in the oven and put the pork strip through two rungs of your oven rack. Carefully thread another pork strip on the skewer and put the new strip through two different rungs of your oven rack (wherever it fits). Continue until all the pork strips are hung. Here, a photo will help:

roast pork in ovenTurn on the oven to 350˚ and bake 45 minutes, then increase the temperature to 450˚ and cook another 15 minutes. Carefully remove the skewers and pork from the oven and cool.

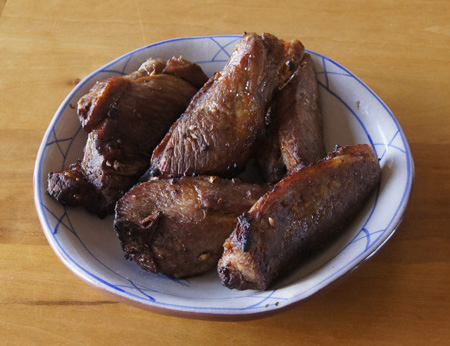
cooked roast pork stripsStore the pork in the refrigerator until you are ready to cook the rolls. Traditionally, these pork strips are sliced into paper-thin slices for serving as part of a meal.

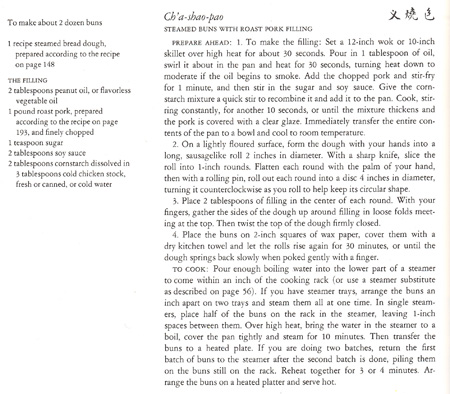
Here is the original recipe for Steamed Buns with Roast Pork Dumplings.

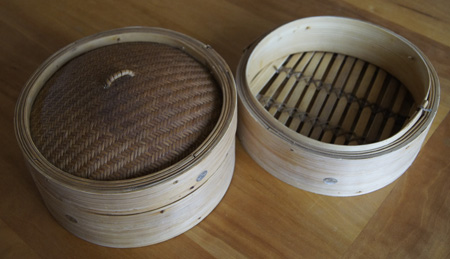
steamed pork buns recipeI made a half-recipe and used my bread machine to prepare the dough. I steamed them in Chinese style bamboo steamers set in a pan of boiling water. I lined the steamer trays with parchment for easy cleaning.

bamboo steamerMy version of steamed buns follows.

Steamed Buns with Pork Filling
makes 12

for the dough:

  • 1/2 cup milk
  • 2 tablespoons water
  • 1 1/2 teaspoons yeast
  • 1 1/2 teaspoons sugar
  • 2 cups flour

for the filling:

  • 1 pound roast Chinese pork strips, prepared as in the above recipe
  • 1 teaspoon sugar
  • 2 tablespoons soy sauce
  • 2 tablespoons corn starch dissolved in a little water

Put the dough ingredients in a breadmaker set to the dough cycle, or knead the dough by hand and let it rise until double.

Prepare the filling while you wait for the dough. First, chop the pork strips into small pieces. Cook in a small amount of hot oil for a minute or so, then add the sugar and soy sauce and stir for a minute. Add the corn starch mixture and stir for about 10 seconds, until the mixture thickens and the pork is covered with a clear glaze. Take it off the heat and transfer to a bowl to cool.

When the dough has risen, punch it down and roll into a long cylinder about 2 inches in diameter. Cut the cylinder into 12 sections. Roll each section into a circle about 4 inches in diameter.

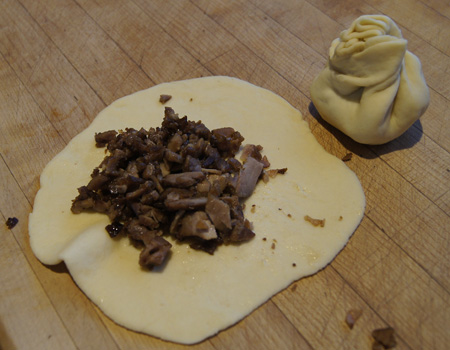
Put the filling on the dough circles. Gather the sides of the dough up around the filling in loose folds meeting at the top. Then twist the top of the dough firmly closed.

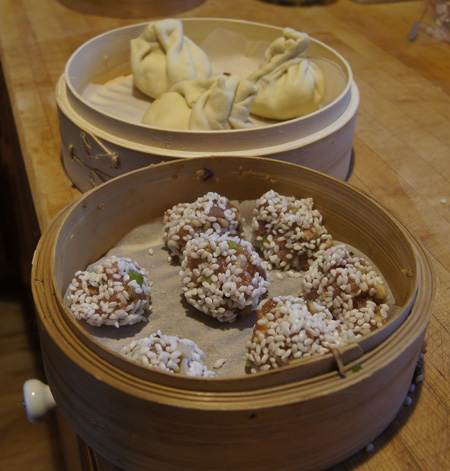
filling the bunsPlace the filled buns an inch apart in parchment-lined steamer trays and let rise about 30 minutes. (Those are my Pearl Balls in the front steamer.)

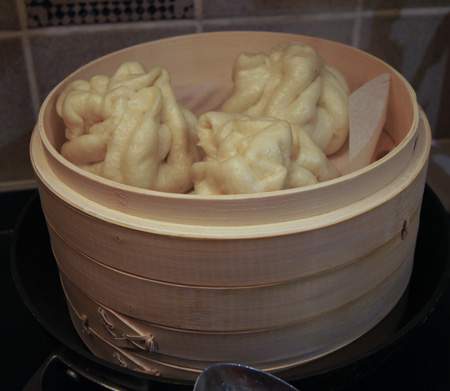
ready to steamSteam the buns for 10 minutes.

steamed bunsThe buns I made had more dough than I like. I followed the recipe in the book carefully, measuring the size of the dough cylinder and the size of each round. But, I only made 9 buns from all the dough. I should made 12! Next time I will make them as I wrote in the above recipe and I am sure they will be perfect.

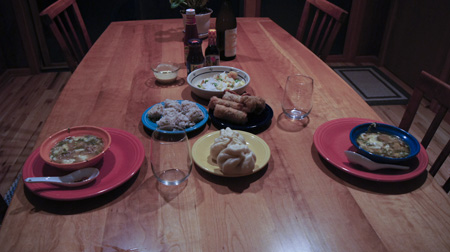
I served these with egg rolls and pearl balls and fried rice and sour-and-hot soup. I had sweet and sour sauce on the table and also a bottle of “banana sauce” that I picked up at the Asian store. These sauces were good with the steamed buns.

ready to eat!Success! I finally made steamed pork buns and they are great. I now have another Chinese recipe to add to my repertoire.

250 Cookbooks: The Nutrition Bible

Cookbook #92: The Nutrition Bible, Jean Anderson and Barbara Deskins, Quill, Willaim Morrow, NY, 1995.

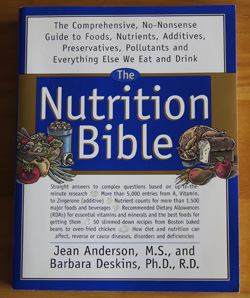
The Nutrition Bible“The Comprehensive, No-Nonsense Guide to Foods, Nutrients, Additives, Preservatives, Pollutants and Everything Else We Eat and Drink.” This is a large, thick book that pretty much lives up to its promise on the cover. And it does it with attitude, which makes it fun to read.

Why would anyone need a print book with all of this easy-to-look-up information about foods? You can always search the internet instead. Aha! But what about when you have an extended power outage, and no cell phone coverage, as we did during the Lyons flood last year? And some entries I would never even think of looking up: aldacarb, ketoacidosis, keratomalacia, furcelleran, efamol, weisswurst. Twiinkies! The Pritikin diet. Hunger. Fudge. These are all discussed in The Nutrition Bible. Here is an example of an entry with attitude:

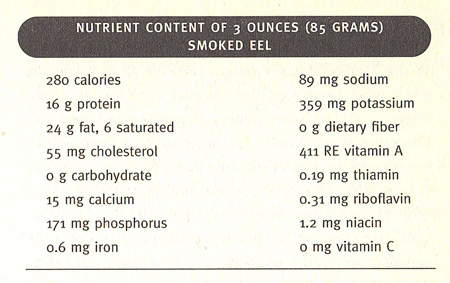
Nutrition Bible entryAs a retired semi-scientist, I get a kick out of reading this “bible”. Plus, it has good nutritional information for the foods. Here is an example:

Nutrition Bible entryThe authors of this book both hold degrees in nutrition. Jean Anderson, who earned a B.S. in food and nutrition and an M.S. in journalism, is the author of numerous cookbooks, including The Food of Portugal and The Grass Roots Cookbook. Barbara Deskins, as an associate professor of clinical dietetics and nutrition, wrote Everyone’s Guide to Better Food and Nutrition. References for specific entries are not footnoted, but an extensive bibliography is included in the back pages. And the author of one of the books in the bibliography? An old favorite of mine, Jane Brody, whose nutrition book I covered in a blog post.

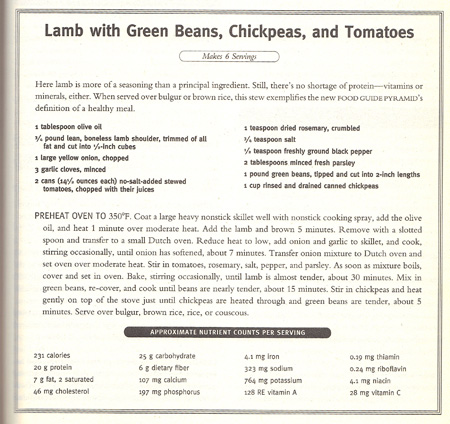
This book also contains some recipes, interspersed throughout the encyclopedia-type entries. For this blog, I choose to make Lamb with Green Beans, Chickpeas, and Tomatoes.

Lamb with Chickpeas and moreThis recipe should be good for a cold winters day. Note that there are more vegetables in this dish than meat: the meat is more of a “seasoning” than a main ingredient. As we learned from our daughter who lives in Africa and from our own travels, in a large part of the world, meat is much less prevalent than in the US. And maybe that is a healthier way to eat. Anyway, I hope it tastes good. I made a few changes; my version is below.

Lamb Stew with Tomatoes and Vegetables
serves 4-6

  • 9 ounces lamb (I used a single lamb steak-chop), cut into 1/2-inch cubes
  • 1 onion, chopped
  • 3 minced garlic cloves
  • 1 28-ounce can diced tomatoes
  • rosemary, either 1 teaspoon dried or a couple sprigs of fresh rosemary, chopped
  • 2 tablespoons chopped fresh parsley
  • salt and pepper to taste
  • 1 cup green beans, cut into about 2-inch lengths
  • 1 cup garbanzos (chick peas)

In a stove-top-to-oven casserole (I used a LeCreuset), cook the onions in a little oil. Salt them a bit. When they are about done, add the garlic and stir for 30 seconds. Remove from the pan.

Brown the lamb cubes in a little oil. My lamb kept releasing water into the pan, so this took a little while.

Add the onions and garlic back to the casserole along with the tomatoes, rosemary, and parsley. Salt and pepper to your liking. Bring to a boil, then cover and place in a 350˚ oven.

Bake for 30 minutes. The lamb I used was really tender, so this was plenty of time. Add the green beans and garbanzos and put back in the oven for 15 minutes.

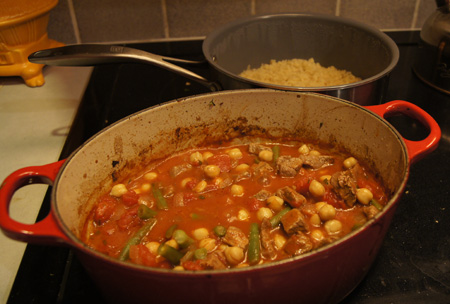
You can serve this lamb stew over bulgur, rice, potatoes, or couscous. I chose bulgur, a cracked wheat product that is common throughout the Middle East. We had it on our trip to Turkey. It is also spelled burghul, bulghur, burghul or bulgar. I bought some at the Mediterranean Market and Deli in Boulder. The package reads: Cracked Wheat Coarse Burghul #3. I recommend everyone try this sometime!

Lamb StewThat’s the bulgur in the pan behind the stew. This stew was very good. I felt really healthy eating it – it’s low in fat and has lots of vegetables. Lamb is generally lower in fat than is beef. The lamb was good, and in fact, my husband didn’t even know it was lamb, he assumed it was beef.

I’ll keep the Nutrition Bible and I’ll make this lamb stew once in a while. Try it, it’s different!

250 Cookbooks: Eat, Drink and Be Healthy

Cookbook #91: Eat, Drink and Be Healthy, Agnes Toms, Pyramid Publications, NY, NY, 1971.

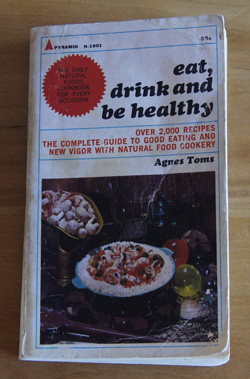
Eat, Drink and Be Healthy cookbookEat, Drink and Be Healthy is one of the early “health food” cookbooks that fueled my generation of hippies. I probably bought it in a used book store when I was a poor graduate student – my guess is that the word “drink” in the title caught my eye as much as the promise of being healthy. I never used this book a lot and there are few food stains and no handwriting or paper notes in it. I should just toss it now. But . . . a closer look at the publication details reveals that the first printing of this book was in 1963, not 1971. I used to think that my generation invented the “health food” craze, but no, eating natural foods had its seeds in American culture “before the first young man grew his hair long, before the first young woman burned her bra”, as I wrote in my blog entry on The Soybean Cookbook. Maybe I should explore this book a bit more before tossing it in the recycling pile.

Searches reveal that the author, Agnes Toms, wrote several other books, including Delicious and Nutritious Cooking: A Book for Students and Others (1956), The Joy of Eating Natural Foods: The Complete Organic Cookbook (1962), and Natural Foods: Meals & Menus for All Seasons (1973).

“The Complete Organic Cookbook”! Toms published a book on organic cooking in 1962! I don’t remember hearing much about “organic foods” until maybe the early seventies. Whole grains and nuts and seeds and the like, but not organic.

In her forward to Eat, Drink and be Healthy, W. Coda Martin, M.D., writes “this is not just another cookbook. It is one that fulfills a specific need for all – a way to better health through good nutrition” and encourages “food unspoiled by sprays, additives, artificial coloring or flavoring”.

These are not new concepts to today’s food culture, but in the fifties and sixties, when home cooks were using a plethora of newly available canned and packaged products, convenience took precedence. Be in the kitchen for the hour it takes to cook brown rice? No, cooks were encouraged to use instant white rice. And so on.

Agnes Toms had a Masters in Home Economics and taught nutrition and prepared menus for a junior high. Her book outlines a nutrition plan that is still sound today. The recipes include ingredients like carob, unbleached white flour, whole wheat flour, a variety of whole grains, brewers yeast, honey, meat and game (even organ meats), sunflower seeds, sesame seeds, home-baked breads, garden fresh vegetables, fruits, sprouts, unsaturated oils, tahini, nuts, and food unspoiled by sprays, additives, artificial coloring or flavoring.

Today we have no problem finding these food items in our huge “health food” stores. But in 1963? No, they were hard to find. I remember those days. Toms addresses this issue in her introductory pages:

“I know it is a real problem for many people to find the food products mentioned in this book. To them, may I suggest some ways to deal with this problem:

  1. Look in the Classified pages of your telephone book for health food stores in your area; or consult the advertisements in health magazines.
  2. Search the shelves of your local market for unsulphured molasses, spray-dried milk, unflavored gelatin, honey, herbs, spices, nuts, vegetable oils.
  3. Look for milling companies in your area and ask them about wheat germ, whole-grain flour, buckwheat, peanut, rice, and other flours. See if they have brown rice and whole soybeans.
  4. Look for a hatchery near you for fertile eggs, or scour the neighborhood for some one who has a flock of chickens on the ground, with a rooster.
  5. Get the health-minded women in your neighborhood together and demand that the local dairy produce raw certified milk; and be sure to ask your dairy where you can procure natural cheeses.”

We are fortunate to have such variety in our markets today!

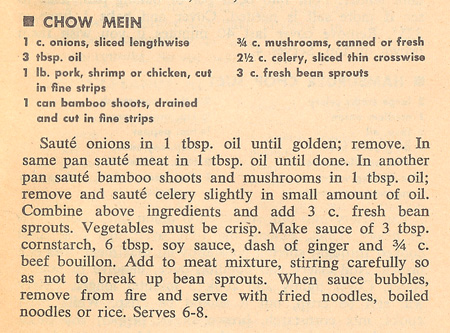
For this blog, I decide to make “Chow Mein”.

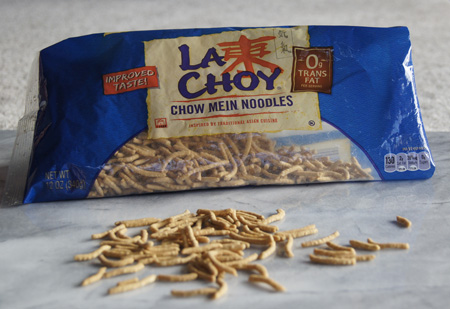
Chow Mein recipeI bought noodles labeled “chow mein”  for this recipe. That’s the dry, crunchy noodles sold ready to eat in a plastic bag or in a can. I plan to serve the dish directly over these noodles.

chow mein noodlesI have always served whet I call “chow mein” directly over these noodles. But when I look up chow mein recipes today, they use fresh egg-wheat noodles, not the packaged crunchy ones. Wikipedia’s entry on chow mein states that for crispy chow mein, fresh noodles are stir fried for the dish. AboutFood.com explains the difference between chow mein and lo mein; they too state that chow mein is made from fresh noodles. Even the La Choy website – La Choy is the brand name of the chow mein noodles that I bought – doesn’t have a recipe for a chow mein served directly over the crunchy, packaged noodles. They do have the recipe for Haystacks, that classic recipe for cookies made from the crisp noodles.

Consensus? In today’s American cooking culture, crunchy packaged chow mein noodles are added to salads, vegetables, stir-fries, and even desserts to give a boost of crunch, but not as the sole noodle ingredient in a dish.

Toms’ recipe including the basic ingredients of onions, thinly sliced meat, and bean sprouts in a brown sauce are consistent with traditional chow meins (according to Wikipedia). Here is the version of chow mein that I made.

Pork Chow Mein
serves 2-3 people

  • 1/2 cup sliced onions
  • 8-10 ounces pork, sliced thinly (shrimp or chicken could be substituted)
  • about 1/2 teaspoon freshly grated ginger
  • 1 cup celery, sliced
  • 5-6 mushrooms, sliced
  • 2 tablespoons corn starch
  • 4 tablespoons soy sauce
  • 1/2 cup water or broth (more if necessary)
  • 1-2 cups fresh mung bean sprouts
  • chow mein noodles

Cook the onions in hot oil until soft; remove from pan. In the same pan, stir-fry the pork until it loses its pink color; add the ginger to the pork while it cooks. Remove the pork from the pan, then stir fry the celery and mushrooms just until the celery is a little softened. Add back the onions and meat and stir to combine.

Stir together the corn starch and soy sauce and water and add to the pork-vegetable mixture. Heat and stir until it thickens; if it gets too thick, add some water or broth. Add the bean sprouts just a few minutes before you serve the dish.

Serve directly over packaged crunchy chow mein noodles, or over cooked egg-wheat noodles or rice. Your choice.

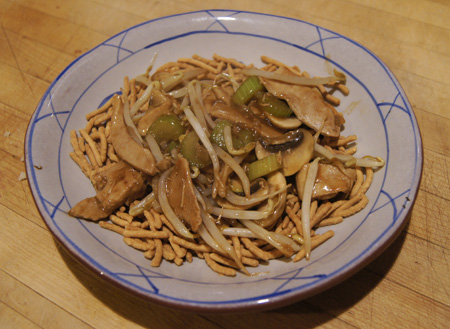
pork chow meinComments

This was good. I would make it again. But next time I’ll serve it over noodles or rice and just sprinkle with the crunchy noodles.

If you read the original recipe, you will note that I changed the instructions a bit. Her version says to use two pans, an unnecessary step, IMHO. The sauce ingredients were not listed with the other ingredients; I put them in the list with the others.

If you make this, feel free to add any vegetables you like. I think some carrots and red bell peppers would make it prettier. As Agnes Toms states in the directions: “Vegetables must be crisp”, so don’t overcook them. This chow mein goes together fast, yielding a tasty nutritious meal in minutes.

250 Cookbooks: The Pizza Book

Cookbook #90: The Pizza Book, Evelyne Slomon, Times Books, NY, 1984.

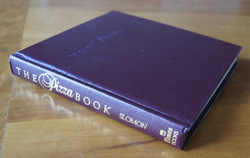
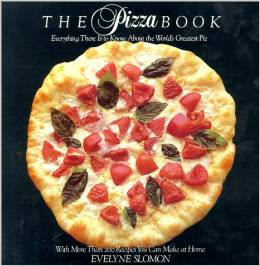
The Pizza BookI didn’t keep the book jacket, but here is what it looked like:

The Pizza Book jacket coverPicture this: Boulder, Colorado, sometime in the seventies. We are enjoying a pizza at Old Chicago Pizza, downtown. Wow, they used fresh mushrooms on this pizza! It was heavenly. I fell in love with pizzas at that point. But not the cheesy-greasy fast food pizzas, the good ones. I started making my own, and bought The Pizza Book in the eighties.

Since we live too far from a town for pizza deliveries, and since I am a cook, it’s not a stretch that I began making my own pizzas. I make one about every other week. My favorite crusts have morphed over the years, from a thick whole wheat crust to a thinner beer-based crust to a non-kneaded thin crust. I have tried many toppings, but usually come back to a tomato and cheese based pizza with sausage or pepperoni, mushrooms (fresh!), onions, and black olives. (My Mexican pizza is one of my saved variations.) I have tried several baking methods: cookie sheet, perforated round pan, baking stone, and gas grill.

And you know what? All of the crust and ingredient and baking methods work. Each type of pizza has its place in a sensible pizza-eating plan!

Evelyn Slomon tells us that pizza came to America with Italian immigrants in the late nineteenth century. Too poor to buy bread, the women would pay to bake their own dough in an oven at a bakery. They would often take a portion of the dough and flavor it with tomato sauce and bake it alongside their loaves. “In the old country it was called pizza” according to Slomon. This pizza was done before the loaves and it “appeased the appetites of hungry children.”

Slomon continues with the history of pizza in America, then presents a comprehensive guide on how to make pizza. It’s a great reference on different types of pizza doughs and the basic skills needed to prepare pizzas. And then there are about 200 recipes to choose from – enough ideas to keep any pizza cook happy. And of course, you are encouraged to come up with your own ideas. Most of Slomon’s recipes give a choice of different doughs and toppings and even baking methods.

Even though this book was published thirty years ago, it is still available either new or used. It has stood the test of time – this book is still all you need to make great pizza. I highly recommend The Pizza Book.

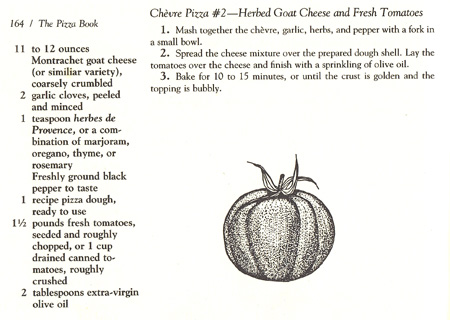
I decide to make “Chèvre Pizza”. I have the choice of 7 different crusts and 5 different toppings. I decide to use Sicilian-style dough (has a lot of olive oil) and Chèvre Pizza #2: “Herbed Goat Cheese and Fresh Tomatoes”. I am going to vary this further by adding prosciutto (from variation #3) and a few fresh basil leaves (from my garden). I’ll assemble it on a pizza peel and then bake it in a hot oven on a preheated baking stone.

The Pizza Book recipeMy version is below.

Herbed Goat Cheese, Fresh Tomato, and Prosciutto Pizza
makes two 12-inch pizzas (approximately)

Besides the ingredients below, you will need semolina flour. For equipment, you need a pizza peel and a large baking stone.

Sicilian Style Pizza Dough

  • 3/4 cup water
  • 1 package (scant tablespoon) yeast
  • 3 cups flour (I used bread flour)
  • 1/4 cup olive oil
  • 1/2 teaspoon salt

Put the dough ingredients in a breadmaker and set to the “dough” cycle (including a rising step). Or, mix and knead by hand or in a food processor, then let rise until double in bulk. During the mixing and kneading steps, you may need to add a little more flour to get a soft, smooth ball of dough. Prepare the pizza toppings while you wait for the dough to rise.

Oven

Place a baking stone in your oven 30 minutes before you want to start baking the pizzas. Turn it to 500˚, or as close to that as your oven will go.

Herbed Goat Cheese (etc.) topping

  • 11 – 12 ounces plain goat cheese
  • 2 minced garlic cloves
  • 1 teaspoon dried or 1 tablespoon chopped fresh mixed herbs – I used fresh thyme and fresh oregano
  • 8 ounces grated mozzarella cheese
  • fresh tomatoes, about 1 1/2 pounds
  • several thin slices of prosciutto, about 2-3 ounces
  • several fresh basil leaves, thinly sliced
  • 2 tablespoons olive oil (approximate)

Mix the garlic and herbs with the goat cheese, using a fork to mash them together. My goat cheese mixture was pretty crumbly. Cut the prosciutto into strips.

Peel and core the tomatoes, then chop them into rough dice. Put them in a strainer and let them drain while you roll out the pizza dough.

Assemble and bake the pizza

Note: There are many ways to roll or stretch out a pizza dough. I usually use a rolling pin. But after re-reading Slomon’s pizza book, I decided to try chilling the dough briefly before stretching it out. So below is the method I used, but feel free to use another method.

After the dough has risen, divide it into two portions. Flatten each into a disc and cover with plastic. I placed them in the refrigerator for 15 minutes or so. (This should make the dough easier to handle. It is an optional step that I might eliminate next time; see my comments below.) Next, remove from the fridge and work each disk on a breadboard, pushing and stretching into a circle. You can pick up the dough and play with letting it hang down over your knuckles to stretch it out, and even hold it by the edges and let gravity pull it down. The olive oil in this dough makes it easy to work with! I was able to get each portion stretched into a 12-inch circle.

(Is your oven hot? You need it hot before you assemble the pizza, or the dough might get soaked while you wait for the oven to heat.)

Put one of the discs onto a pizza peel that has semolina dough sprinkled on it. Sprinkle the herbed goat and mozzarella cheeses on first, then add the prosciutto and the basil leaves. Put on the tomatoes, then drop some olive oil on top of the tomatoes and on the rim of the dough.

Carefully slide the topped pizza onto the hot pizza stone, close the oven door, and bake for 15 minutes. Get the second half of the pizza dough topped while you wait for the oven, then bake it in the same manner.

I actually made one goat cheese pizza and one with prosciutto, black olive, onion, bell pepper, mozzarella, Parmesan, and fresh tomatoes. I had a feeling the goat cheese one would be “too much” for him, and I was right. I liked both toppings!

Comments

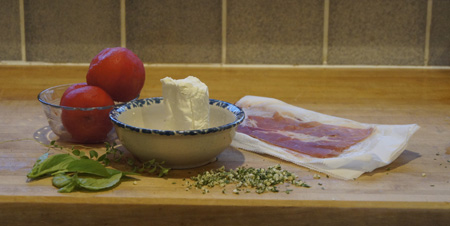
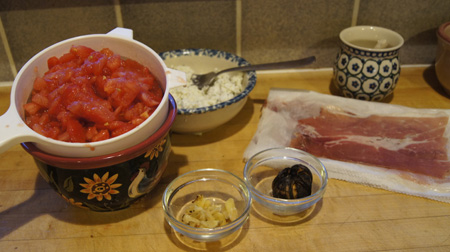
While my dough was rising, I gathered my ingredients. First, the goat cheese and herbs with the peeled tomatoes and prosciutto.

pizza ingredientsI was glad that I thought to drain the chopped tomatoes. I had some great roasted garlic from a stand in Lyons, so I used some of it on the pizza.

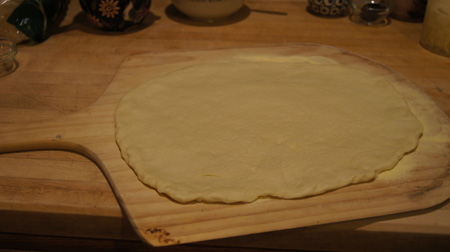
pizza ingredientsBelow is half the dough on a pizza peel.

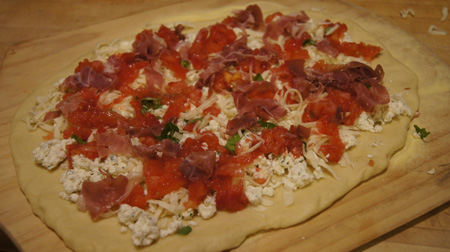
pizza dough on pizza peelHere is the first pizza, ready for the oven.

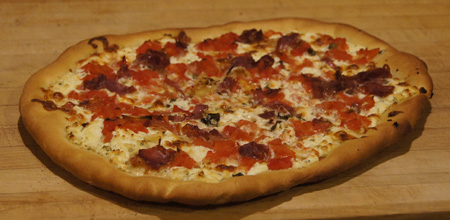
pizza before cookingBaked!

goat cheese pizzaThese pizzas were baked to perfection. I really, really like the simple “sauce” of just fresh, non-precooked tomatoes. It’s easy and fresh-tasting. Putting the cheese on first keeps the crust from sogging. The prosciutto tucked under the tomatoes keeps it from burning in the very hot oven. The very hot oven makes the crust crisp.

Both of us thought the crust tasted a bit like a big “cracker”. This is good or not, it depends on your preference. I will probably use less olive oil in the dough next time and eliminate the chilling step. I think the yeast in the dough didn’t have time to warm up and work its magic in rising the baking dough, or perhaps the olive oil inhibited the rising. The recipe is good as written, but . . . tweaking is part of the experiment, and that’s what cooking is about!

250 Cookbooks: Pillsbury’s 36th Bake-Off Cookbook

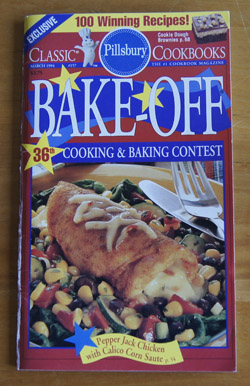
Cookbook #87: Pillsbury’s 36th Bake-Off, The Pillsbury Company, Minneapolis, MN, 1994.

Bake-Off Cookbook 36thThe earliest Bake-Off cookbook I covered in this blog was published in 1959; I discuss these cookbooks/recipe magazines more thoroughly in my blog post covering the 1964 Bake-Off Cookbook.

I recorded in my database that this cookbook was my mother’s. She did not mark any of the recipes, but I find some main dishes that sound interesting: Garden Vegetable Feta Pizza, Spicy Broccoli Aioli Pizza, Tuscan Spinach Torta, Confetti Corn and Bulgur Salad, West African Chicken and Groundnut Stew, and Chicken Vegetable Stir-Fry Salad. I am sort of surprised to find this trendy recipes in this old cooking magazine. I didn’t discover feta cheese until the late 90s. I learned about aioli in a cooking class sometime in the 2000s. Bulgur? Late 90s too. We had “groundnuts” in Ghana on our first trip to West Africa in 2011. In the US,  groundnuts are called “peanut butter”.

The cookbook also has recipes for salads and soups and sandwiches, and of course, cookies and cakes and pies. Only about a quarter of the recipes are for sweets – an unusual stat for Bake-Off Cookbooks – and yes, I would love to make any of them, but I will restrain myself! It’s nice that most of the main dishes in this bake-off cookbook dial in at a little under 500 calories.

My only complaint is a general one: many recipes include pre-made doughs, such as pie crusts, refrigerated biscuits or crescent rolls, or mixes, such as corn muffin or yellow cake mix. Pillsbury brand name canned vegetables are always specified but hey, it’s their cookbook.

The cover recipe, “Pepper Jack Chicken with Calico Corn Saute”, sounds excellent! That’s what I will make for this blog. I decide to hang onto this cookbook for awhile and try several of the recipes.

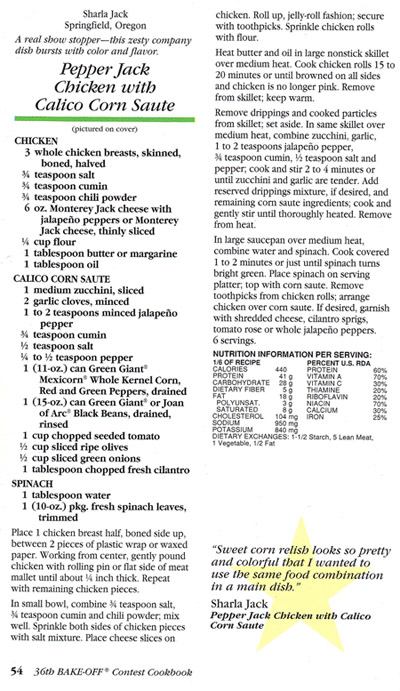
Pepper Jack Chicken RecipeThis recipe calls “3 whole chicken breasts” and infers that the cook will bone them. A whole chicken breast is the two halves together. Today boneless chicken breasts are usually sold as half-pieces. And they are fairly cheap, so you don’t save a lot by boning them yourself. Since chicken breasts range in size from small to large, I find it best to weigh out 9-10 ounces for a meal for the two of us.

I plan to make this Pepper Jack chicken pretty much as written. I happen to have my own black beans, so I will use them instead of the canned ones. I don’t have fresh jalapenos, but I have some great dried ones. I wonder if I will get away with the spinach, plated under the “calico corn saute”. My dining partner does not like cooked spinach . . .

Pepper Jack Chicken with Corn Saute
serves about 2, depending on appetites

Feel free to change up the vegetables in this recipe. Or if you like following a recipe, do so. Whatever!

  • 2 boneless chicken breast halves; about 9-10 ounces
  • 1/2 teaspoon cumin
  • 1/2 teaspoon chile powder
  • salt and pepper
  • 2-3 ounces Jack cheese with jalapenos (“Pepper Jack”), grated
  • flour (to coat the chicken)
  • zucchini, about a third of a medium one, sliced or diced
  • 1 garlic clove, minced
  • jalapeno pepper, about 1 teaspoon fresh or dried
  • 1/2 teaspoon cumin
  • salt and pepper
  • 1/2 of an 11-ounce can of canned corn, or use fresh or frozen corn, about 1/2 – 1 cup
  • 1/2 of a can of plain or seasoned black beans; about 1/2 – 1 cup
  • 1 medium tomato, chopped
  • 1/2 of a small can of black olives, sliced
  • 1 green onion, chopped
  • chopped fresh cilantro to taste
  • 5 ounces of fresh spinach (optional)

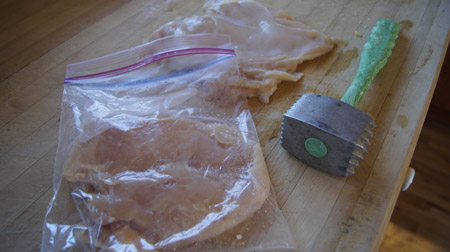
Pound the chicken until it’s thin. I like to put it on a ziplock bag and pound with the flat side of a mallet. Others advise to work from the center and gently press it thin. I like to pound. And it worked.

(One of my chicken breasts was huge, so I cut it in half. I proceeded with three rectangles of flattened chicken breasts.)

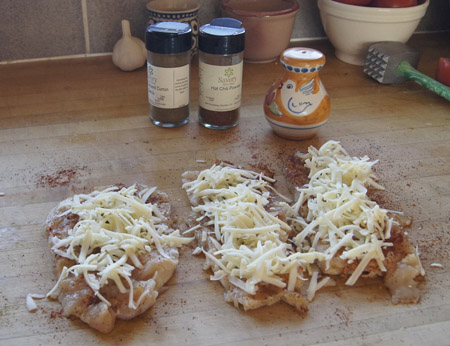
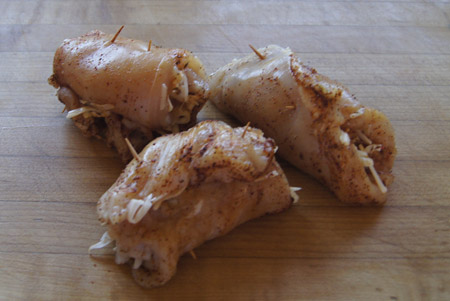
pounding a chicken breastSprinkle both sides of the chicken breasts with the cumin, chile powder, and salt and pepper. Lay them out on your work surface and top with the grated cheese.

chicken breasts with cheeseRoll up as tightly as you can and use a couple toothpicks to secure the rolls. Sprinkle with flour on all sides.

stuffed chicken rollsHeat a skillet using medium heat, then add a little oil (and a little butter if you want). Add the chicken rolls and cook until browned on all sides. Continue cooking until they are done. It’s hard to tell when these are “no longer pink”, but 15-20 minutes is probably how long they will take. You can check the temperature with a thermometer; you can cover them if you think they need more cooking. When cooked, remove the toothpicks.

Meanwhile, make the “corn saute” in another pot or skillet. First, cook the zucchini, garlic, jalapeno pepper, cumin, and salt and pepper in a small amount of olive oil a couple minutes until everything softens. Add the corn, black beans, tomato, olives, green onions, and cilantro and cook a couple minutes until everything is hot. Taste and adjust seasonings if necessary.

If you are using spinach, get it ready too. I usually put the fresh spinach in a big pot, add about a tablespoon of water, cover the pot, and turn to high until it boils. Then I remove it from the heat, allow to cool, and drain. Feel free to cook it using your own favorite method.

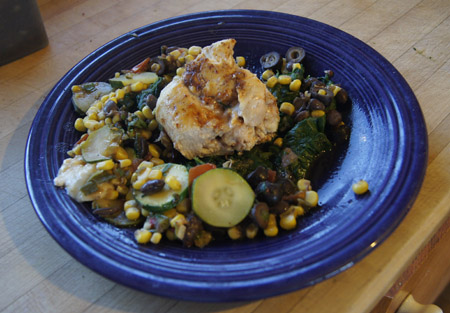
Plate the spinach topped with the corn saute, then put the chicken breasts on top.

Pepper Jack Chicken RollsThis was soooo good! I love meals with lots of vegetables. It was good and spicy and the cheese melted into the chicken, keeping it moist and giving it a lot of flavor. I think this might become one of our favorites.

And the spinach? Didn’t get away with it. It was left behind on my husband’s plate. But he liked the rest of it!

250 Cookbooks: New Slow Cooker Meals

Cookbook #86: New Slow Cooker Meals, Betty Crocker, General Mills, Inc., Minneapolis, MN, 2001.

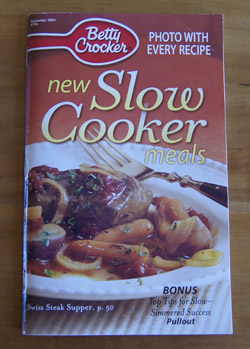
New Slow Cooker CookbookI remember there was a time that I searched my house but couldn’t find any of my slow cooker cookbooks. That’s probably when I picked up this small cookbook at a supermarket. Today, I don’t find any of the recipes in New Slow Cooker Meals inspiring. In my opinion, most of the recipes would be better cooked in a pot on the stove for an hour than dragging out a big crockpot and having it cook all day. But then again, I am retired. (See my first crock pot entry for my opinions on crock pot cooking in general.)

Betty Crocker’s New Slow Cooker Meals is 5×8-inches and 96 pages. You could subscribe to Betty Crocker cookbooks, and this cookbook has a url printed in it: www.bettycrocker.com. On the current website, these small printed cookbooks are called “Recipe Magazines from Betty Crocker”, and you can still subscribe to them. The website has a section on slow cooker recipes.

I do have a task this week that I can tie into this cooking blog. The Lyons Garden Club is having a chile cookoff, and I want to contribute a crockpot of chile, albeit not one to enter into the contest (since I am a member). So, I will make the Family-Favorite Chili on page 19 of this Betty Crocker recipe magazine. Family-Favorite Chili is made with hamburger, spices, tomatoes, and beans.

(I find myself typing “chili” and “chile” interchangeably. Which is correct? A web search reveals much controversy. I kind of like the answer at MJ’s Kitchen: a chili is a pepper and a chile is a dish cooked with a chili pepper. Don’t sweat it.)

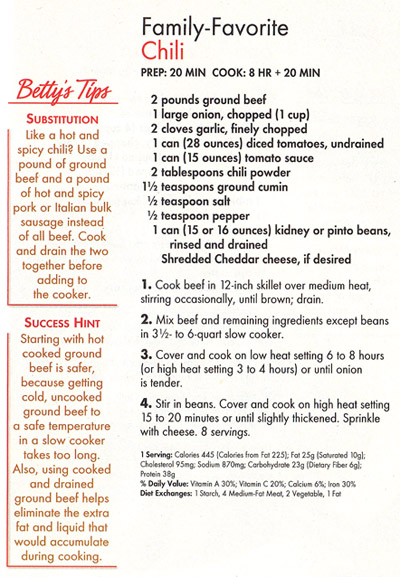
Here is Betty Crocker’s recipe for Family-Favorite Chile.

FamFavChiliRecI will of course make some changes. I like to wilt onions a few minutes before adding them to a dish. (And I find it odd that step 3 says to cook until the onions are tender: 3-4 hours.) I like to use a seasoning packet like Two Alarm Chili or Carroll Shelby’s Chili Kit. Boring, but consistent. I have some dry pinto beans and a new pressure cooker, so I will cook my own beans instead of using canned beans. Below is my version.

My Basic Red Chile with Hamburger and Beans
makes a big crockpot’s worth of chile

  • 2 pounds ground beef
  • 1 large onion, chopped
  • 2 cloves garlic, chopped
  • 1 14-ounce can of diced tomatoes
  • 1 15-ounce can tomato sauce
  • a chili kit (Carroll Shelby’s or Two-Alarm or your favorite) or chili powder to taste
  • 1 teaspoon salt (or to taste)
  • 2 cups (more or less) cooked or canned kidney or pinto beans (I used pintos that I soaked then pressure cooked for 20 minutes; I added dried hot peppers and salt before cooking)

Brown the ground beef, then drain off any fat and put it in a crock pot. Heat some olive oil in a small pan and cook the onion (salt it) until it wilts; add the garlic and stir 30 seconds. Add the onion-garlic mixture to the crock pot.

Add the tomatoes, tomato sauce, and seasonings to the crock pot and give the mixture a good stir. Cover and cook on low about 6 hours. Add the beans and check the seasoning, adding more spice or salt to your personal taste. Cook until the chile-bean mixture is heated through.

This chile will hold well on low for another hour or more but you might have to add a little water if it gets too thick.

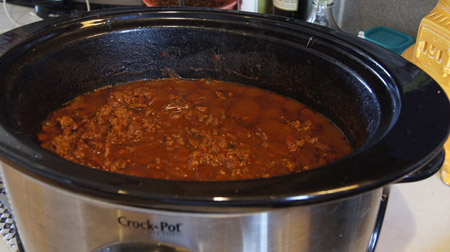
My ChileThis chile is always good! Not different and unusual, but always welcome for a comfort-food dinner. We usually put cheese and onions on it and serve it with warmed flour tortillas.

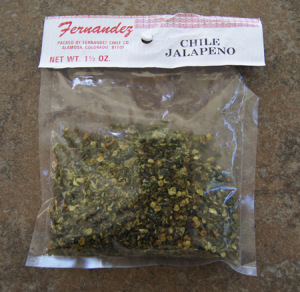
I added some Mexican oregano and some of these dried chiles to this pot of chile:

jalapeno chilisAnd here are the Chili Queens at the Chili Cookoff!

Chili Queens

Photo credit to J. O’Brien, downloaded from Facebook.

Favorites: Pearl Balls

“Pearl Balls” are pork meat balls, seasoned with ginger and soy sauce, rolled in soaked rice, and then steamed. I forget when I first discovered these treats, but I always go back to my 1968 The Cooking of China Time-Life Books cookbook when I get a hankering for these. (I have admitted here before that I love meat balls so my current hankering isn’t out of character.)

The recipe below is adapted for my tastes. I believe the fresh ginger and water chestnuts to be essential in Pearl Balls, and I buy the best quality ground pork that I can find. These can be used as appetizers or to round out a Chinese-style meal.

Pearl Balls
serves about 4 as part of a Chinese-style meal

  • 1/2 cup rice, preferably a glutinous or starchy rice like a sushi rice
  • 1 pound ground pork
  • 1/2 cup finely chopped water chestnuts
  • 1 green onion, finely chopped
  • 1/2 cup finely chopped mushrooms (use fresh white or shitake mushrooms, or reconstituted dried shitake mushrooms)
  • 1 teaspoon grated fresh ginger
  • 1/2 teaspoon sugar
  • 1-2 tablespoons soy sauce
  • 3/4 teaspoon salt (adjust this amount to your own taste)
  • 1 lightly beaten egg

Start the rice soaking in a cup of water before you begin the Pearl Balls. About an hour’s soak is enough.

Combine the pork with the rest of the ingredients and mix well. Form the mixture into 1-inch meat balls.

Drain the soaked rice through a strainer and lay it out on a paper towel. Roll one pork ball at a time in the rice, pressing down gently but firmly as you roll so that the rice grains adhere to the meat.

Steam the pork balls for about 30 minutes. I use an electric steamer; a bamboo steamer set in a wok also works.

Serve at once! (Although, I enjoyed one of these cold out of the refrigerator the next day.)

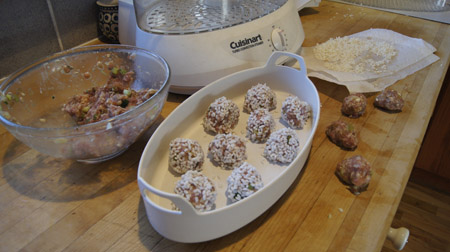
Preparing the Pearl Balls:

pearl ballsCooked Pearl Balls along with Egg Rolls in Phyllo Dough:

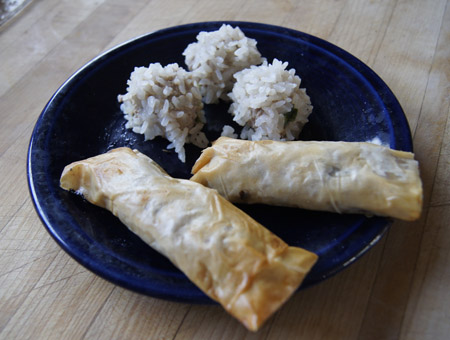
Egg Rolls and Pearl Balls

250 Cookbooks: The Wide World of Fillo

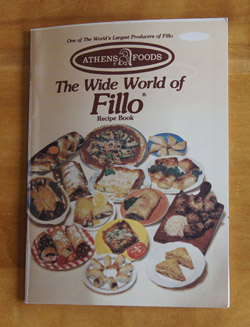
Cookbook #84: The Wide World of Fillo, Athens Foods, Cleveland Ohio, 1980.

Wide World of FilloI shake my head at myself. Why did I call this little pamphlet a “cookbook”? It’s only 5.5x4x.12 inches. But I did, back when working on my cookbook database from 2006-2012, leading to my “250 Cookbooks”. So I have to stick with it. A bit obsessive. (I am reading 600 Hours of Edward. Edward is afflicted with OCD and each morning when he wakes up, he records the time [usually 7:38 am] and totals and writes down the number of days in that year that he has woken up at the same time. I totally get it. I get up each morning at exactly the same time. I am involved with databases.)

Small as it is, this pamphlet has about 50 recipes using fillo dough and helpful instructions for working with this thin pastry.

“Fillo” is usually spelled “phyllo” or “filo”. Phyllo is a wheat dough stretched into paper-thin sheets. Wikipedia: “The practice of stretching raw dough into paper-thin sheets probably evolved in the kitchens of the Topkapı Palace”. Hey, I’ve been there! The Topkapi Palace is in Istanbul, Turkey. We visited it in 2013. During our stay in Turkey, we often enjoyed phyllo savory entrees and sweet desserts.

I have stayed away from phyllo dough recipes, thinking them fraught with calories, because you brush butter between the layers of dough before you bake it. But the introduction to The Wide World of Fillo claims that only 2 tablespoons of butter is used per sheet of pastry, resulting in a dish that is “much lower in calories” than comparable fried dishes. I’m still not convinced that this is true. It’s hard to estimate how many calories are added when deep frying. But I don’t enjoy deep frying – too much splattering. An alternative is welcome.

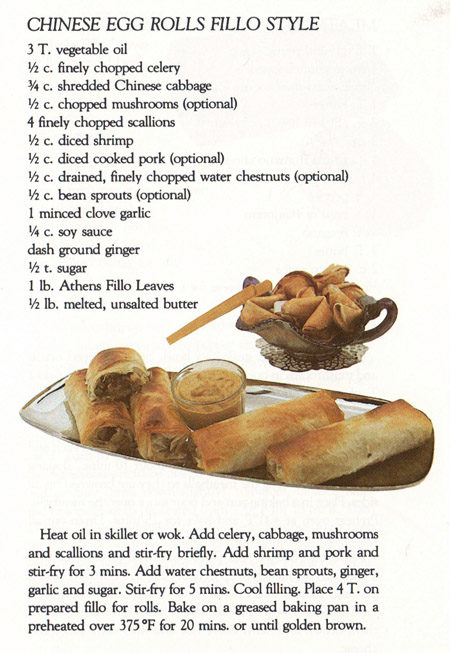
Although phyllo is traditionally used in Mediterranean dishes, this cookbook shows how it can be used in Asian, Mexican, and American cooking. I decide to try a recipe for an Asian food that I usually deep fry: egg rolls. I have tried – with little success – baking egg rolls wrapped in traditional egg roll skins. I did successfully make egg roll crepes in this blog. Maybe phyllo egg rolls will be another alternative to deep frying. (Though it seems weird using an Ottoman cooking method to make a Chinese dish.)

Chinese Egg Rolls Fillo StyleNote that the directions in the above recipe do not tell you when to add the soy sauce. I’ll add at the very end of the stir-fry cooking.

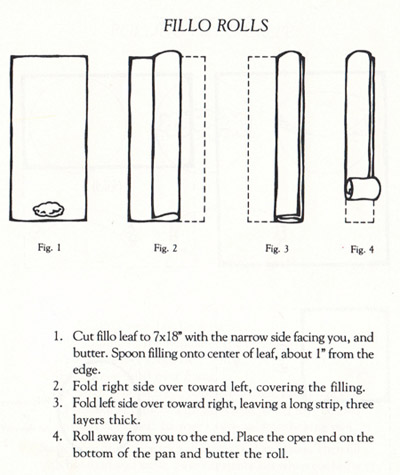
The pamphlet gives the following instructions for forming rolls from a sheet of phyllo dough:

fillo rolls

Egg Rolls in Phyllo Dough
makes about a dozen small rolls

Feel free to swap up any ingredients in this recipe. The amounts stated yield about a dozen rolls. You can use any vegetables you have on hand, and include pork or shrimp or any other meat. Consider the recipe below a rough guide.

  • 1/2 cup finely chopped celery
  • 3/4 cup shredded cabbage
  • 1/4 cup shredded carrot
  • 1/2 cup chopped mushrooms (shitake or button or whatever)
  • 4 green onions, finely chopped
  • 1/2 cup diced shrimp
  • 1/2 cup cooked ground pork or diced cooked port
  • 1/2 cup finely chopped water chestnuts
  • 1/2 cup chopped bean sprouts
  • 1 minced clove garlic
  • 1/2 teaspoon sugar
  • about 1/2 teaspoon grated fresh ginger (you could use dried ginger instead)
  • 2-4 tablespoons soy sauce
  • 1 tablespoon cornstarch (optional)
  • about 4-6 phyllo single sheets
  • melted butter (start with half a cube)

Stir-fry the celery, cabbage, mushrooms, carrots, and green onions in a little hot oil for a minute or two. Add the shrimp and pork and stir-fry just until the shrimp is done. Add the water chestnuts, bean sprouts, ginger, garlic, and sugar. Add soy sauce to taste (and cornstarch if you want) and stir-fry until heated through. Cool to room temperature.

Lay out a sheet of phyllo pastry. I suggest laying the phyllo-sheet-rectangle out with a long side facing you, then making two vertical cuts to cut it into three pieces (see photos). Brush one of the third-sheets with butter, then place about a quarter cup of the filling just above the bottom edge, on the edge closest to you. Fold in the sides and roll up, or simply roll up. Place the roll on a parchment-lined half sheet pan and brush the top with butter.

I had a bit of trouble with the dough breaking, before and during the rolling process. The pamphlet suggests keeping the pastry sheets covered with a wet towel whenever you are not actively rolling it. That was hard to do! See my photos (below).

Bake at 375˚ for 20-25 minutes, until golden brown.

Egg Rolls and Pearl BallsThe egg rolls are golden brown and deliciously flaky. The filling is perfect. And those little rice covered balls? Those are my Pearl Balls.

Comments

These were delicious! They were still a pain to fill and roll up, though. That’s partly because I’m not real patient. As the book states, you should carefully remove a sheet and then constantly keep the dough covered with a wet paper towel. It dries out very quickly. And the dough sheets are so very delicate they want to tear if you just look at them.

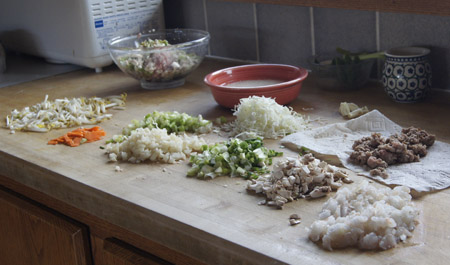
I will advise you that it can take a while to gather and chop all the ingredients. Granted, I was making Pearl Balls at the same time, but you can see my efforts in the piles of ingredients below:

egg roll ingredientsHere is the great stir-fried filling:

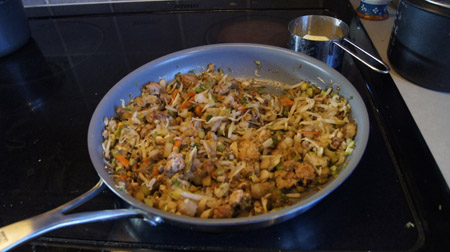
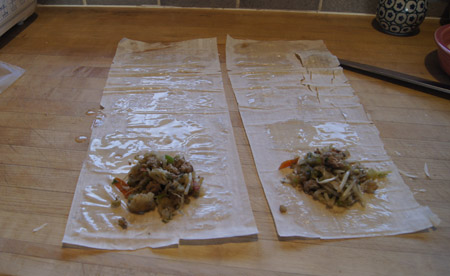
egg roll fillingI was trying to take photos and butter dough sheets and fill pastries and deal with a couple total rolling failures all at once. I am sure I got a bit of butter on my camera. Anyway. In the photo below, I cut a piece of dough lengthwise into two pieces, then buttered them. Then I put about 4 tablespoons of filling above the bottom edge.

egg rollsIn the next photo, I have folded in the sides of one of the pastry strips and will next roll up the dough.

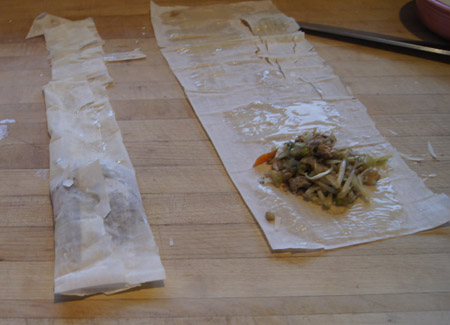
egg rollsFailure! When I tried to roll up the left-hand one, above, it fell apart! The filling sogged out the bottom dough and it ended up a ball of pastry pieces and filling. What a mess. (Next time I’ll use a bit of cornstarch in the filling so it isn’t so wet.)

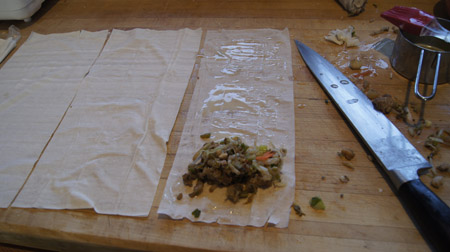
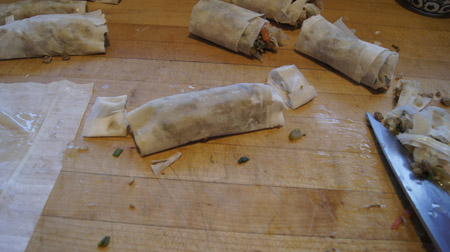
How did I solve the problem and roll up the rest of the egg rolls? I cut the pastry into shorter strips (thirds, cut on the horizontal, see below) and did the rolling process as quickly as possible and eliminated the fold-in-the-sides step. Here is the pastry, buttered, with the filling on the bottom:

egg rollsFrom here, I quickly rolled the filled sheet without folding in the sides. It wanted to soak through, but I kept rolling. When done, I cut off the ends.

egg rollsThese baked up beautifully (the photo is up above). I would definitely make them again.

The original recipe said to use a pound of phyllo dough; I only used 4 sheets (plus the couple I ruined) which is only about a fifth of a pound. (I do like this larger filling-to-dough ratio.) I used about a quarter cup of butter, so that is about 400 calories total, or an addition of 35 calories per egg roll. I think if you are careful and neat, you could probably use even less butter. So maybe these are a lower-calorie alternative to deep-fried egg rolls. They sure are good.

Will I keep this tiny cookbook? I guess I will. It has good instructions for using phyllo dough and I might try another of the recipes someday.

Favorites: Beer Can Chicken

“We are having Beer Can Chicken for dinner.” “What’s that?” my daughter [who has been living abroad] asked.” “Well, you take a whole chicken and put it on a beer can and grill it.” “Do you . . . open the beer can?” “Yes!”

Beer can chicken recipes have been circulating amongst my Colorado friends for several years now. My recipe is based on one posted by the Culinary School of the Rockies (now Escoffier School of Culinary Arts, Boulder) in 2009. I tweaked it a bit, and have made it a lot!

I highly recommend Oskar Blues Old Chub as the beer for this recipe. I’m kind of partial to Oskar Blues, since this brewery started out in my town of Lyons. During the September floods in 2013, Oskar Blues helped our community with grants to businesses and individuals.

Oskar Blues was one of the first breweries to sell their microbrew in cans. Old Chub is a very hoppy IPA, and works great in this recipe.

Beer Can Chicken
serves about 4

  • 1 whole roasting chicken
  • 1 open 12-ounce can of beer, preferably a flavorful microbrew
  • 1 tablespoon brown sugar
  • 1 teaspoon each: garlic powder, onion powder, ground mustard powder, and chili powder
  • 1 teaspoon paprika – use smoked paprika if you have it
  • 1/2 teaspoon cayenne pepper
  • a couple tablespoons fresh herbs, if you have them on hand; I have used thyme, mint, basil, and oregano
  • salt and pepper to taste
  • olive oil

Rinse the chicken and pat it dry.

Mix the brown sugar with all the spices and herbs. Rub the chicken with some olive oil, then rub in the spices. Rub them in the cavity, under the skin that covers the breast, and on the outside of the chicken.

Preheat a gas grill to 350˚. The chicken needs to be cooked over indirect heat. My grill has 3 burners, so I set the first and third burners to medium high, and leave the middle burner off. Then the chicken has room in the middle to stand up without touching the gas grill cover when it is closed.

Hold the chicken upright (legs down) and place it on top of the beer can so that the can easily slides into the cavity. Use the legs to balance the chicken upright on the grill. (Yes, this can be a bit tricky the first time you do it!)

Close the lid. Grill the chicken at 350˚ for 1 hour to 1 hour 15 minutes. With my grill, I find that I need to check every 15 minutes or so to make sure that the grill is still at 350˚. The chicken is done when it is golden and at least 165 degrees.

Transfer the chicken (minus the beer can!) to a platter and serve!