250 Cookbooks: Mexican Cookery for American Homes

Cookbook #194: Mexican Cookery for American Homes, Gebhardt’s, San Antonio, 1935.
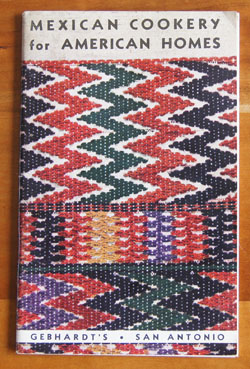
Mexican Cookery for American Homes cookbook

I am not sure how I acquired this cookbook, maybe it was Grandmother’s, or maybe it came from the Ruth C. Vandenhoudt house. One recipe – Chili Meat Loaf – has a handwritten note, but I’m not sure whose writing it is.

Mexican Cookery for American Homes was produced by the manufacturer of a chile powder: Gebhardt. Almost every recipe calls for either Gebhardt’s chili powder or Gebhardt’s canned chili.

An earlier version (c1923) of Mexican Cookery for American Homes is available in full text on the Hathi Trust web site. An even earlier version is now available as a reprint. The back cover of this 2005 reprint, compiled by Andrew F. Smith, a teacher of culinery history, reads:

“The Gebhardt Chili Powder Company was founded by William Gebhardt, a German, who migrated about 1885 to New Braunfels, Texas. Gebhardt opened a café, which served chilis imported from Mexico. To preserve them, he dried and crushed them into powder. He began bottling his powder, and in 1890, he opened a factory to San Antonio. Six years later he trademarked the name “Gebhardt’s Eagle Brand Chili Powder.” The powder became an important ingredient to such an extent that recipes in Texas cookbooks specifically recommended its use. When Gebhardt began marketing chili powder to a wider audience beyond Texas, he ran into a very serious problem-consumers not familiar with Tex-Mex cookery had little idea what to do with it. To help cooks understand Tex-Mex cookery, Gebhardt produced a small 32-page cookery pamphlet. This cookbooklet was originally published about 1908. As such, it was the first English-language booklet published in the United States that focused on Mexican-American cookery. It proved so successful that new editions of it were regularly published through the 1950s. In 1911, Gebhardt sold his company to his brothers-in-law, who expanded their product line to include beans and tamales. During the 1920s, they introduced to the tourist trade Gebhardt’s Original Mexican Dinner Package, consisting of cans of chili con carne, Mexican Style Beans, shuck-wrapped Tamales, Deviled Chili Meat, and a bottle of Chili Powder-all for one dollar. By the 1930s, Gebhardt products were sold throughout the United States and Mexico. The company survived until 1960 when it was purchased by Beatrice Foods, which in turn was acquired by ConAgra in 1990.” (From Amazon description accessed 2017.)

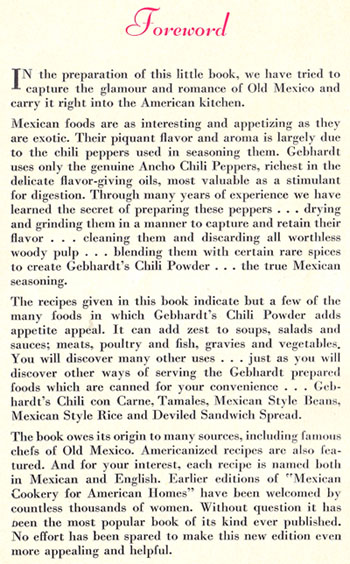
My 1935 edition of Mexican Cookery for American Homes reflects the culture of America at the time – women were the home cooks. I’ve addressed the issue of women-in-the-kitchen many times in this blog, most recently in this post. The foreword (below) to Mexican Cookery for American Homes states in the last paragraph: “Earlier editions of ‘Mexican Cookery for American Homes’ have been welcomed by countless thousands of women.”
MexCookery page 6

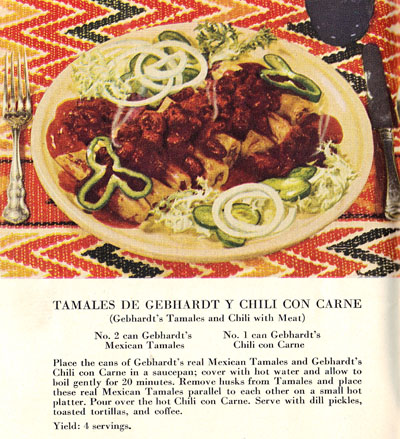
I found a post about Mexican Cookery for American Homes on a website by another affectionado of old cookbooks, Wendi. The blog is called “Resurrected Recipes, this is your grandma’s cooking“. Wendi has the same version of Mexican Cookery for American Homes that I do. I like her discussion of the recipes, recipes quite different from the Mexican foods we have today, or even the recipes in the 1950-60s era of cookbooks. She calls some of them silly! Like this recipe for “Gebhardt’s Tamales and Chili with Meat”:
MexCookery page 8

Yup, you put two cans – unopened – in boiling water for 20 minutes! Silly indeed.

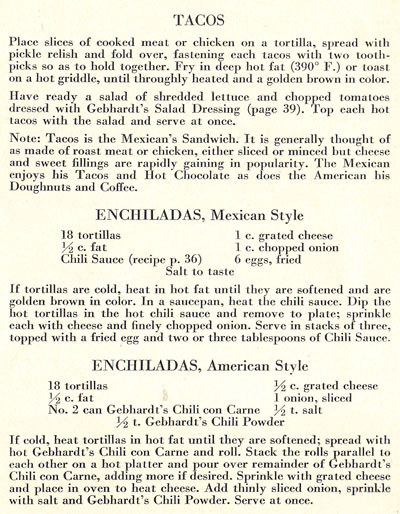
I decide to make “Enchiladas, Mexican Style for this blog”. It’s the middle recipe in the scan below – I included the other recipes for curiousity’s sake.
MexCookery page 10

Note that the Mexican style of enchilada is served on flat – not rolled – tortillas. And, you put fried eggs on top. Another twist! I’ve put poached eggs on tortillas and beans to make Huevos Rancheros and we’ve always like them.

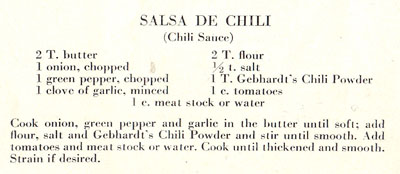
This enchilada recipe calls for Chili Sauce on page 36:
MexCookery page 36

I’ll make these pretty much as the recipe reads. Except, I do not want to fry the tortillas, instead I’ll soften them in the microwave. I don’t have Gebhardt’s chili powder, but I have some great chili powder from Savory Seasonings.

Enchiladas with Eggs
serves 2 for dinner

  • 1 small onion, diced
  • 1/4 bell pepper, diced
  • 1 clove garlic, minced
  • 2 tablespoons flour
  • 1 tablespoon hot chili powder
  • 1/2 teaspoon salt
  • 1 cup chopped tomaotes (fresh or canned)
  • 1 cup beef stock (or water)
  • 6 corn tortillas
  • 1/2 to 1 cup grated cheese (I used cheddar cheese)
  • a few diced onions, if desired
  • 1-2 eggs, fried or poached

To make the sauce, cook the diced onion, bell pepper, and garlic in a little oil until soft. Combine the flour, chili powder, and salt, then add to the cooked onion mixture and stir until smooth. Slowly stir in the tomatoes and beef stock (or water) and simmer about 20 minutes.

On each plate, layer 3 tortillas with a little sauce and cheese between each layer. Microwave on high until the cheese and sauce are bubbly – probably less than a minute. Top with fried egg(s) and serve.
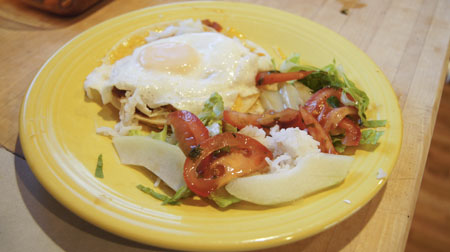
Enchiladas with Eggs

I served these enchiladas with a little lettuce, rice, tomatoes in a balsamic vinaigrette, and chayote. (More on chayote below.) This meal was a success! I really enjoyed the mixture of egg, tortillas, cheese and seasonings – a different taste for dinner. Hubby said he’d prefer it with refried beans, more like traditional huevos rancheros. Maybe next time.

Chayote

Chayote is a member of the gourd (squash) family, as I learned when I read my 1928 Salads, Vegetables and the Market Basket. Chayote is common in Latin American cooking, but is not listed in Mexican Cookery for American Homes. Last week I was at my favorite Asian Seafood Market and found a chayote in the fresh produce area. I brought it home because it looked so interesting! I served it with a mixture of tomatoes and balsamic vinegar:
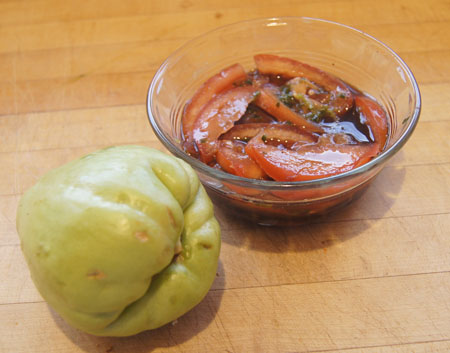
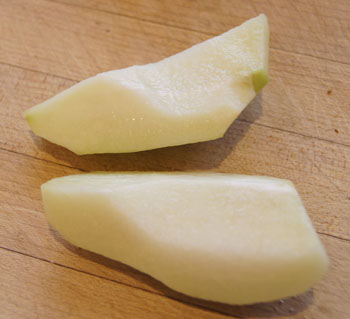
chayote and tomato vinaigretteHere’s the sliced, peeled chayote. It tastes like something between an apple and a pear, crunchy and interesting. cut chayoteMy tomato vinaigrette is a modification of a recipe for “Spicy Balsamic Tomato Salad” that I found on allrecipes.com.
  • 2 tomatoes, cut into thin wedges
  • 1 tablespoon balsamic vinegar
  • 1 tablespoons rice vinegar
  •  basil to taste, dried or fresh
  • 1/4 teaspoon ground ginger
  • salt to taste
  • chayote, peeled and sliced

Combine tomatoes and vinegar and seasonings. Let sit, stirring every 15, until flavors combine, about 1 hour. Combine with sliced chayote and serve.

250 Cookbooks: Salads, Vegetables and the Market Basket

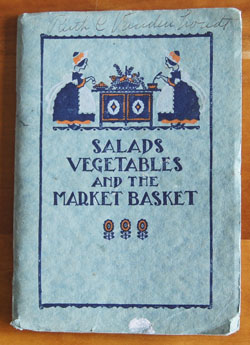
Cookbook #193: Salads, Vegetables and the Market Basket, California Home Economics Association, Southern Section, 3rd ed., 1928.

Salads, Vegetables, and the Market Basket cookbook

Note:This cookbook is in the same series as Pastries and Desserts, 250 Cookbooks entry number 218.

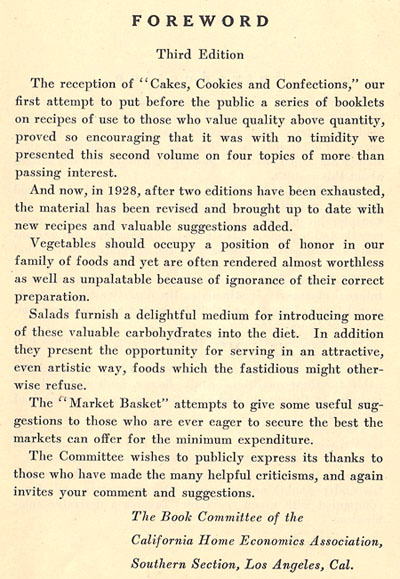
This book was published in 1928! That means Salads, Vegetables and the Market Basket gives a glimpse into the kitchens of America when my own mother was not yet a teen. Here is the foreword:

foreword

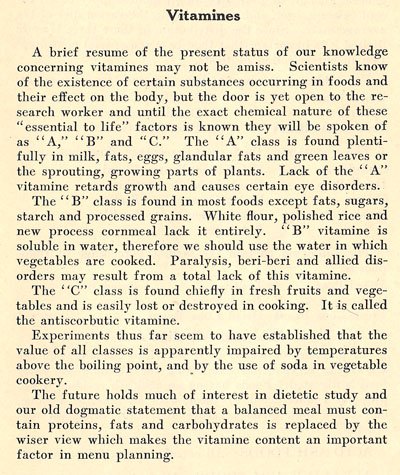
This description of “vitamines” is interesting:

vitamines

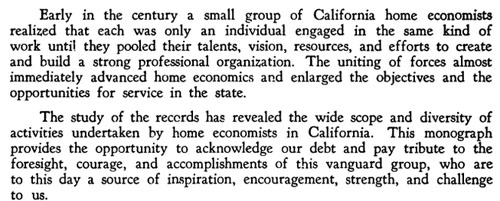
A web search for Salads, Vegetables and the Market Basket only pulled up one relevant site, the bibliographic entry on the site “Food and Agriculture Organization of the United Nations (AGRIS)”. I did find full text of a related book: The California Home Economics Association, yesterday, today, and tomorrow, 1921-1961 in the digital library of Hathi Trust. I spent a bit of time perusing this history of the California Home Economics Association (CHEA) and the introduction of courses in “Home Economics” to the curriculum of California schools. An excerpt from the forward (note that the century is the twentieth):

CHEA1

(I discussed home economics in when I covered my mother’s text, General Foods Cookbook. I brushed on the topic in The Fannie Farmer Cookbook and Rice – 200 Delightful ways to serve it.)

Secondary schools in California had home economic classes in secondary schools as in the early 1900s:

CHEA2

College courses in home economics were introduced by 1909:

CHEA3The following is the beginning of an appendix in The California Home Economics Association, yesterday, today, and tomorrow, 1921-1961. It dilineates the early introduction of home economics to California schools. Note the last entry on “hand and machine sewing”. I learned sewing (as well as cooking) in junior high in California in the 1950s.By the 1960s, American home kitchens are influenced by many changes: industrialization, urbanization, suburbanization, working mothers, a higher level of education, and automation.
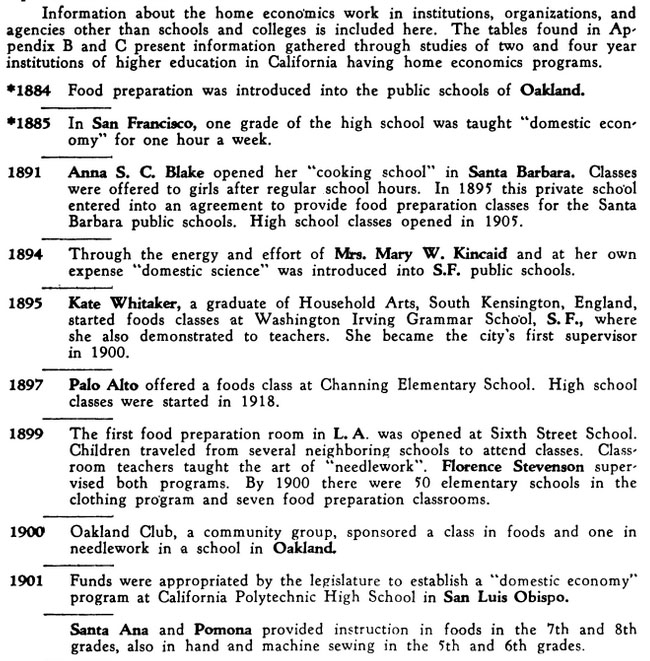
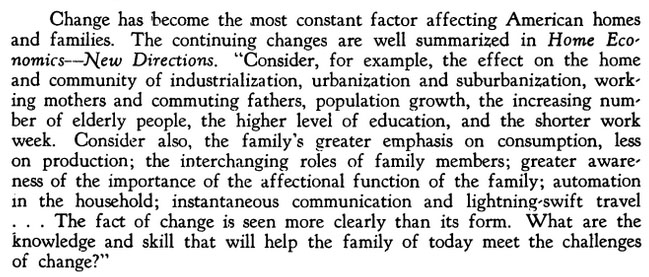
CHEA4

(I puzzle over the phrase in the above excerpt: “Consider also, the family’s greater emphasis on consumption, less on production.”)

Salads, Vegetables and the Market Basket in my hands, I stand in my sunny kitchen and feel company with all the women who ever stood in their own kitchens, studying how to get the best food – the best health – for their children and spouses. And yes, I say women. I know that men are also cooks, but in the culture of my youth, the home was the where woman belonged. I am so thankful for my college education, and the chance to break some of womens’ bonds to the kitchen and engage in the scientific pursuit of chemistry, enjoying stretching my intellect, hobnobbing with Nobel laureats, studying in the lab where DNA was first synthesized and isolated, creating new experiments for organic chemistry students, creating web sites, and basically, enjoying the heck out of life. But I always come back to my kitchen for comfort.

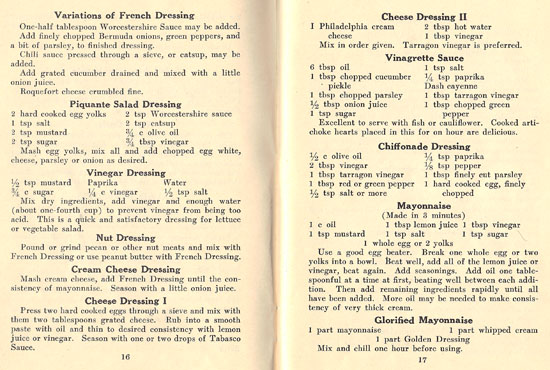
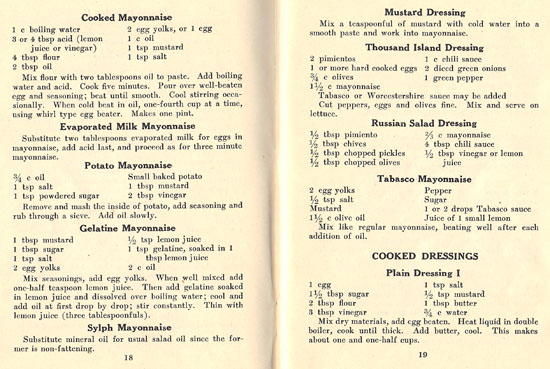
What shall I cook from this book? The recipes are quite aged. Below are two pages of recipes for salad dressing. They do not include good directions for a true vinaigrette dressing. Cream cheese dressing made with cream cheese and a bit of vinegar does not entice me. Nor am I inclined to make a piquante salad dressing from cooked eggs, mustard, sugar, worcestershire, catsup, oil and vinegar – or potato, gelatin, and sylph mayonnaises (the last has mineral oil in it instead of vegetable oil).

Market BasketMarket BasketSome salads have fancy presentations, like Butterfly Salad, or Banana Canoes.Market Basket
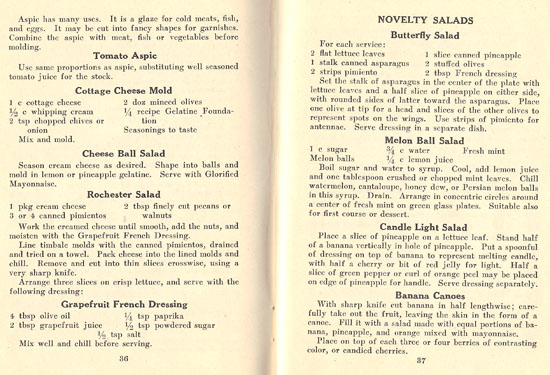
Salads, Vegetables and the Market Basket includes many recipes for cooked vegetables, from broccoli to to collards to chayote to lentils to potatoes to tomatoes. Many times they are cooked in white or cheese sauces, butter and sugar, or baked covered with buttered bread crumbs. I can’t find anything I want to make!

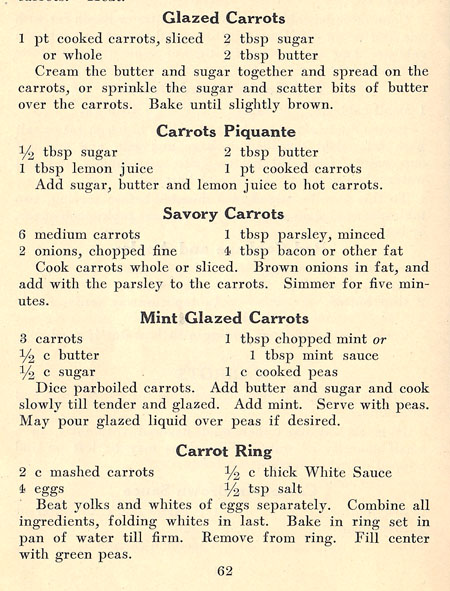
Finally I come upon a recipe for Mint Glazed Carrots (second from the bottom in the scan below). If I cut down on the butter and sugar, these might be a good accompaniment for a meat and potatoes meal.

Mint Glazed Carrots recipeGlazed Carrots with Peas with Mint
serves two

  • 2 medium carrots, peeled and cut in half
  • 2 tablespoons butter
  • 2 tablespoons sugar
  • 1/2-1 tablespoon chopped fresh mint
  • 1 cup cooked peas (about)

Parboil the carrots: put in boiling, salted water, then simmer 10-15 minutes, just until barely fork tender. Dice the parboiled carrots.

Melt the butter in a pan and add the sugar, stir until incorporated. Using medium heat, cook and stir until the carrots are tender and glazed (they do not need to brown). Add the mint.

Scoop the carrots and mint out of the pan and put over cooked peas. (This way, you can leave some of the butter/sugar/calories in the pan.)

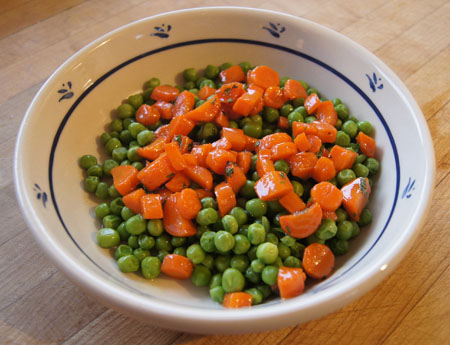
Glazed Carrots with Mint and PeasI thought these were good – hubby was less impressed. I love the colors and the bright mint flavor. Yes, they were a bit sweet, but I thought it nice for a change.
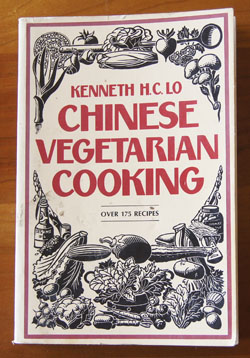
Ruth C Vandenhoudt

This name is handwritten on the cover of my copy of Salads, Vegetables and the Market Basket. This tells me that I acquired this cookbook from the Ruth Vandenhoudt house, back when I was a teen. My paternal grandmother was related to Ruth Vandenhoudt, and on Ruth’s passing, relatives were invited to her house to take things from the estate. I found books and books and books – old books with brittle pages and faded covers. A couple were gorgeous, most were just curious and aged. I still have many of these books.

250 Cookbooks: Chinese Vegetarian Cooking

Cookbook #192: Chinese Vegetarian Cooking, Kenneth H. C. Lo, Pantheon Books, Random House, NY, 1974.

Chinese Vegetarian cookbook

“In spite of the widespread popularity of Chinese food, Chinese cooking is still rather new and strange to the average Western housewife. By concentrating each chapter on one method of cooking, the book should make it much easier for the Westerner to conduct an initial trial, after which the mystique still surrounding Chinese cooking should evaporate. One of the purposes of this book, apart from introducing Chinese vegetable and vegetarian cooking, is to help dispel some of the mystery that still pervades any subject connected with the Chinese.”

So reads the introduction to this 1974 book. By 2017, much of the mystery about Chinese cooking has been dispelled, and Americans have adopted many Chinese dishes: stir-fries, steamed and fried dumplings, egg rolls, hot and sour and egg drop soup, fried rice . . .  dishes part of our restaurant and home culinary fair.

Lo wrote over 40 books on Chinese cooking from the 1950s to the 1990s. According to the back cover of Chinese Vegetarian Cooking, he was also a news commentator for the BBC, a diplomat, a fine-arts publisher, a champion tennis player, and a food critic. He certainly knows a lot about Chinese cooking and culture! It’s evident in every page of Chinese Vegetarian Cooking.  I search the internet to see if had a web site, and perhaps recipes that are not 40 years old. No such site exists. I did find from a 2015 bibliography entry stating that he has passed away.

(Curious fact: One of his books, Oriental Cooking [1996] is listed for $1141.11 on Amazon in February 2017.)

I especially like reading about the unusual ingredients in Chinese Vegetarian Cooking. For instance, “red-in-snow”. I envision a pile of crushed ice with spots of red coloring in it. I search the index, but do not find a description of red-in-snow. But, I found a webpage explanation: “Basically any pickled green vegetables in the mustard family can be called ‘red in snow.’ The word ‘red’ in Chinese doesn’t literally mean the colour here. Red symbolises spring and livelihood. And because many types of mustard green can still thrive in cold winter with snows, this name was given to it.” (Accessed 2017.) And I found this on Google books:

red-in-snowI decide to look for red-in-snow at the Asian Seafood Market on 28th St. in Boulder. Nothing under that name in the store, but I did find pickled mustard greens:
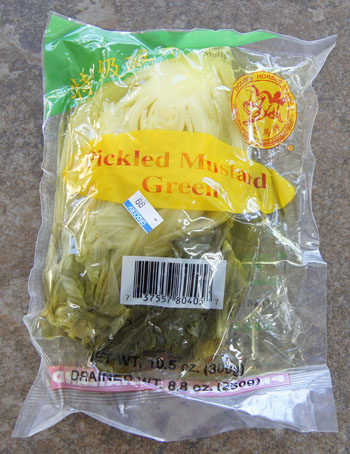
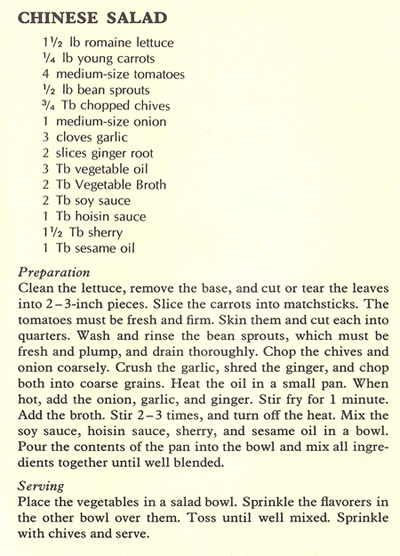
red-in-snow

I was pretty proud of myself! I picked up a package just to see what it tastes like. Heck, it only cost 99 cents!

So what shall I make for this blog? As I page through Chinese Vegetarian Cooking, none of the recipes look familiar, and none are marked. I don’t think I’ve ever cooked any recipe from this cook book, although I’ve owned it for forty years. When I make pot stickers and dumplings and soups and egg rolls, I use recipes from other of my Chinese cookbooks. But I have to find something! After a lot of searching, I choose to make Chinese Salad.

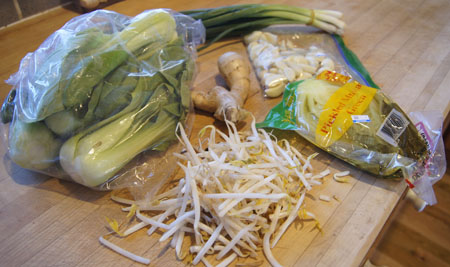
Chinese Salad recipeI pick up some bean sprouts for this salad at the Asian Seafood Market. I really like that this market sells bean sprouts in bulk – most stores sell them in packages, and the two of us can never finish them before they go bad. I don’t find chives, but pick up a bunch of green onions; these too are always good a the Asian Seafood Market. I get some ginger, and a big baggie of peeled garlic ($1.50!). I decide to put some of the pickled mustard greens in the salad to see what they taste like. I don’t have and sherry, but decide to substitute with a little rice wine vinegar. It’s not in the salad, but I buy a big bag of bok choy (the storeowner always gives me grief when I just buy a couple bok choys).
Chinese Salad
serves 2

  • romaine, torn or chopped into bite size pieces; enough for 2 people, about 4 ounces
  • 1 carrot, cut into matchsticks
  • 1 tomato, peeled and chopped in chunks
  • bean sprouts, about 1/2 cup
  • green tops of 1-2 green onions, chopped
  • 1/2 onion or 1 shallot, diced
  • 1 clove garlic
  • 1 teaspoon fresh garlic, grated or chopped fine
  • 3 tablespoons oil
  • 2 tablespoons water
  • 1 tablespoon hoisin sauce
  • 2 tablespoons soy sauce
  • 1 1/2 tablespoons rice wine vinegar (or use sherry, but it will be a sweeter dressing)
  • sesame oil to taste (I used about 1/2 teaspoon)
  • red-in-snow for garnish (totally optional)
  • fried chow mein noodles (optional)

Place the romaine, carrots, tomato, bean sprouts, and green onion tops in a bowl.

Heat the oil in a pan, then add the onions, garlic, and ginger; stir fry 1 minute. Put the mixture in a small bowl and whisk in the water, hoisin sauce, soy sauce, rice wine vinegar, and sesame oil. Toss the salad, then plate on two dishes. If you like, top each salad with a few crunchy chow mein noodles.

Here are the items I bought at the Asian Seafood Market. Note how fresh the bean sprouts are! I used the bok choy in a stir fry to go along with the salad.

Chinese salad ingredients

My Chinese Salads:

Chinese Salad

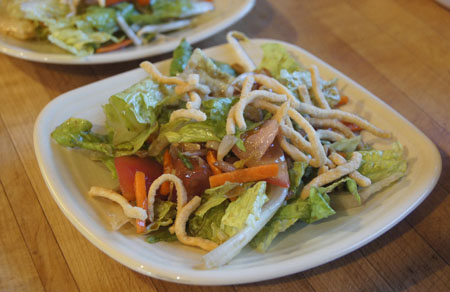
The salads were a success. The dressing is good – probably better than store-bought “Oriental salad dressing”. The dressing was also easy to put together and it was quick and convenient to make enough for just two people. Of course, vary the salad ingredients to whatever is on hand!

Although this recipe was a success, I will recyle this cook book. Can’t find any other recipe in it I’d like to try, and I have other proven references/recipes for Chinese ingredients and dishes.

250 Cookbooks: Electric Fondue Cook Book

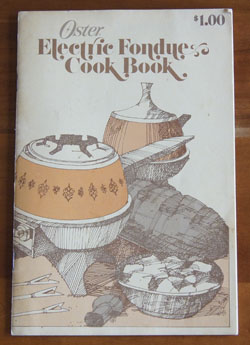
Cookbook #191: Electric Fondue Cook Book, Oster Corporation, Milwaukee, WI, 1976.

Electric Fondue Cookbook cookbookThat lovely decade when my husband and I were in our twenties . . . many memories. Among those memories are certain yummy and often fattening foods. Like fondues. Our party friends with us, the fondue pot filled with a beer-cheese-spice mixture, big, slurpy, cheesy mouthfuls scooped up by homemade tortilla chips. Back in the day. It was fun.
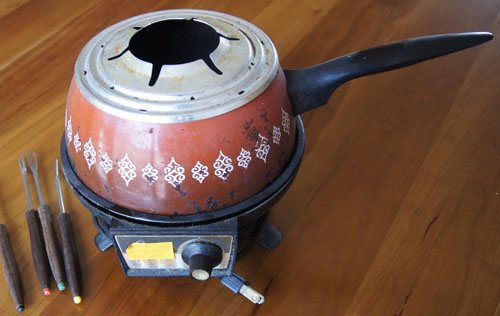
That’s when the Electric Fondue Cook Book came into my collection. Our electric fondue pot – and we still have it! – was a gift from a friends-couple. The cover says the book cost $1.00, but actually it came with the appliance.

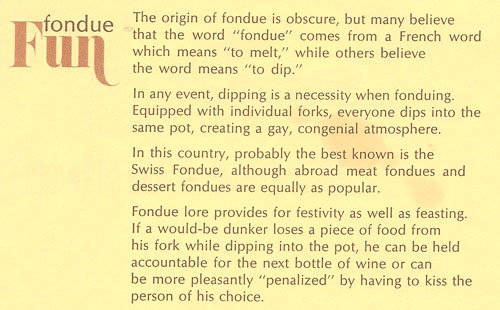
From the introduction:

fondue fun

I’ve made cheese fondues, and maybe Oriental hot pot fondues. I like dessert fondues, but only when other people make them (!). Beef fondue? Made it zillions of times. That’s the kind where diners cook their own beef cubes in hot oil in the fondue pot and dip the cooked meat in sauces. To this day, it’s still one of our favorite meals. It makes us take more time at dinner, eat slowly, enjoy the food and each others company.

The Electric Fondue Cook Book is short, but has useful, relevant instructions and recipes. The first chapter covers Classic Swiss fondue. Cheese fondue ingredients are garlic, white wine, kirsch, and Swiss cheese; dippers can be bread chunks, meats (ham, meat balls, shrimp), or vegetables (potato cubes, celery, green peppers, cherry tomatoes). Chili con queso, American, and pizza fondue recipes are variations on the cheese fondue theme.

Meat fondues “make cooking as much fun as eating”. The cooking liquid is either oil (Fondue Bourguignonne) or a broth (Fondue Orientale). Since hot oil presents special cautions, I appreciate re-reading the instructions in the Electric Fondue Cook Book. The cooking oil can be strained and saved for re-use; to clarify re-used oil, put a few pieces of raw, peeled potato into the heating oil. One of the most important things to remember with hot oil fondues is the safety of the guests, especially when serving directly on the dinner table. Since the pot is electric, there is a cord running to an outlet (and perhaps also an extension cord). We always wrap an extension cord around the leg of the table and even secure it under the leg, then attach the fondue pot. That way, if someone trips over the extension cord, it won’t also knock over the very hot oil in the pot. Gotta watch out for those rowdy little kids around the table.

The next chapter is “Sauces”, a good collection of dipping sauces for both hot oil and hot broth fondues. Dessert fondues include chocolate (bittersweeet, sweet, chocolate chip, mocha), butterscotch, and caramel-rum. Dippers can be fruits (pineapple, strawberries, apples, dates, etc.), marshmallows, angel food cake, cream puffs, doughnuts, or large types of nuts.

(I have a couple other books that also cover fondues: Encyclopedia of Cooking Vol. 5 and Encyclopedia of Cooking Vol. 3.)

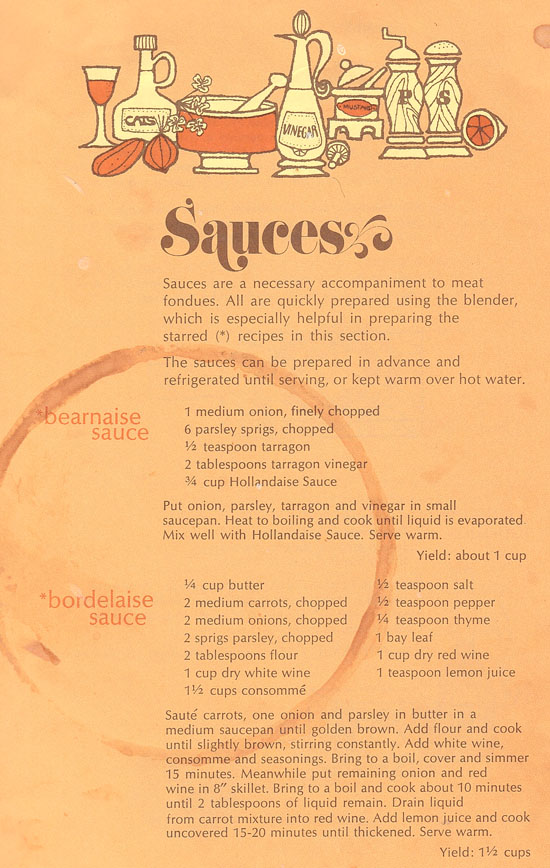
I decide to make Bearnaise Sauce for beef fondue for this blog. I scanned in the whole page that has this recipe to show you how well-used it is!

fondue recipes

This recipe calls for “hollandaise sauce”. Most of us know that this is a classic sauce made by skillfully emusifying melted butter, egg yolks, and lemon juice. The problems are, the sauce has to be made just before use – it does not hold together long. For instance, you can’t make eggs benedict by preparing the sauce the night before. (I can make hollandaise – I became extra good at it when I took a class on “Sauces” at Escoffier Boulder.) The other problem is that recipes for hollandaise make a lot of sauce because you need enough hot butter to cook the egg yolks. I only need a small amount of hollandaise, as I only need enough bernaise sauce for two people.

Hollandaise sauce in a jar is available (as per a google search), but I could not find it in any of my local markets. So, I default to my old quick and easy (cheater’s?) recipe for “blender hollandaise” from the Joy of Cooking. The authors claim that this hollandaise can be held in the refrigerator or even frozen and then warmed up in a bowl of hot water just before use.

The bearnaise sauce calls for “tarragon vinegar”. In the past, I know I never looked for this specific vinegar in a market (and I’m not sure how available these oils were in the 1970s). Luckily, I learned how to make herbal vinegars when I covered Michael Chiarello’s Flavored Oils and Vinegars. Briefly, you put in a blender equal amounts of herb and vinegar, and then strain. It’s ready to use right away.

Results

I made this recipe (full recipe hollandaise, half recipe bearnaise) but it did not turn out good enough to re-copy into this blog.

Issues:

I made the tarragon vinegar, and while it’s a petty color, it really isn’t worth the extra effort when I only need 2 tablespoons for this recipe. Instead, I highly advise fresh tarragon in the onion mixture if you want to make bernaise sauce.

I used 1/2 onion for my half-recipe, but this is still too much onion. I advise a couple tablespoons of chopped onion, or use a shallot instead.

My hollandaise was okay, but I used unsalted butter and I should have added a lot more salt.

When I added the hollandaise to the onion mixture directly in the hot onion cooking pan, the eggs “cooked” and the sauce lost its velvetiness.

Suggestion: Next time I make bernaise sauce, I’ll use my tried and true bernaise sauce recipe instead of trying to shortcut! I doubt I’ll make it for fondue though (unless we have guests).

Note: For beef fondue, we usually dip our cooked beef chunks in a simple homemade sauce, like a red sauce (tomato sauce, horseradish, worcestershire) or a creamy sauce (sour cream, worcestershire, ketchup).

Photos

We did enjoy our meal, inspite of the less-than-perfect bernaise sauce. Here is our forty year old fondue pot:

fondue potHere is my chunky bernaise sauce:
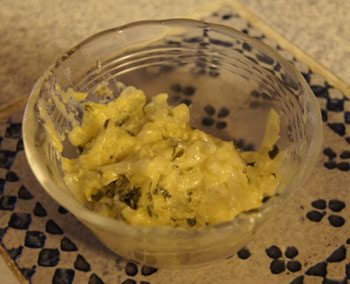
sauce bernaise

250 Cookbooks: Our Favorite Recipes

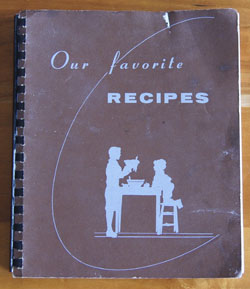
Cookbook #190: Our Favorite Recipes, compiled by the Student Letter Exchange, Walter’s Publishing Company, RFD 4, Waseca, Minnesota, circa early 1970s.

Our Favorite Recipes cookbook

I am clueless as to how this book entered my collection – maybe it was my mother-in-law’s, maybe it was at Walnetto in Boulder where we lived for a year or so.

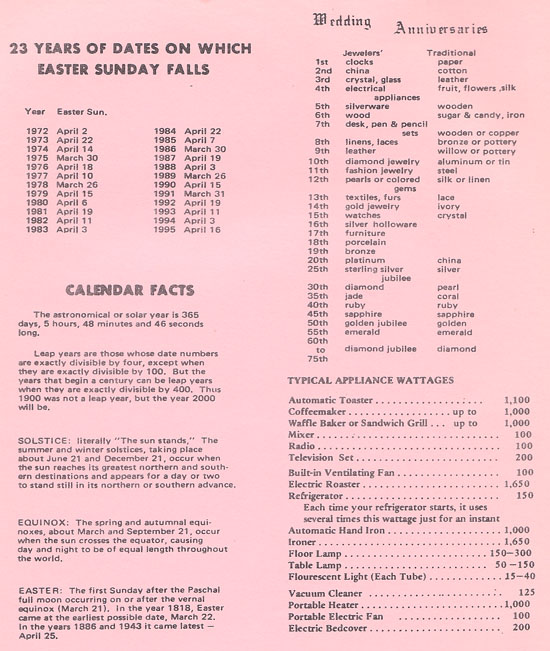
Our Favorite Recipes is a community cookbook; Google Books lists one similar to mine. I have 8 such cookbooks, as discussed in my post on Menu Melodies. My copy of Our Favorite Recipes does not have any handwritten notes in it, or even food stains. I guessed the publication date from the page below, which lists (among other curious facts) “23 years of dates on which Easter Sunday falls”:

Easter Sundays

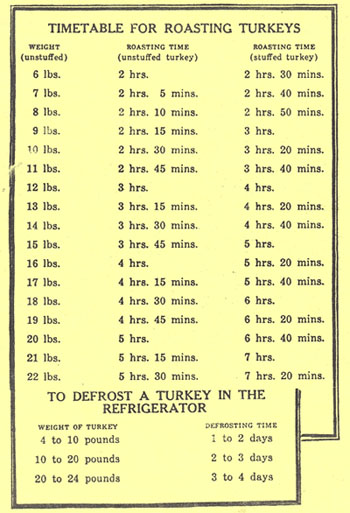
This timetable for roasting turkeys might be more helpful if they gave the temperature setting for the oven:

turkey roasting

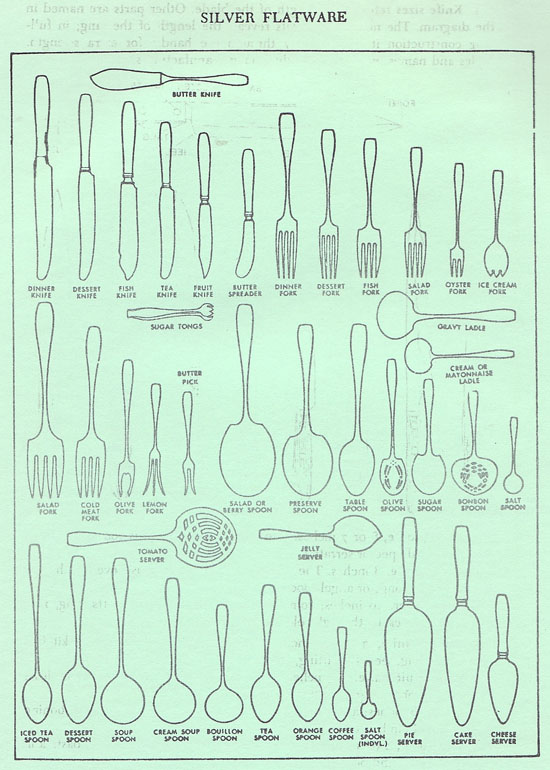
Just in case you need to know the name of that piece of silverware in the drawer:

silver flatware

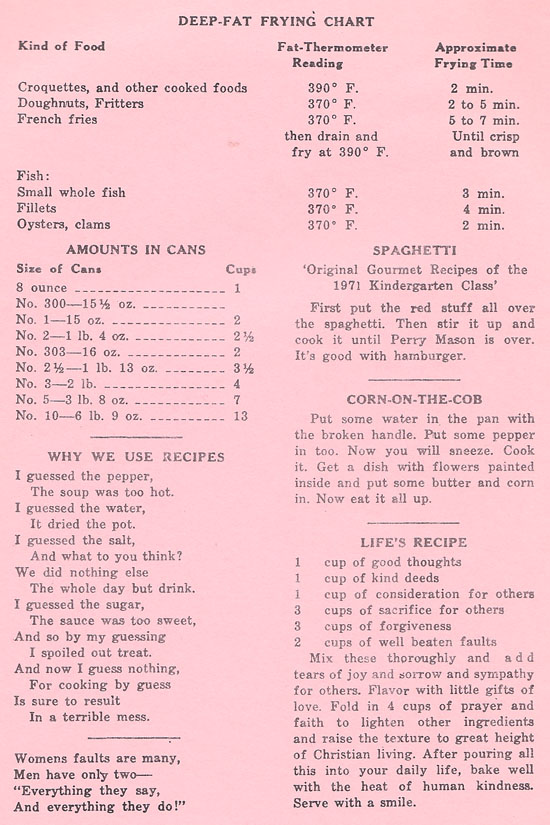
And there is more! I giggle over most of the page below, but the amounts in cans is actually quite useful. Some older recipes call for a “No. 1 can” of an ingredient, a nomenclature only rarely used these days.

miscellaneous

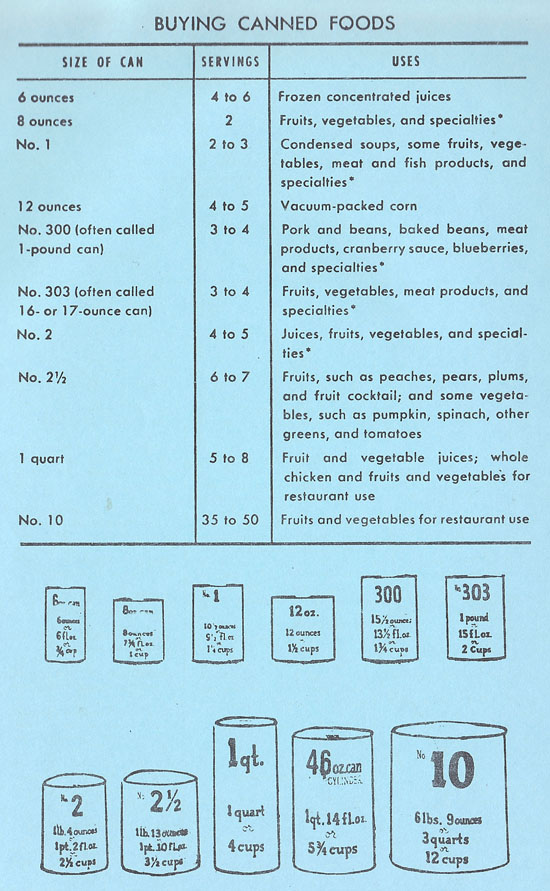
Another canned foods conversion table:

canned food sizes

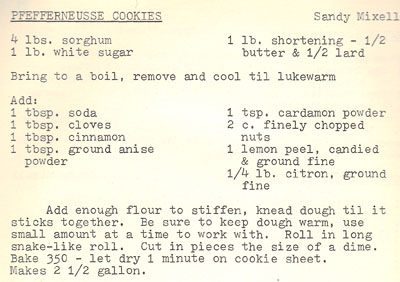
Our Favorite Recipes chapters include appetizers, bread and rolls, cake and cookies, desserts, jellies and jams, main dishes, soups and salads, vegetables, and miscellaneous. What can I say about the recipes? They reflect the cooking of America in the 1960s. Lots of canned soups and fruits, lots of sugar and shortening. I have a hard time finding a recipe I’d even like to try for this blog. I kind of wanted to try the recipe for Pfefferneusse Cookies, as I was reminded of this old favorite of mine when I covered volume 9 of the Encyclopedia of Cooking. But, the recipe calls for 4 pounds of sorghum. Hmmm.

pfefferneusse cookies

Bumsteads! A bumstead is tuna salad and cheese mixture that is placed in hot dog or hoagie rolls, wrapped in foil, and baked. I used to love these! But I had forgotten what they were called and could not search for a recipe.

bumsteads1bumsteads2

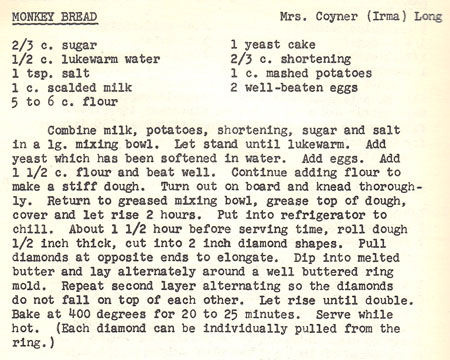
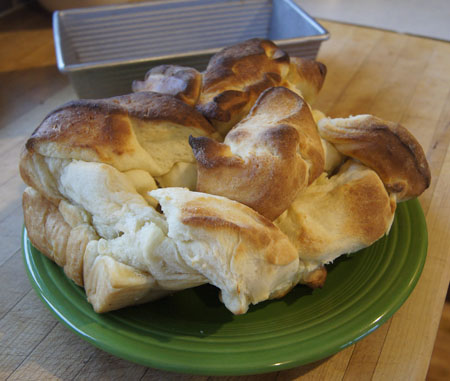
I decide to make “Monkey Bread”. I’ve made monkey bread before, but this recipe includes mashed potatoes, so I’d like to try it. Monkey bread is a yeast dough that is rolled out and cut into diamonds, dipped in butter, and put in a baking pan. It can be sweet with the addition of cinnamon and sugar, or savory with the addition of garlic and herbs and cheese.

Monkey Bread recipeI think there is a bit too much sugar in this recipe, I prefer butter to shortening (and less), I will use active dry yeast yeast, I want to make only half a recipe, and I want to use my breadmaker. My version of this recipe is below.
Monkey Bread
makes one loaf

  • 3/4 cup milk
  • 1/4 cup sugar
  • 1/2 teaspoon salt
  • 3 tablespoons butter
  • 1 egg
  • 1/2 cup cooked potatoes (I boiled a potato and mashed it; you could use leftover mashed potatoes)
  • scant 1 tablespoon yeast
  • 2 1/2 cups flour (may need a little more)
  • additional melted butter for dipping dough pieces before baking

Put all ingredients in the bowl of a breadmaker. Set to a dough cycle with a rising step. As the dough kneads, you might have to add a bit more flour. (I added a couple tablespoons of flour to make a smooth dough.)

When the rising cycle is completed, roll the dough out to about 1/2-inch thickness. Melt about 1/4 cup butter. Cut the dough into diamond shapes about 2-inches long. Dip the dough pieces into the melted butter, and put them in a pan (I recommend a bundt pan rather than a large loaf pan – see my photo below). Let rise in pan about 30 minutes (although I am not sure this step is necessary).

Bake at 375˚ for 25-30 minutes, or until well browned.

Monkey BreadAs you can see, my bread rose crazily! That’s why I suggest a bundt pan next time. Usually a 9×5-inch loaf pan is big enough for 2 1/2 cups flour – but this time it obviously wasn’t!
This monkey bread was delicious. Soft and buttery. Yes, I’d make this recipe again, but I’d cook it in a bundt pan.

Shall I keep this cookbook? Not sure. I’ve scanned in the pages I want, so I may recycle it.

250 Cookbooks: Encyclopedia of Cookery, Volume 9

Cookbook #189: Encyclopedia of Cookery, Vol. 9, Pec-Pur, Woman’s Day, Fawcett Publications, NY, 1966.

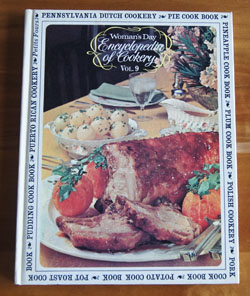
Encyclopedia of Cooking Vol. 9I have a set of twelve Encyclopedia of Cookery volumes and this is the ninth of that set – I covered the first eight in previous posts. I’ve enjoyed all of them so far! This volume covers curious and helpful information about foods from pec(tin) to pur(ée).
Pectin is an ingredient I use when making jams – it helps them thicken. I learn that it comes from the cell walls of citrus, apples, and sugar beets. “Pennsylvania Dutch Cookery” actually derives from Deutsch, meaning German. Penuche, a favorite candy my mother used to make, is made from brown sugar. “Pepper” has two listings: pepper (capsicum) is hot peppers; pepper (piper nigrum) is our familiar black peppercorns. Pfeffernusse is an old fashioned spicy traditional Christmas cookie. It has German origins, and I remember one of my older relatives giving these to us at Christmas when I was a kid. They were hard, spicy little cookies, and I liked them, but have yet to find a recipe that is like the ones I had. Phillipine Cookery includes many recipes, piccalilli is a pickle relish made with green tomatoes, bell peppers, onions, sugar, vinegar, pickling spices, and often cabbage.

James Beard wrote a nostalgic section on picnics: “My family upbringing imbued me with a passion for picnics. We lived in western Oregon, a green countryside whose mountains, streams, and beaches provided perfect setting for outdoor dining.” I like his recipe for Pungent French Rolls made with red onions, green peppers, cucumbers, anchovies, tomatoes, olives, parsley, capers, and his recipe for Italian Rice Salad made with rice, pimientos, peppers, onions, basil, olives, chicken, and anchovies.

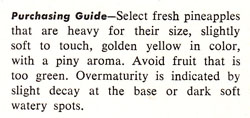
The Pie Cookbook includes recipes for meat, vegetable, and dessert pies. Mother made a note on the Black Bottom Pie recipe, a delicious chocolate pie I remember from childhood. If I ever need to know how to carve a suckling pig, all I have to do is open this cookbook. Pineapples are native to South America – and I love pineapples. Most of the pineapple recipes call for canned pineapple. I’d like to try Pineapple Oatmeal Cookies, and choose a chicken/pineapple main dish for this blog. Here is a guide for selecting fresh pineapple:

picking pineapplesPimientos are red bell peppers. It is interesting that red bell peppers are actually green bell peppers that have reached a further state of maturity. The pimiento variety of bell peppers are heart-shaped and very sweet. You can find them canned in the markets, often in small glass jars. I usually substitute fresh red bell peppers for pimientos in recipes.
The Plum Cookbook has a recipe for Plum Dumplings with these ingredients: fresh plums, sugar cubes, butter, flour, riced cooked potatoes, and eggs. How much sugar in a sugar cube? Google tells me “One sugar cube, which is equivalent to one teaspoon of sugar, weighs approximately 4 grams.

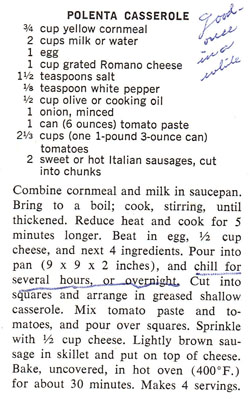
I like polenta and have several good recipes using it. It’s basically a type of cornmeal used in Italian cooking. But I was surprised that my mother knew about and used polenta! Here is the recipe with her note: “good – once in a while”.

polenta casserole

Polish and Polynesian cookeries. I’d like to try Opini, a Polynesian ceviche made with scallops. Popcorn, popovers, poppy seed. The poppy seed filling interests me because we once had a landlord (and friend) who raved about this filling for pastries. A “porgy” is a fish.

As I read the Pork Cookbook and Portugese Cookery sections, I reflect on how it seems that older recipes and foreign country recipes include lots of fish, game, whole pigs, organ meats, tongue, pigs feet.

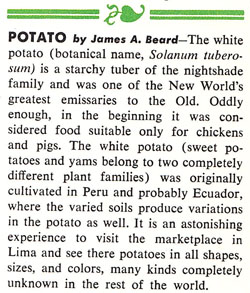
James Beard writes on the white potato. They originated in South America, probably Peru or Ecuador:James Beard on potatoesFrom the same article by Beard: “Eliza Acton, in her magnificent book of Modern Cookery, published in London in 1848, quotes the following ‘genuine Irish receipt’ for boiling potatoes”:
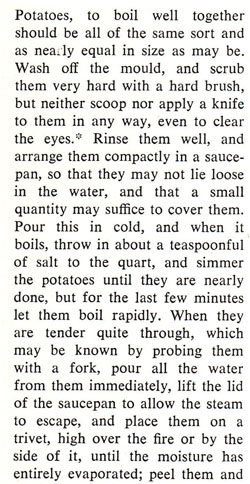
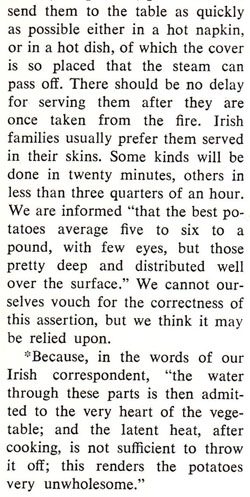
cooking potatoes

cooking potatoes


From the potato section of recipes, I’d like to try Pommes Anna, potato chocolate cake, and potato waffles.

Pot Roast is defined as “a term applied to larger cuts of meat which are cooked by braising, that is cooked slowly in a small amount of liquid or in steam. The meat may or may not be browned in a little fat before it is braised.” Poundcake is “a compact, fine-grained, easily sliced cake which, as its name suggests, traditionally contained a pound of sugar, a pound of butter, a pound of eggs, a pound of flour, a flavoring such as vanilla and no chemical leavening agent. Pralines are any confection made of nuts and sugar, although it originally was made with burnt almonds. Pressure cookers cook foods fast because the food is cooked with moisture (water) under pressure, and by increasing the pressure in the container, water’s boiling point increases and foods cook faster. Soft pretzels date back to the Middle Ages, while the hard pretzel is relatively new.

Prosciutto, prunes (lots of recipes, but none interest me), and a pudding cookbook. Puerto Rican Cookery, puff paste, pumpkin, including an interesting essay by Esther E. Wood entitled “Pumpkins and Philosophy”. Pumpkin pie spice is a blend of cinnamon, cloves, and ginger. This volume has lots of recipes for punch, either with or without alcohol. And lastly, purée, a mixture made by pressing a raw or cooked food through a sieve or food mill, or by whirling it in a blender so that it is smooth and thick.

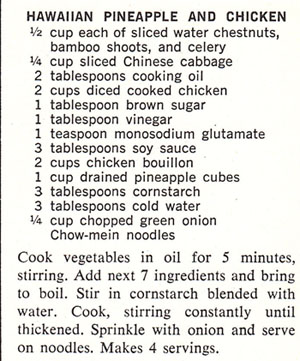
I choose to make “Hawaiian Pineapple and Chicken” for this blog:

Hawaiian Pineapple Chicken recipe

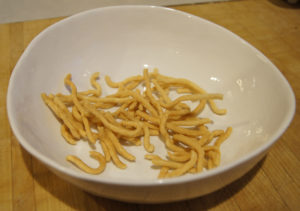
This is similar to sweet and sour chicken, as it has sugar and vinegar in it. I decide to keep some of the ingredients and change other ingredients. For instance, I like canned water chestnuts for their crunchiness and flavor, so I will keep them. But I think canned bamboo shoots are tasteless and soggy, so I will leave them out. I decide to use boneless chicken breasts because I don’t have any cooked chicken. Definitely I’ll leave out the monosodium glutamate (Accent®). I want to use fresh instead of canned pineapple. Chow mein noodles? I generally think of these as the crunchy kind of noodle that doesn’t need cooking, and I have a bag of these on hand, so I will use them.

chow mein noodles

Below is my version of the recipe.

Chicken with Fresh Pineapple
serves 2

  • 1 boneless chicken breast, about 10 ounces, cut into chunks
  • 1/4-1/2 cup sliced celery
  • 1/4-1/2 cup bell pepper, cut into chunks or diced
  • 1 cup sliced Napa cabbage (or use Chinese cabbage, bok choy, or regular cabbage)
  • 1/4-1/2 cup sliced water chestnuts
  • 1 tablespoon brown sugar
  • 1 tablespoon vinegar (rice, red wine, white wine, apple cider, or white vinegar, your choice)
  • 3 tablespoons soy sauce
  • 1/2 to 1 cup chicken stock (or water)
  • 3 tablespoons cornstarch
  • 3 tablespoons water
  • 1 cup fresh pineapple, cut in chunks
  • 1/4 cup sliced green onions

Cook the chicken in a little hot oil until browned; add the celery and bell pepper and cook until the vegetables soften. Add the cabbage and water chestnuts and stir a couple minutes. Add the brown sugar, vinegar, soy sauce, and 1/2 cup chicken stock; bring to a boil. Combine the corn starch and water in a small bowl, then stir into the chicken-vegetable mixture. Add more chicken stock if it is too thick.

Add the pineapple and cook until the pineapple is hot, then serve over chow mein noodles and garnish with green onions.

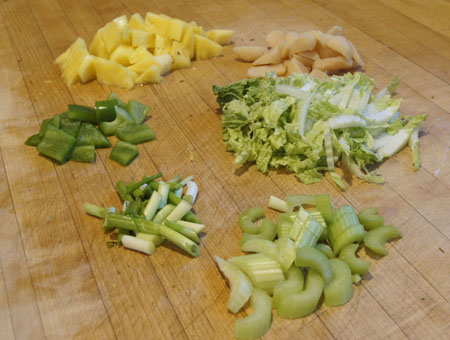
Here are my ingredients, all but the chicken. Note that the tan chunks above the cabbage are water chestnuts. Usually they are white; I bought these at Whole Foods and they were darker and had excellent flavor.

Pineapple Chicken ingredients

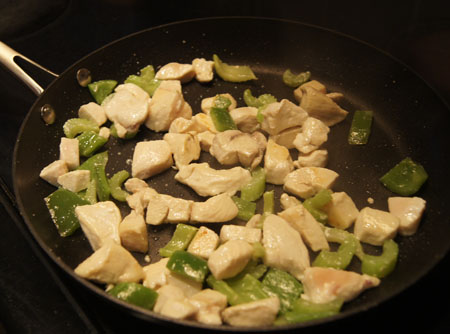
Frying the chicken and celery and peppers:

pineapplechickenThe completed dish:

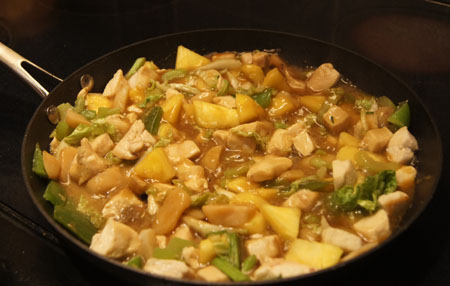
Pineapple ChickenThis was excellent, worth making again! It’s fast and easy, and I like the fresh pineapple in it. I liked it over crunchy chow mein noodles, but any Oriental noodle or rice would also work well with this dish.
250 Cookbooks: Sunbeam Cooker and Deep Fryer

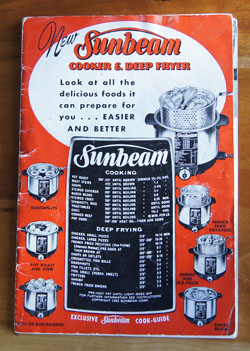
Cookbook #188: Sunbeam Cooker and Deep Fryer, Sunbeam Corporation, Chicago, Illinois, 1952.

Sunbeam Cooker and Deep Fryer cookbookMy Sunbeam deep fryer spends most of its time down on a shelf in the basement. It is greasy and old and just the thought of deep-frying sends fears of high calorie food into my healthy eating plan. Even though I read (and mostly believed) The Big Fat Surprise by Nina Teicholz, I am reluctant to deep fry foods. But I must cover this cookbook, and so I’ll just have to indulge a bit!
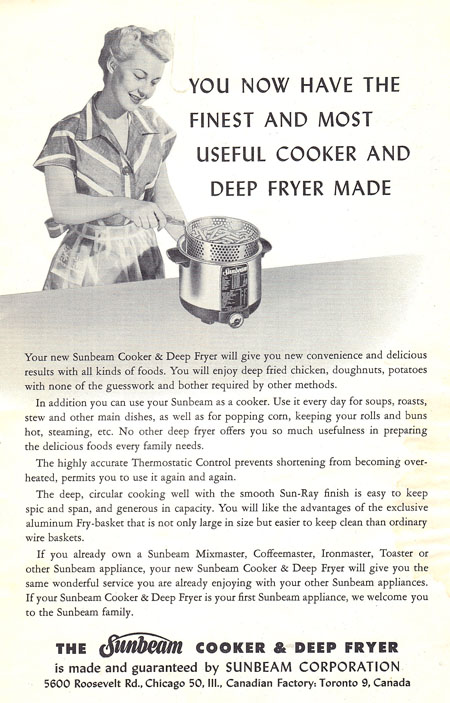
This booklet, Sunbeam Cooker and Deep Fryer, definitely belonged to my mother. I am not sure how I acquired my deep fat fryer – whether I got it new or as a hand-me-down or bought it myself or received it as a gift.  Introduced in 1952 as both a deep fryer and a cooker, this appliance pre-dated the introduction of slow cookers into the American cooking culture. It’s likely my Sunbeam deep fryer is almost as old as I am. Now that’s scary!

Sunbeam fryer introductionThe Sunbeam Cooker and Deep Fryer booklet advises the cook to use solid vegetable shortening, such as “Spry”, a product I discussed in my blog entry for the 1942 cookbook Good Cooking made Easy, Spry, the flavor saver. (Crisco® is now the common brand-name solid shortening.) The Sunbeam Cooker and Deep Fryer booklet directs cooks to re-use shortening by lifting the little bits of food from the warm shortening, and then allowing it to cool and solidify. The shortening can even be stored right in the fryer. (Well, I’m not going to do that.)
The booklet begins with recipes for coated and deep fried chicken, pork chops, liver, hot dogs, fish, shrimp, oysters, and clams. Next are fritters and croquettes, from apple and banana fritters to tuna or macaroni and cheese croquettes to french toast. “Appetite-teasers” include fried pigs in a blanket, liver sausage bonbons, salted nuts, and French fried pop corn.

Doughnuts are next (more on that later!).

Breaded and deep fried vegetables is the next section: cauliflower, tomatoes, mushrooms, onions (I’ve made these), sweet potato balls, and potato cakes. I have used this deep fryer to make french fries many many times, but I only occasionally indulge in french fries nowadays. When I do, I use the method in this booklet, because it’s the best! First, you peel and cut potatoes into half-inch “fries”, then soak them in hot water for about 30 minutes. Next you drain and dry them, carefully lower into 375˚ oil for 5-7 minutes, until the potatoes are tender but not brown, and then lift the basket out of the hot oil (this step can be done an hour or so before serving the fries). Just before serving, you heat oil to 390˚ and re-fry the potatoes until browned and crisp, about 3-5 minutes. Serve at once.

The final section section in the Sunbeam Cooker and Deep Fryer booklet covers “cooking” rather than deep frying, including bean, chili, stew, ribs, and soup recipes. You can even use “Your New Sunbeam” as a steamer, or a bun warmer (!).

For this blog, I choose a recipe for doughnuts. I will do this on a morning when we have company to enjoy this rare treat! Doughnuts can be made from a quick-bread dough or from a yeast dough. After frying, doughnuts can be topped with sugar or frosting – I think we all know about the variety of doughnut toppings!

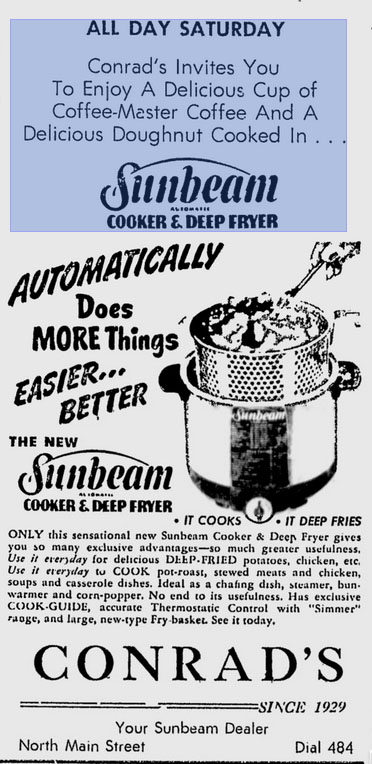
Here is an add for a demonstration of the Sunbeam Fryer at Conrad’s, from The Dispatch, Lexington, NC, Friday, March 6, 1953 (article reference).

fryer ad

Before I begin my doughnuts, I must clean my deep fat fryer. It is in shameful shape.

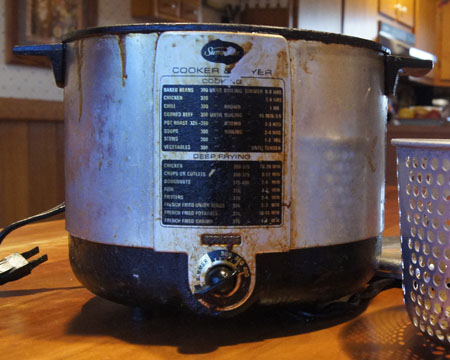
fryer before cleaningCleaned up, it doesn’t look a whole lot better. Some of the paint came off before I realized it was happening.
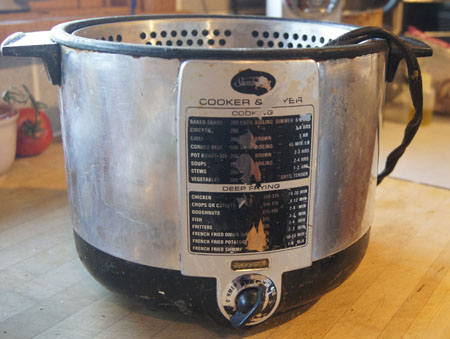
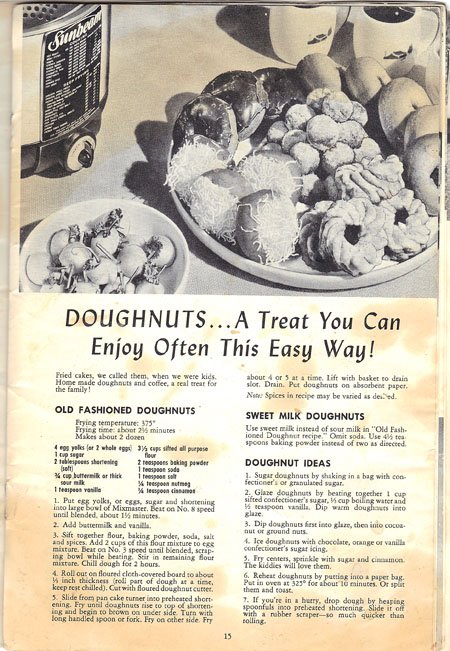
cleaned deep fryerBelow is the scanned-in recipe for Old Fashioned Doughnuts in the Sunbeam Cooker and Deep Fryer booklet. I can tell from all the grease splashes that I have used the doughnut recipe before:
Doughnut recipe

I prepared two different types of dough: one that used baking powder as a leavener (Old Fashioned Doughnuts) and one that uses yeast (Glazed Yeast Doughnuts, from a website). I prepared both doughs the day before, so that my morning could be simplified.

Old Fashioned Doughnuts
makes about 2 dozen

  • 2 eggs
  • 1 cup sugar
  • 2 tablespoons vegetable shortening
  • 3/4 cup buttermilk
  • 1 teaspoon vanilla
  • 3 1/2 cups flour
  • 2 teaspoons baking powder
  • 1 teaspoon salt
  • 1/4 teaspoon nutmeg
  • 1/4 teaspoon cinnamon

Mix eggs, sugar, and shortening in a mixer for about a minute. Add the buttermilk and vanilla.

Stir together the dry ingredients, then add to the wet mixture, blending (and scraping the bowl) until the mixtures are completely combined.

Chill the dough 2 hours (or overnight).

Roll the dough out on a floured board until about 1/3-inch thick. Cut out doughnuts with a floured doughnut cutter.

Slide each doughnut into 375˚ oil. Fry until the doughnuts rise to the top and begin to brown on the under side. Turn, fry other side. Fry about 4 or 5 at a time; takes about 2 1/2 minutes each.

(Fry doughnut holes too.) Sugar, sugar-cinnamon, dip in powdered sugar/water, vanilla glaze and then you can dip in coconut or chopped nuts.

I also want to make raised doughnuts. The recipe for these treats in Sunbeam Cooker and Deep Fryer states to use your favorite yeast sweet roll dough recipe, and after the dough rises, roll out and let rise again before frying. Well, I want doughnuts for breakfast, and do not want to get up at the break of dawn to start these! Luckily a google search found a recipe for raised doughnuts that you start the day before in a breadmaker, store the dough overnight in the fridge, and then rise the dough only a short time before frying. The sweet yeast dough recipe is similar to my own, so I decide to use this recipe.

Glazed Yeast Doughnuts
makes about 2 dozen

I used this online recipe: Glazed Yeast Doughnuts for the Bread Machine on AboutFood.com.

Comments

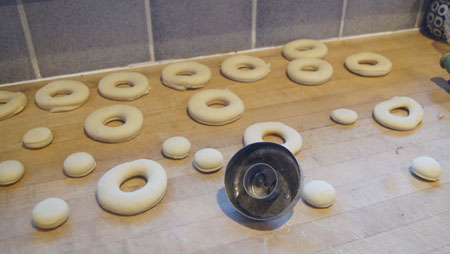
I rolled out the Glazed Yeast Doughnuts dough first, assuming it would take a half hour or so to “wake up” the yeast. I even found my ancient “doughnut cutter” to form the doughnuts. It’s a biscuit cutter with an optional doughnut-hole cutter that can be added to the center.

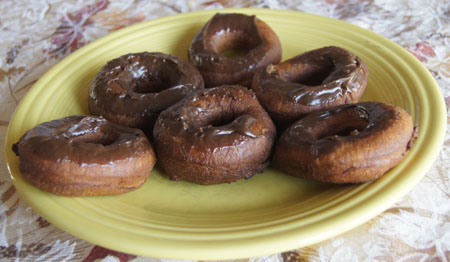
formed doughnutsHere are the doughnuts cooked and glazed. I found out on the next batch that it helps to keep the glaze hot so that it covers the doughnuts better. These look a bit sloppy, but they tasted delightful!
doughnutsI cooked the “Old Fashioned Doughnuts” too. They were sweeter with a nice hint of spices. I recommend both recipes!
250 Cookbooks: KitchenAid

Cookbook #187: KitchenAid, KitchenAid Portable Appliances, MI, circa 1991.

KitchenAid cookbook

My KitchenAid mixer was a gift from my husband, and wow, have I ever used (and loved) this mixer! I call it “Big Bertha” everytime I lift it out of the lower cabinet below my work surface. I have considered replacing it with a new model, but dang, I have no complaints with how this one works. It’s about 25 years old (I wrote “Model KSM90, 12/91” on the inside cover of my KitchenAid booklet). The only part I’ve replaced is one of the beaters (our water ate through the inside metal). Sometime last year, my handy husband took the mixer apart and fixed a broken cross shank in the drive shaft (he made the replacement part himself).

This KitchenAid replaced my Sunbeam Mixer, which I wrote about in this post. Before I got a bread machine, I used the KitchenAid with the dough hook attachment to knead yeast dough. Currently, I use this mixer for cookies, cakes, muffins, quick breads, and other general mixing tasks.

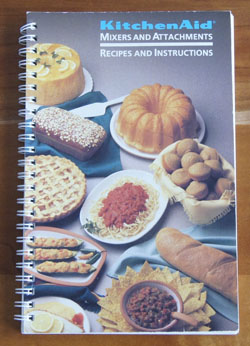
The KitchenAid booklet has maybe 100 recipes in recipes 5 chapters. I start with the first, “Appetizers, Entrees, and Vegetables”, but none of the recipes entice me or offer anything not already in my repertoire. In the “Cakes, Frostings, and Candies” chapter, I might like the Double Chocolate Pound Cake if I ever want a very chocolatey cake baked in my (new) bundt pan. I have used the Angel Food Cake recipe quite a bit – often when I have egg whites leftover from making custard ice cream. I know I’d like the Divinity, a candy my mother used to make. The fudge recipe is interesting because it is made from a cooked sugar mixture that is beat for 8 minutes, like a true candy.

For me, the “Cookies and Quick Breads” chapter repeats recipes I already have. One note: I’d like the Vanilla Custard Filling that is included with the cream puffs recipe. In “Pies and Pastries”, I find a recipe I’d like to try: Country Pear Pie.

Now we come to the “Yeast Bread” chapter. The mixer-kneading techniques dilineated helped me develop my current breadmaking skills, as discussed in My Daily Bread. I have notes throughout this chapter! I do remember the French Bread recipe – I tried to duplicate store bought baguettes with only so-so results for many years, until I discovered the no-knead method (see also Artisan Bread). The recipe for Basic Sweet Dough is a good one to have in my repertoire; I have used it to make Cinnamon Swirl Rounds in muffin tins. I have made (and should make again!) the Honey Oatmeal Bread. I’d like to try the Dutch Apple Bread because it uses fresh apple in a dough that is rolled around a cinnamon sugar filling. Orange Breakfast Bread is rich, but interesting to me because it is filled with an orange marmalade-ricotta cheese mixture and baked in a bundt pan.

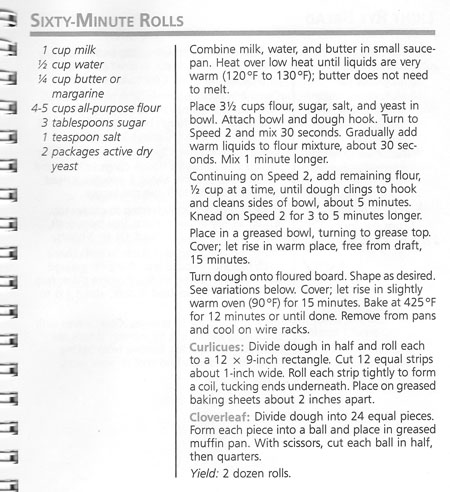
I decide to make Sixty-Minute Rolls for this blog. These are basic yeast dinner rolls that are ready in 60 minutes, with only 2 15-minute rises and then a 12 minute bake. Might be nice to have such a quick recipe in my repertoire.

60 Minute Rolls recipe

How long will it really take me to make these? I’ll check the clock when I start!

Sixty-Minute Rolls
makes 1 dozen

  • 1/2 cup milk
  • 1/4 cup water
  • 2 tablespoons butter
  • 2-2 1/2 cups flour
  • 1 1/2 tablespoons sugar
  • 1/2 teaspoon salt
  • 1 scant tablespoon yeast

Combine the milk, water, and butter in a small sauce pan (or microwave) and heat until warm (the butter does not need to melt).

Stir together 1 3/4 cups of the flour with the sugar, salt, and yeast in the big bowl of a mixer. Using a dough hook (if possible) or the regular beater, add the milk mixture to the flour mixture and beat on low speed about a minute.

Continue beating on low speed while adding enough of the remaining flour (1/4 – 3/4 cup flour) so that the dough clings to the beater and cleans the sides of the bowl, about 5 minutes. Then, mix on low speed about 3-5 minutes.

Cover the bowl and let rise in a warm place for 15 minutes. Grease or Pam-spray a muffin pan.

Turn the dough onto a floured board and fold over several times. Divide the dough into 12 equal sized pieces (I used the scale to help). Roll each into a smooth ball and place in the muffin tin. Slice an “X” across the top of each bun. (Or, make cloverleaf or curlicue shapes as in the original recipe in the above scan.)

Let rise in a warm place for 15 minutes. (Cover if possible.) Bake at 425˚ for 12 minutes.

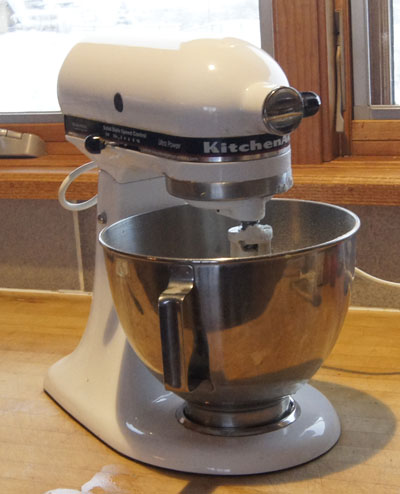
Here is my KitchenAid, mixing the dough:

my KitchenAidHere are the rolls, ready for the oven after the first rise. They rose to just above the top of the muffin tin.
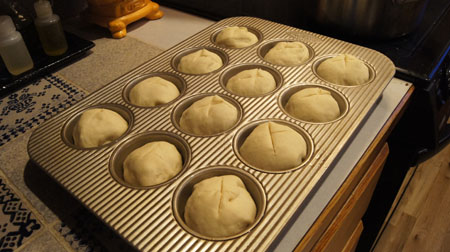
60 minute rolls, unbakedAnd here are the golden brown rolls, baked:
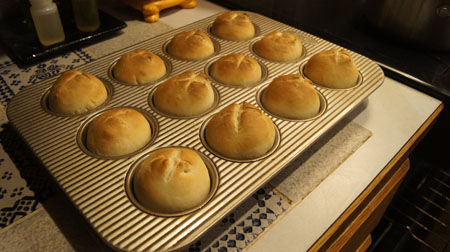
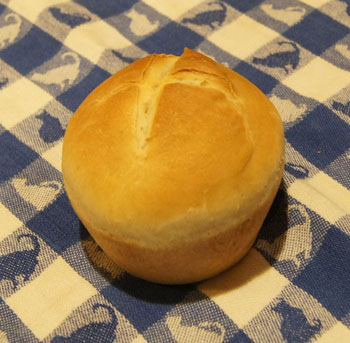
baked 60 minute rolls

Comments

How long did these take from start to finish? 65 minutes. But about 5 minutes of that time was me looking for my dough hook. Never found it! It’s gotta be somewhere. I used the regular beater instead and it worked fine.

The dough mixed about 8 minutes in the KitchenAid. It was noisy! I am so used to my breadmachine doing a quiet kneading.

I did not cover the rolls during the rising step. In my experience, both plastic wrap and towels stick to rising dough. Even though the dough dried out a bit, they turned out fine.

I am not satisfied with the KitchenAid method for the second 15 minute rise in a “slightly warm 90˚ oven”. My oven does have a very low setting, 100˚, but I only have one oven and needed to be heating it to 425˚ for the baking step. I set them in the 100˚ oven for 15 minutes, then took them out and heated the oven to 425˚ and popped the rolls into the oven as soon as it reached temperature, about 5 minutes. I re-wrote the instructions to just have the second rise “in a warm place”. Like, on top of the oven that is heating to 425˚. I am sure it will work.

Taste? These rolls are good, especially hot out of the oven. With butter melting into them. I will keep this recipe in my repertoire for those times I have not planned ahead and need dinner rolls in 60 minutes!

60 minute rollNote: I put the extra rolls in the freezer. A week later, I need bread for a dinner, so I popped three in the microwave on high for 60 seconds. Perfect! Now these are “60 second 60 minute rolls”.
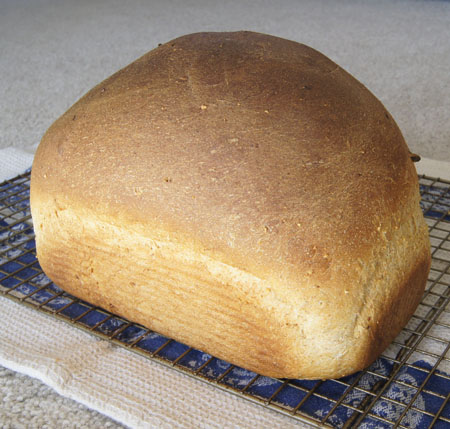
Anadama Bread

Aside

Dammit, I made a mistake! I took Healthy Bread Recipes off the shelf and chose a recipe for “Anadama Bread” to make for this blog. Only after I had made the bread did I discover my mistake: I’ve already covered this cookbook!

The bread was very very good, so I decided to go ahead and share the recipe.

I love the name for this bread: “Anadama” from “Anna, damn her!” According to Healthy Bread Recipes:

“Colonial American folk stories about the name Anadama accredit Anna’s husband for this bread. The hungry fisherman returned home to find Anna gone and a supper of cornmeal mush and molasses. The legend is he cursed her while preparing his own bread from the meal.”

(Wikipedia gives a slightly different version of the legend.)

This bread has a rich and hearty flavor, and is great in sandwiches, as peanut butter toast, with stews and spaghetti. It’s good and healthy enough to qualify as a “daily bread“, and it makes me wonder why I don’t vary my old standby more often.

Anadama Bread
makes 1 9×5-inch loaf

  • 1 1/8 cup boiling water
  • 1/4 cup oatmeal (I used old-fashioned oatmeal)
  • 2 tablespoons cornmeal (I used a coarse-grind type, Bob’s Red Mill medium grind)
  • 2 tablespoons butter
  • 2 tablespoons molasses (1 1/2 ounces)
  • 1 teaspoon salt
  • 1 cup whole wheat flour (5.3 ounces; not white whole wheat flour)
  • 2 cups bread flour (10.6 ounces)
  • 2 tablepsoons gluten flour
  • 1/4 cup dry milk
  • 2 teaspoons yeast

(This recipe is written for a bread machine.)

With the bread machine off off, put the boiling water in the pan, then add the oatmeal and cornmeal and stir to mix. Let stand 20 minutes.

Add the remaining ingredients and select a dough cycle that has a rising step. When the cycle is complete, remove the dough and place in a large loaf pan.

I baked my loaf at 385˚ for 25 minutes; the bread did not look done and I when tested it with an instant read thermometer, it was about 145˚. The loaf was already pretty brown so I turned the oven down to 350˚ and baked for another 20 minutes. It tested close to 198˚ and was perfect. Well, it rose a little too high! But the texture was great throughout.

Anadama Bread

250 Cookbooks: Cuisinart Prep 11

Cookbook #186: Cuisinart Prep 11, Cuisinart, East Windsor, NJ, 2001.

Cuisinart Prep 11 cookbookThis is the instruction booklet for my first Cuisinart, a DLC-2011 series, that I gave to my daughter a year ago. It is still a working unit, although over the years I had some issues with the top and its attachment to the working bowl. (And now the blade has been recalled due to issues with the rivets in the blade falling apart.)
Included in this instruction booklet are about 40 recipes for appetizers, soups, breads, entrees, pizzas, sauces and dressings, sides, and desserts. The instructions for all recipes are excellent. I love the recipe for hummus – have made it many times. Although I have my own banana bread recipe, I read with interest the one in this booklet: finally a recipe that does what I came up with on my own. Why hand mash bananas? Use a processor, mix the bananas with other wet ingredients, and then fold in the mixed dry ingredients. I have used the pizza dough recipe, but not often. You can use the dough blade and the unit to knead yeast breads, but I rarely do.

The pesto recipe on page 43 is excellent and I have used it lots. As the instructions state, this pesto “is lower in fat than traditional pestos, and just as flavorable”. It makes a lot, but can be frozen (I’ve frozen it before in ice cube trays).

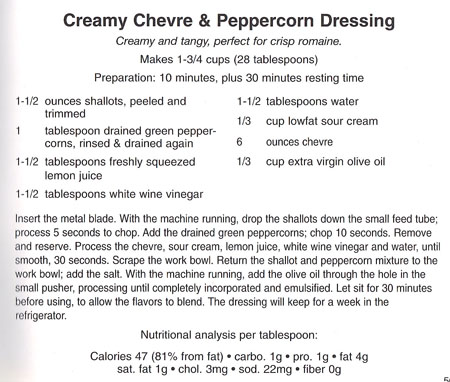
Creamy Chevre and Peppercorn Dressing catches my eye. This is a salad dressing with shallots, green peppercorns, lemon, vinegar, sour cream, and olive oil. I think I’ll make it for this blog! If I ever want to make my own mayonnaise using a food processor, I would use the recipe in this booklet.

I use a modified version of the french-cut green beans on page 54. Generally, I start with the chopping blade in place, then run the machine andI drop in a clove or two of garlic. I leave the garlic in the bowl, but remove the blade and insert the slicing disc and use it to process the green beans. Then I dump the lot into a sauce pan and saute in butter for a few minutes, add water and cook another few minutes, drain and serve.

I will definitely save this cookbook. I noted at least 10 recipes to try!

Below is the recipe for Creamy Chevre and Peppercorn Dressing.

Creamy Chevre Peppercorn Dressing recipe“Chevre” is more commonly called “goat cheese”, at least where we live. I have used green peppercorns before (ages ago), and they were packed in brine, as called for in the printed Creamy Chevre & Peppercorn Dressing recipe. According to my Food Lover’s Companion, “the green peppercorn is the soft, underripe berry that’s usually preserved in brine. It has a fresh flavor that’s less pungent than the berry in its other forms”. But all I could find on my venture to Whole Foods was a spice jar of hard, dried green peppercorns. I bought that jar, and soaked a few peppercorns in a mixture of salted hot water and vinegar for awhile, then drained. They were still pretty hard. Thinking they are sort of like capers flavor-wise, I used half a tablespoon of these peppercorns and half a tablespoon of capers. If you can’t find brined green peppercorns, I suggest substituting with a teaspoon of capers and then grind some fresh black peppercorns into the dressing to your own taste.
Creamy Goat Cheese Dressing
makes about 1 3/4 cups

  • 1 1/2 ounces shallots, peeled and roughly chopped (for me, this was one medium-sized shallot “clove”; you could substitute a portion of a regular onion)
  • 1 tablespoon drained and rinsed brined green peppercorns (or substitute as I suggested in the above paragraph)
  • 1 1/2 tablespoons freshly squeezed lemon juice
  • 1 1/2 tablespoons white wine vinegar
  • 1 1/2 tablespoons water
  • 1/3 cup sour cream
  • 1/4 teaspoon salt
  • 6 ounces goat cheese
  • 1/3 cup extra virgin olive oil

Insert the metal blade in a food processor. Start the machine, and drop the shallots down the feed tube; process 5 seconds. Add the green peppercorns and process 10 seconds. Scrape the mixture out of the bowl and reserve.

Add the lemon juice, vinegar, water, sour cream, salt, and goat cheese to the food processor bowl. Process until smooth, about 30 seconds. Scrape down the sides of the bowl and add the shallot/peppercorn mixture. Start the machine running, and slowly add the olive oil through the feed tube. Process until all the olive oil is added and incorporated.

Remove the dressing from the processor. Let stand at least 30 minutes for the flavors to blend. This dressing will keep for a week in the refrigerator.

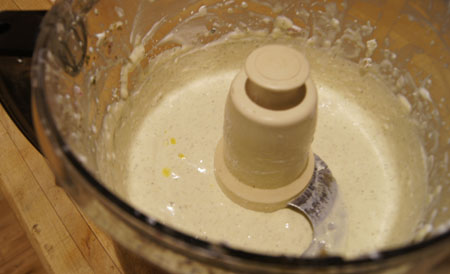
Below is a photo of my just-finished dressing, still in the processor. You can see I have a couple drops of olive oil still on top.

mixing dressing

I honestly didn’t think my husband would like this goat cheese dressing. So when I made up our salads, I only dressed mine, and told him he could make his own choice.

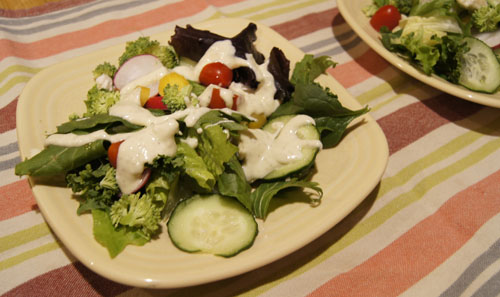
Goat Cheese DressingHe ended up choosing the goat cheese dressing, and he liked it! He even chose it the next night too.

Me? I love this dressing. It’s creamy and pungent and only about 50 calories in a tablespoon. It was even better the second night. I am using it for all of my salads until it is gone!