250 Cookbooks: Cooking of Germany

Cookbook #222: Cooking of Germany, Nika Standen Hazelton and the Editors of Time-Life Books, Time-Life Books, NY, 1969. Foods of the World series; revised 1973, reprinted 1974.

Cooking of Germany cookbookThis is the fifth and last book that I own in the Foods of the World series. Once again, I look forward to discovering another interesting author as I open Cooking of Germany, just as I discovered M. F. K. Fisher in the Cooking of Provinvial France, Emily Hahn in the Cooking of China, Joseph Wechsberg in Cooking of Vienna’s Empire, and Rafael Steinberg in the Cooking of Japan.

Nika Standen Hazelton is the author, and who is she? Let’s see what I can find. She was born in 1908, in Rome; her father was a German diplomat. She studied at the London School of Economics and began a career as a European journalist at the young age of 22, in 1930. In 1940, she emigrated to the US with her husband.

In the States, she started writing cookbooks. Her obituary states she authored 30 cookbooks, and also “was a frequent contributer to the major food magazines and for several decades wrote a column about food, wine and travel for The National Review“.  Her writing style wove memoirs into her recipes, and several of her books remain cookbook standards. Her attitude towards cooking is described as “no-nonsense”. “Searching for Nika Hazelton, the no-nonsense cook” is a delightful 2011 blog entry by Sandra Lee. I chuckled several times at Sandra’s descriptions of this apparently full-of-attitude author.

So I am a bit abashed that I was ignorant of Nika Hazelton’s writing. She belongs among the other important woman authors of food articles and books in the twentieth century, alongside M. F. K. Fisher and Emily Hahn. (And why did I not read and appreciate these female authors of the Foods of the World series when I first received the books in the mail? I have no good answer.)

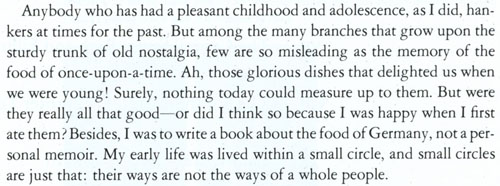
Nika Hazelton begins the introduction with “when I began to think about this book, I was puzzled . . . should the book be aboutt he cooking of present-day Germany? Should it be about the cooking I grew up with between World Wars I and II? . . . each approach could be illuminating, and each had its drawbacks.” Here is the paragraph that follows these thoughts – note her philosophical tone:
page 6

Her musings continue. “Why write about a bygone age? The Germany of those days is gone forever – and good riddance to it.”

This paragraph describes her decision for the book’s focus:page 6page 7

And:

“As in any cookbook, some readers will miss their own favorites, or question ingredients or techniques that went into making a typical dish. I can only remind them that no book is all-inclusive, and that most traditional dishes of any country come in almost as many versions as there are cooks. This is an asset rather than a fault, for it gives room for pleasant speculation on the whys and wherefores of a dish – pleasant speculation, because food and cooking are pleasant and comforting in themselves.”

“Food and cooking are pleasant and comforting in themselves.” A woman after my own heart.

The introduction is followed by the first chapter: “Surprises of the German Table”. Nika Hazelton writes that the tourist (of the late 1960s) might expect to find a Germany filled with the music of Bach and Beethoven, castles perched high above the Rhine, and Hansel-and-Gretel towns nestled in dark forests. Meals would be a long succession of sausages and sauerkraut followed by sauerbraten and dumplings served with great steins of beer “hoisted by hefty maidens”. But in reality, the tourist would fly in jets over the Rhine castles, and “The Gretels are miniskirted, the Hansels long-haired, and they sway to rock ‘n’ roll in the automobile-choked streets of their age-old towns.” Those automobiles would be Volkswagens. The tourist would find all the expected dishes, but they will be different in flavor and in an incredible variety of forms. And food is sold in “supermoden supermarkets”, offering foods “premixed, freeze-dried, precooked, and, of course, temptingly packaged for impulse buying, along with fresh foods from the world over.”

Here she describes why she thinks Americans are so comfortable with German food:
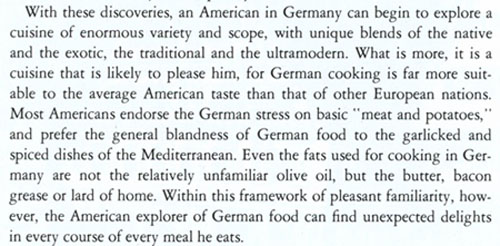
Cooking of GermanyThis book has wonderful full-page photographs. The photographer was German-born Ralph Crane, who worked for the NY Times as well as Time-Life books. Here is an example of the full-page photos in this book:
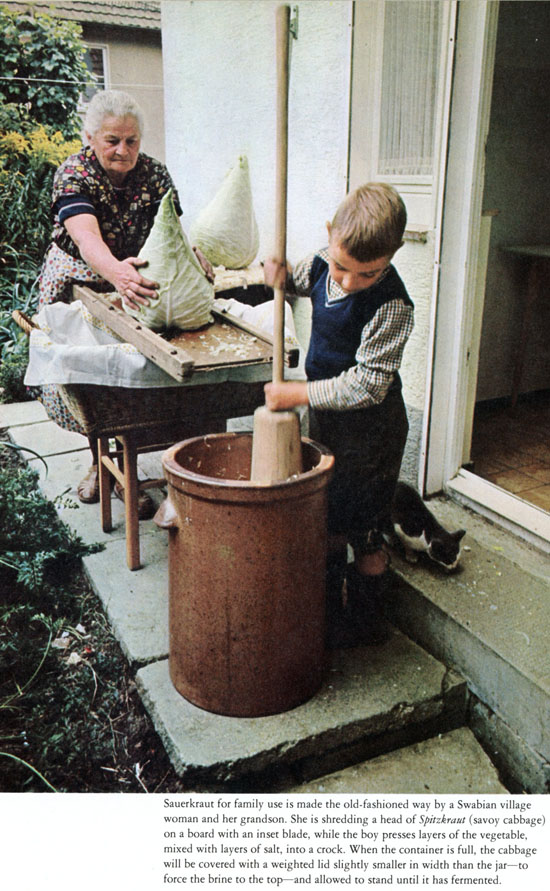
Cooking of Germany

The second chapter is “How to Eat Five meals a Day”. I turn to a photo of a man in suit and tie, his wife in dark sweater and trousers. They sit at a table, under an elegant chandelier, complete with candles, flowers, and fancy dishware. She is feeding a bite of her food to the family dachshund. The photo caption tells us they are “dining informally at home”. Oh yes. Informal. (You should see my informal.)

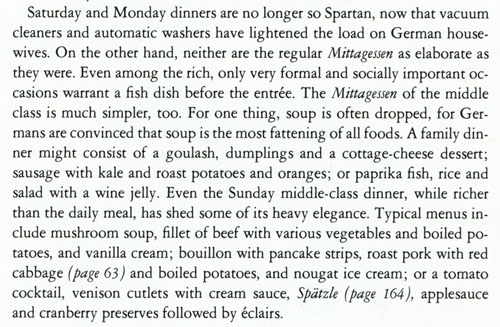
The five-meals-a-day chapter exemplifies Nika Hazelton’s character as she describes not only the food, but the people and the traditions of German cooking. She takes us through a day in the life of a German in the mid-twentieth century, weaving the hours with people coming together and enjoying food, and compares the experiences of Germans today with those of yesteryears.

This paragraph exemplifies the chapter’s tone:
Cooking of Germany

She mentions the grape harvest:

“Incidentally, for those who think that grape harvesting is romantic, with maidens in dirndls wearing Bacchic wreaths in their hair, I have news. Grape pickers wear jeans, sweaters and high rubber boots. The pretty dresses and stupendous beehive hairdos come later, at the Winzerfeste, or local vintners’ fêtes, where the merriment is astonishing indeed.”

At the end of the second (and each) chapter are recipes. Katerfisch, or “Fish for a Hangover” with tomato sauce and pickles, and Röllmopse, or “Rollmops”, are herring rolls filled with onion and pickle, “prized as a pick-me-up on a morning after”. Ah, those Germans.

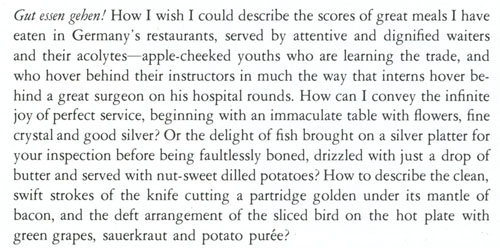
Chapter 3 is “The Pleasures of Eating Out”. Here is an example:
Cooking of Germany

Chapter 4 is “Old and New Ways of Party Giving”. Again, an example:
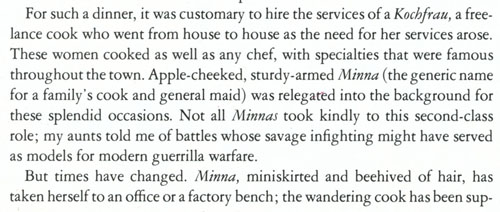
Cooking of GermanyCooking of Germany

Nika Hazelton ties her own past with her own present:
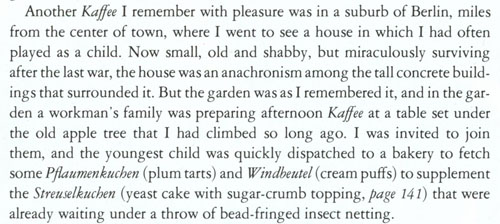
Cooking of GermanyThe flavor and of the Cooking of Germany continues to the end of the book. The next chapters are “A Cooking History 2,000 Years Old”, “The Northern Style: Cold-Climate Cuisine”, “The Central Style: Rich and Filling”, “The Southern Style: A lighter Touch”, “Baking Raised to a Fine Art”, and “Festive Revelry and Nostalgic Holidays”. Here are a few thoughts about these chapters.

  • There is a great photo of a potato on page 134. I learn that potatoes are a new world vegetable, and of all the Europeans, Germans were the last import them. Today, potatoes are called “The King” of German vegetables and are used for Schnaps (an alcoholic beverage), dessert dumplings, hot potato salad, potato pancakes, potato soup, and potato dumplings, among other dishes.
  • One of my favorite pages is the photo on page 154 of 26 different kinds of German wursts (sausages). “Everybody rejoices when November kills its pig” is the title of a photo caption.
  • I enjoy the “Baking Raised to a Fine Art” chapter. Wonderful photos of German yeast breads. Photos of desserts, fancy and rich, like the gingerbread house on the cover of the book.
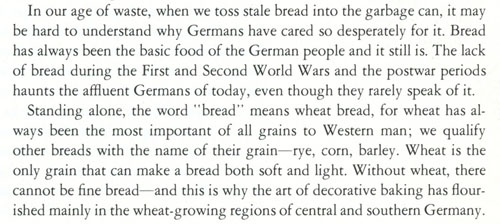
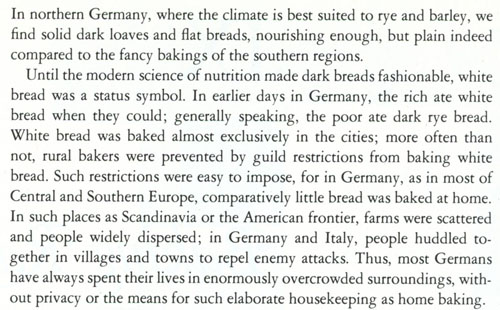
Cooking of GermanyCooking of Germany

Need to mention

I find the recipe instructions in the hard cover and in the accompanying spiral bound booklet very well written. The “late Michael Field suprervised the adapting and writing of recipes for this book. One of America’s foremost food experts and culinary teachers, he wrote many articles for leading magazines.”

Another of the team that put together the Cooking of Germany is the consultant:

Cooking of Germany

As you can see, the consultant was Irma Rhode. Born in 1900, she earned PhD in chemistry. I can imagine that she was the only female in her classes. Heck, I was one of the few women taking chemistry in the 1960s!

Rouladen for dinner

Time to get cooking! I pick up the spiral-bound book of recipes that accompanies the hardcover. I decide to make Rouladen for this blog. These are beef rolls, and the recipe suggests to serve them with spatzle (see scan below)). I’ve made Rouladen before but wow, how long ago was that! We both remember this dish but can’t remember the last time I made it and I can’t figure out why I haven’t made it since.
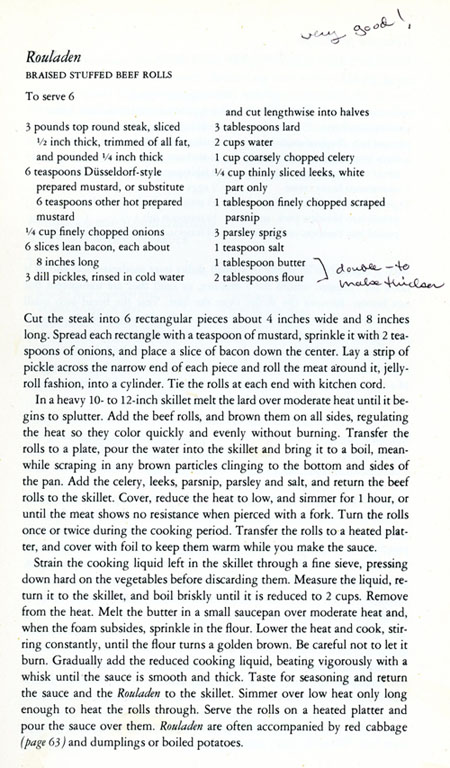
Rouladen recipeAs suggested in the recipe, I’ll serve it with a little Red Cabbage with Apples.
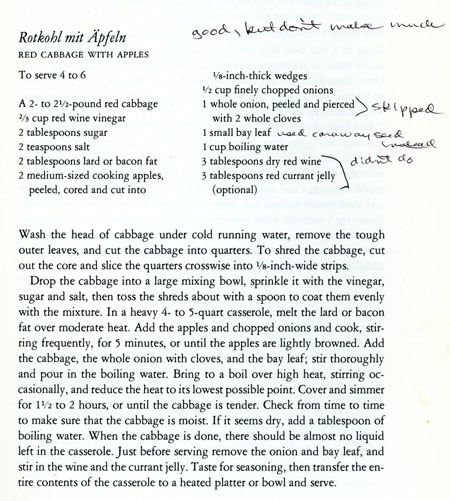
red cabbage recipe

The rouladen recipe also suggests dumplings or spätzle, but I am going to cheat and use convenient potato dumplings, or gnocchi, sold these days in America as a shelf-stable pasta product. Below is the Cooking of Germany recipe for spätzle. You can see I used this recipe booklet, by the sticky pages at spätzle. I love spätzle! But they take a bit of time to make. (Someday I’ll make them again!)
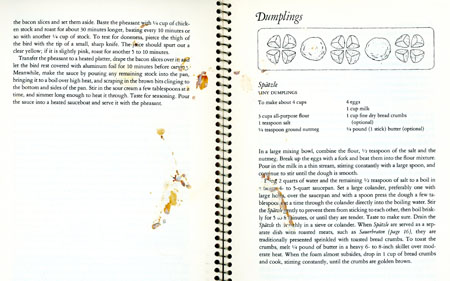
dumplings pages

I modified the rouladen recipe a bit: I increased the onions, leeks, and parsnip in the cooking liquid, and I added some pepper. I made the sauce a bit differently, as described in my version of the recipe, below.

Braised Stuffed Beef Rolls (Rouladen)
serves 2

  • 1 pound thin sirloin (or top round) steak (my local market sells thin sirloin as “petite sirloin”)
  • 2 teaspoons mustard (I used a brown mustard with seeds, but any type would work)
  • 1/4 cup finely chopped onions
  • 2 slices bacon, each about 8 inches long
  • 1 whole dill pickle, cut lengthwise into halves
  • 1 tablespoon lard (or use butter)
  • 1/3 cup chopped celery
  • 1/3 cup thinly sliced leeks, white part only
  • 1/3 cup chopped parsnip (optional; or substitute a carrot)
  • 1/2 teaspoon salt
  • pepper to taste
  • 1 cup water
  • 1 big sprig of parsley
  • 1 tablespoon butter
  • 2 tablespoons flour

Pound the steak until it is 1/4 inch thick. (I put it in a ziplock bag and pounded with a mallet.) If you are using a single piece of round steak or sirloin steak, cut it into two rectangular pieces about 4 inches wide and 8 inches long after pounding. I found that the petite sirloin steaks worked perfectly, as they were sold already the perfect size for this dish.

Spread each rectangle with a teaspoon of mustard, then sprinkle with 2 teaspoons of onions (save the remaining onions for later). Place a piece of bacon lengthwise down the center. Lay a dill pickle half across the narrow end of each piece and beginning at the pickle end, roll the meat around it, jelly-roll fashion, into a cylinder. Tie the rolls at each end with kitchen cord.
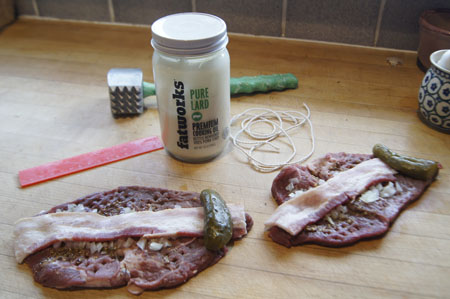
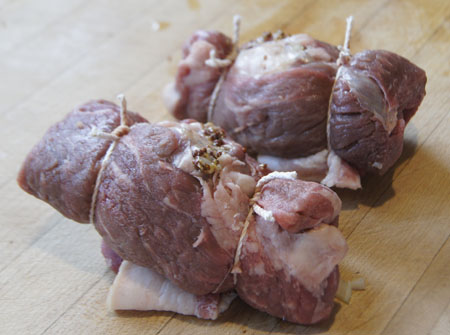
BeefRolls layoutBeefRolls rolledChoose a deep skillet with a heavy lid. I used my old cast-iron stewing pot; a LeCreuset or any heavy cooking pan or pot or skillet would work. Heat the skillet over moderate heat; add the lard (or butter) and heat until it begins to splutter. Add the beef rolls, and brown them on all sides, regulating the heat so they color quickly and evenly without burning. Transfer the rolls to a plate and set aside.

Add the celery, leeks, parsnip, remaining onion, and salt and pepper to the skillet and cook and stir a minute or two to soften the vegetables. Add the water and bring it to a boil, stirring and scraping in any brown particles clinging to the bottom and sides of the pan. Add the parsley. Turn the heat to low and cover the pot. Monitor the pot for awhile: you want a gentle simmer. Let it simmer for an hour or so, turning the rolls once or twice.

Remove the rolls from the pot and cover with foil to keep them from drying out while you make the sauce.

Let the sauce cool awhile in the pot, then scoop the vegetables from the pot with a slotted spoon. Pour the liquid into a gravy separator. Alternatively, if your gravy separator has a strainer-type top, pour the entire contents of the pot through the strainer into the separator. You want these cooked vegetables! Save them!

When the fat has separated from the water layer, pour the water layer into a blender or food processor, or better yet, into the cylindric container that comes with an immersion blender. Add the saved cooked veggies to the liquid, and blend or process or use an immersion blender to homogenize the mixture.

Meanwhile, melt the tablespoon of butter in the skillet until it is foaming, then slowly add the 2 tablespoons of flour, stirring constantly. When all the flour is incorporated, stir a minute or two more, but do not let it burn. Then, slowly and with constant stirring, add the blended broth-vegetable mixture. When it is nicely thickened and bubbly, add the beef rolls, cover the pot, and heat 5-10 minutes to get the rolls to serving temperature.
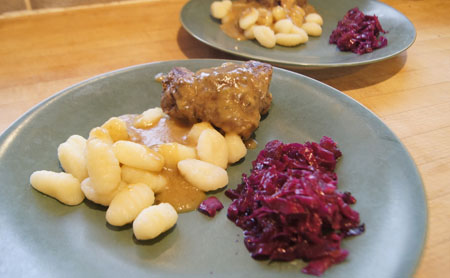
BeefRolls platedThese were delicious! The gravy was amazing, thick and full of flavor. The pickle inside was fun. These remind us of one of our favorite meals, called “little piggies” by my husband’s family. It’s still about his favorite meal  – strips of bacon on strips of round steak, rolled and secured with a toothpick, cooked in a skillet and served over mashed potatoes with gravy. I like the rouladen as made above with tender sirloin steak, because there is less fuss in preparation, and the de-fatted gravy isn’t greasy.

250 Cookbooks: Original SchlemmerTopf Recipes

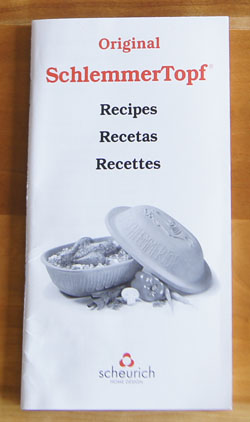
Cookbook #221: Original SchlemmerTopf® Recipes, Scheurich, circa 2009.

Original SchlemmerTopf Recipes cookbookA “Schlemmertopf” is a covered clay baking pot. I wrote a lot of material on clay pots in Römertopf Cooking is Fun, and more in Original Schlemmertopf Recipes, so I won’t repeat that information here.
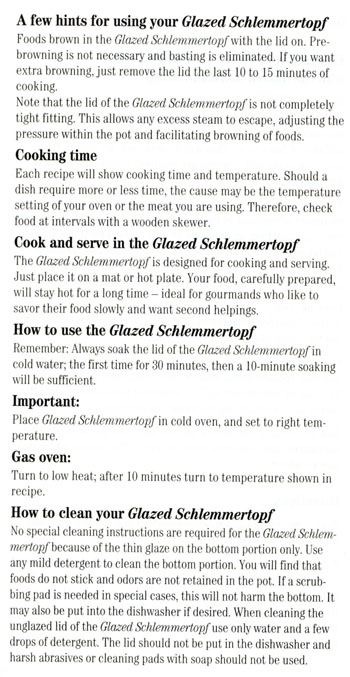
Original SchlemmerTopf Recipes is the instruction and recipe booklet that came with my current SchlemmerTopf. I bought this clay pot in 2009 (plus or minus a year or two) to bake no-knead breads. The back cover of Original SchlemmerTopf Recipes states that Reston Lloyd Ltd. is the exclusive US and Canada distributor for SchlemmerTopf. They suggest: “Visit our Web Site: www.restonlloyd.com” – so I did, and found that currently Reston Lloyd  offers only the Romertopf® brand of covered clay baking pots.

The bottom section of my SchlemmerTopf® is glazed; the top section is not. This makes it a lot easier to clean than the first clay pot I had. The unglazed top section needs to be soaked in water for about 10 minutes before use. After filling the bottom of the pot with recipe ingredients, the top is added, and the SchlemmerTopf® is put in a cold oven. Only then is the oven turned on, usually to a high temperature, like 425-475˚.

And yes, my last two experiences with clay pot recipes for this blog were very successful! I need to remember to use this pot more often, and no only for baking bread!

Here is the instruction page:

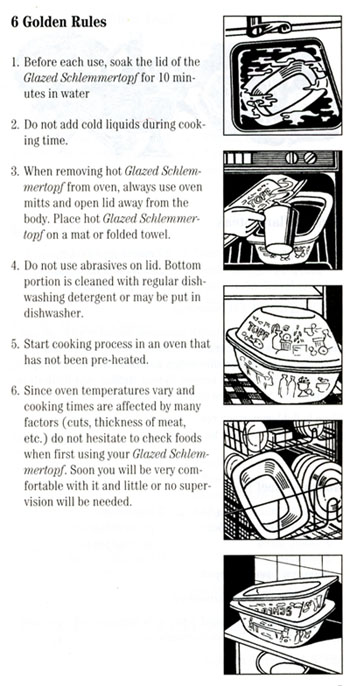
schlemmertopf instructionsAnd Six Golden Rules:

6 golden rulesThe first 23 pages of this booklet is written in English, then (as far as I can tell) the same instructions and recipes are written in Spanish and then in French. Example recipes are stuffed flank steak, beef stew, meat loaf, beef cabbage rolls, roast beef, chicken shanghai (I made this for another blog entry), chicken paprika, turkey curry, roast game hens, roast duck, and roast salmon. I find these recipes are helpful because they illustrate how to bake a variety of foods in the SchlemmerTopf. But, they are not very inspiring.
Hmmm, shall I keep this small booklet? For a while. But I know I could live without it.

For this blog I decide to make the Roast Beef. Largely because I have a small roast in the freezer!

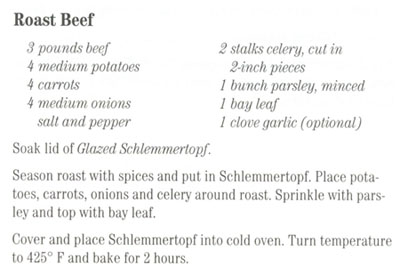
Roast Beef recipeMy roast is only about a pound and a half, so I will cut the recipe in half. Note how the recipe (above) does not state what cut of beef to use, nor does it tell me if the potatoes, carrots, and onions are to be peeled or chopped. It does direct the cook to cut the celery in “2-inch pieces”. I decided to peel and cut in half the potatoes, carrrots, and onions.
SchlemmerTopf® Roast Beef
serves 2, with leftovers for sandwiches

  • beef roast, about 2 pounds (I used a bottom round roast)
  • salt and pepper
  • 2 potatoes, peeled and cut in half
  • 2 carrots, peeled and cut in half
  • 2 onions, peeled and cut in half
  • 1 stalk of celery cut in 2-inch pieces
  • 1/4 cup chopped fresh parsley
  • 1 bay leaf

Soak the lid of the SchlemmerTopf® in cold water for at least 10 minutes.

Season the roast with salt and pepper and place in the base of the SchlemmerTopf®. Add the vegetables around the roast, then put the parsley and bay leaf on top.

Cover the SchlemmerTopf®.

Place in a cold oven. Turn the oven to 425˚ and bake for 2 hours. Feel free to open the lid and check for doneness at any time, it won’t affect the baking.

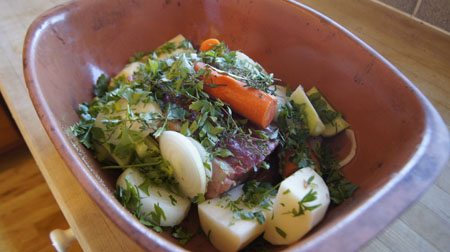
Here is the beef and vegetables, ready to go in the oven.

clay pot roast

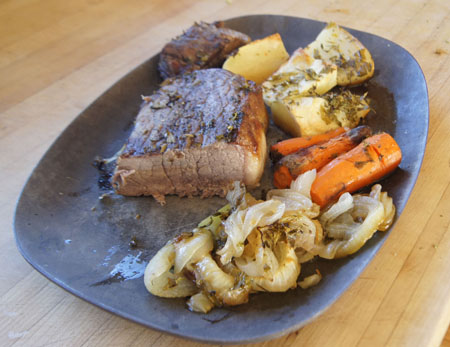
And here is the finished roast.

clay pot roastThis was good. The potatoes were nicely browned and not mushy inside. I liked the onions too – browned and soft and perfect. I wasn’t able to make a gravy, so I served it with ketchup. (I liked the Römertopf Pot Roast that I made when I covered Römertopf Cooking is Fun. For that pot roast, I used a cross rib roast, lots more seasonings, and was able to make a gravy.)
The leftover beef from this Beef Roast recipe was great the next day, sliced thin in sandwiches. So I’d say the recipe was a success!

250 Cookbooks: McCall’s Cook Book

Cookbook #220: McCall’s Cook Book, by the Food Editors of McCall’s, McCall Corporation and Random House Inc., 8th printing, NY, 1963.

McCalls Cook BookThis treasure is my mother’s copy of my book of the same name, as covered in my 2016 blog post. The cover on her book is yellow, and mine green. She took better care of her copy – didn’t have to tape the back binding together.

Inside the front cover, she scotch-taped several bits of useful information. One is a newspaper clipping from a Q/A article on can sizes. In the early twentieth century, cans were sold by sizes “No. 2, No. 10, No. 203” etc. Her clipping translates those values into weight and volume values. (Of course, nowadays we just google for an answer.) She also clipped  a table of weights and measures for fruits and nuts, and a table of food volumes before and after cooking. And tucked in with these tables is a “how much equals how much?” for fruits and vegetables.

Yup, she used this cookbook as a reference. I remember that she always put the exact amount of each ingredient called for in a recipe. If she had a couple tablespoons from a can of olives left over after measuring, those olives did not go into the bowl.

Mother inscribed these words on the page opposite the title page:

McCalls inscription

I page through the book looking for more of her notes. I come to the Quick Breads chapter, which begins:

“It’s hard to buy these sweet breads, so if you want to serve them, you’ll have to make them. Use them when you entertain, particularly at afternoon teas or luncheons when a fruit salad is the main course.”

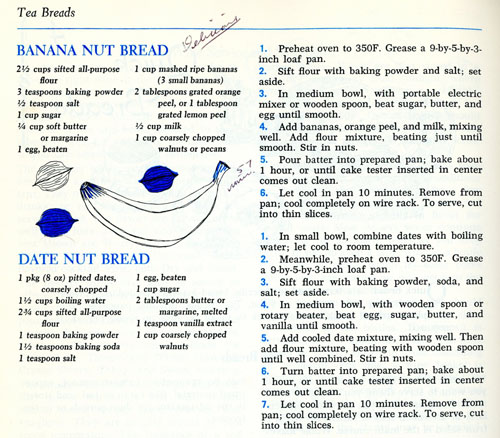
Today we can buy quick breads in coffee shops and markets. Like banana bread. Mother marked “Banana Bread” in her edition of McCalls Cook Book.

banana nut bread and date nut breadI have about 3 or 4 banana bread recipes – I rotate through different versions, but most of my recipes call for vegetable oil – this one uses butter or margarine instead. Might be interesting to try. Seems I often have ripe bananas to use up!
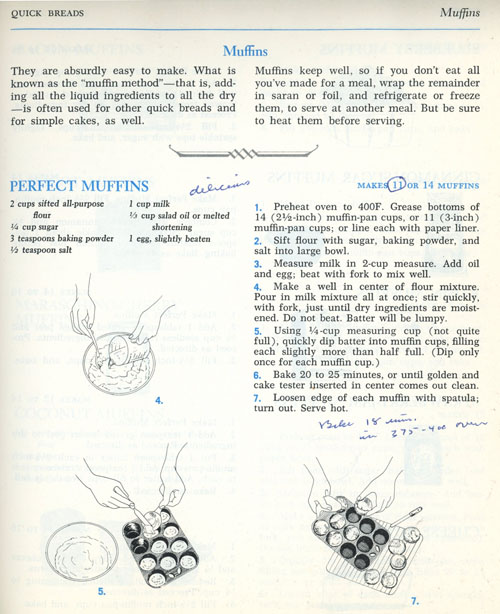
The next recipe she marked is for “Perfect Muffins”. I like the introduction to muffns: “These are absurdly easy to make. What is known as the ‘muffin method’ – that is, adding all the liquid ingredients to all the dry – is often used for other quick breads and for simple cakes, as well.” Perfect Muffins is a basic recipe that can be modified – eight different suggestions are listed on the following pages. I like the way she circled “11” on the number of muffins to make; she also changed the baking time and temperature.

Perfect Muffins recipe

I continue paging through. My goodness, her book is in such better condition than mine! She put a red check but no comments next to a recipe for sour cream in pancakes – I’d like sour cream in pancakes too. The recipe pages for “McCalls Basic White Bread”, a yeast bread, look well used. She thought the Honey-Whole-Wheat Bread was delicious. Mother must have made homemade pizza, although I never remember her cooking it. She liked the McCalls recipe for homemade crust. Plus, she tucked several magazine-clipped recipes for pizza sauce inside the book. These sauce recipes are similar to the ones I found on SeriousEats a few weeks ago.

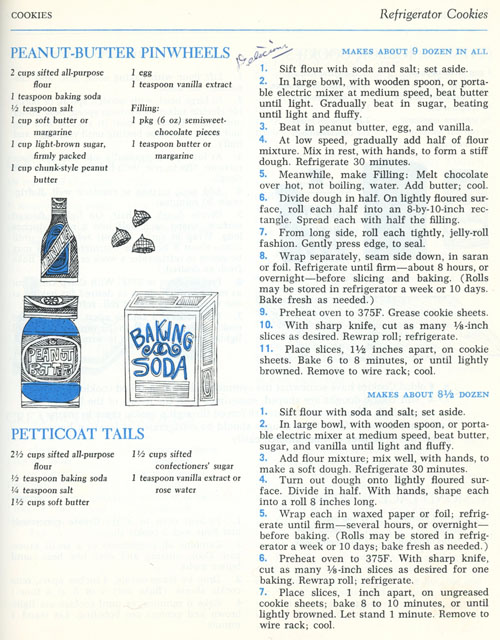
She thought the Old-Fashioned Applesauce Cake was “delicious”. I’ve used this recipe too; I sometimes made this cake into cupcakes, too. In fact, I think I’ll make it again soon, it is a very good cake. Especially with icing! Peanut Butter Pinwheels sound really, really good (she marked them “delicious”). I never remember having one of these cookies: a peanut butter dough rolled out, spread with chocolate, rolled into a log, sliced into cookies.

PeanutButterPinwheelsOn the recipe Chili Con Carne in Red Wine, she commented it was “Pretty good, kinda runny”. I think she served it with the suggested Polenta Squares, a recipe later in the book, because she commented at the polenta squares “Good – I like it”. This makes me chuckle. I too like tomato-based sauces over polenta. I just discovered home-cooked polenta a few years ago. My dining partner sort of likes it, and I can imagine my father felt the same way. So her “Good – I like it” is a sort of rebellion. (I had no idea she ever tried a polenta dish.) She liked the deep fried Corn Fritters, but thought the Chili Con Carne only “fair”.
Now we get to desserts. Looks like she tried the Chocolate Roll with Mocha Filling. Not enough filling, she wrote, and suggested to double the recipe. She thought the French Apple Cobbler “delicious!”.

In the Eggs, Omelets and Souffles chapter, she tried the Scrambled Eggs a la Suisse and thought them “pretty good – but not great”. This is a brunch egg dish. I had another surprise when I found that she made and liked the cheese souffle. Just like pizza, I never remember her making souffles. Eggs Benedict get a “delicious”.

Pickled beets get a “delicious”, and Rolled, Stuffed Flank Steak gets a “delicious!” written in red and underlined. She made some changes in the Corned Beef and Cabbage recipe.

The Pies and Small Pastries chapter comes next. Why it is not with the “Dessert” chapter reminds me that this cookbook has an odd organization (I noted this when I covered my own copy). She tried the Fresh Apricot Pie and has notes on the number and size of apricots she used, plus a note that she cut them in quarters instead of slicing.

In Salads and Salad Dressings, she liked the Raw-Spinach Salad. In the Sandwich and Sandwich Filling chapter, she thought the Hot Crabmeat-Salad Sandwiches “just so-so”. In Sauces and Gravies, she marked “Mock Hollandaise Sauce” as “very good”. This sauce is used for Eggs Benedict in an earlier chapter. In Vegetables and Potatoes, Eggplant-and-Tomato Casserole is marked “very good” and “Paul likes”. She liked Amelia’s Potato Pancakes and Honey-Spice Acorn Squash. And in the Leftoverschapter, Pork Chop Suey is marked “Very good”, and she adds “Serve with dry Chinese noodles”.

This brings me to the end of the book, and all of the recipes she marked. I certainly enjoyed going through this cookbook of hers. Brought back lots of memories.

And now, what to make for this blog? I decide on the “Perfect Muffins” (a scan of the recipe is above). I make a lot of muffins, but don’t pay exact attention to the proportions of flour, sugar, liquid, and shortening. Perfect Muffins gives just that: correct proportions. You could use this recipe to make any flavor of muffin – though I doubt it will work when large amounts of wet fruits (like bananas or apples) or vegetables (like carrots or sweet potatoes) are added. But if you want to add dried blueberries, or maraschino cherries, or nuts or spices, or some other interesting ingredient that catches your eye, Perfect Muffins is a great start. I consider it part of my ever-growing knowledge of muffin making.

I choose the variation of Perfect Muffins that adds raisins and oranges. I made them just like the recipe, except I took Mother’s advice and used her altered baking temperature and time.

Perfect Muffins with Raisins and Orange
makes 11

  • 2 cups flour
  • 1/4 cup sugar
  • 1 tablespoon baking powder
  • 1/2 teaspoon salt
  • 1/2 cup raisins
  • 1 cup milk
  • 1/3 cup vegetable oil
  • 1 egg
  • 1 tablespoon grated orange peel

Stir together the flour, sugar, baking powder, salt, and raisins in a large bowl.

In another bowl, combine the milk, vegetable oil, egg, and orange peel; whisk to combine.

“Make a well” in center of flour mixure (I rarely “make a well”, but this is the way the traditional directions for combining wet and dry ingredients read). Pour in milk mixture all at once, stir quickly, just until the dry ingredients are moistened. Do not overmix! Batter will be lumpy.

Fill muffin cups just slightly more than half full.

Bake at 375˚ for 20 minutes, or until they test done with a toothpick.

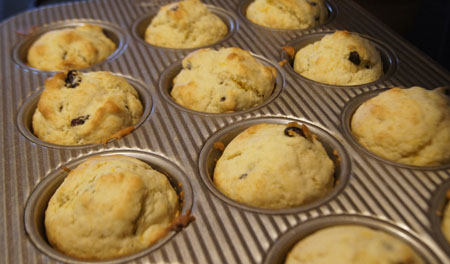
Basic Muffins with Raisins and OrangeThese muffins are cake-like, or cupcake-like. The muffins I make are usually packed with bananas or apples or carrots, or whole grains, so to us, they tasted “less-healthy-than-usual”. Although, after my first bite of one of these muffins, I just wanted . . .  more!
250 Cookbooks: Pastries and Desserts

Cookbook #219: Pastries and Desserts, California Home Economics Association, Press of Clyde Browne, Los Angeles, Cal., 1921.

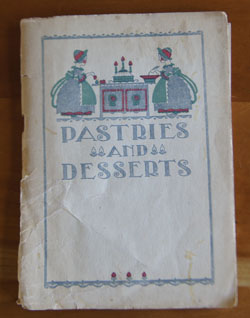
Pastries and Desserts cookbookThis might have belonged to my maternal grandmother. There is very little handwriting in it, but what there is looks like hers. Or it might have come from Ruth Vandenhoudt, since it is from the same cookbook series as Salads, Vegetables and the Market Basket. There are a few food and age stains, but it is actually in pretty good condition for being 96 years old! I have two copies, and one is missing the cover.
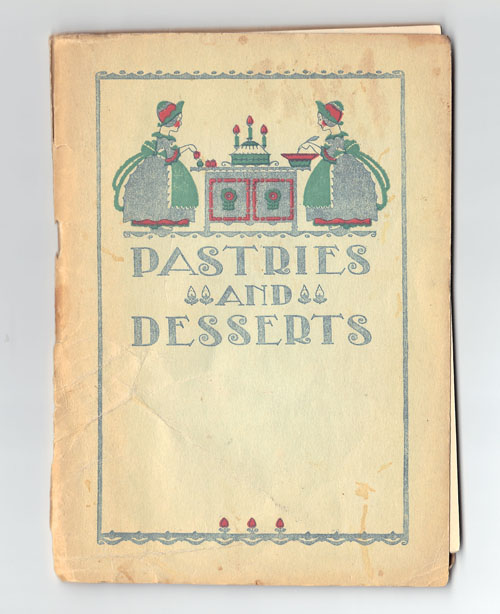
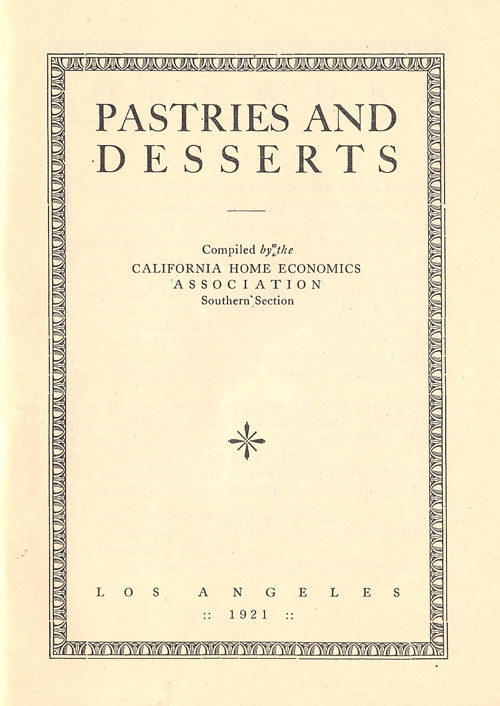
I like the design of the cover and the introductory pages. Here is a scan of the cover, since it gives more detail than my photo:

Pastries and Desserts

The title page:

PastDesstitlepage

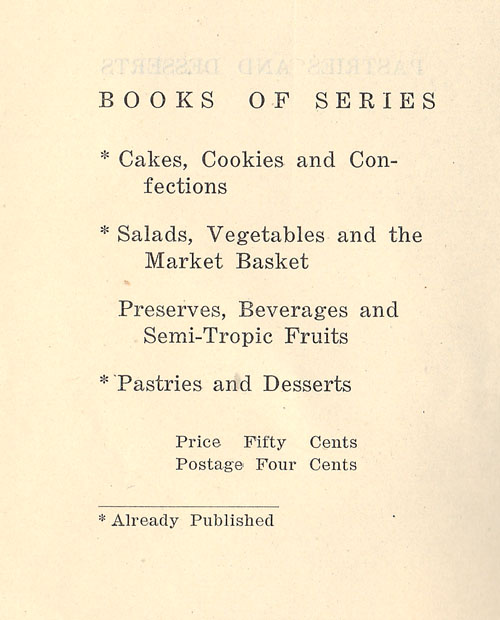
This page is opposite the title page (above) and lists books in the series. I like this: “Price: Fifty Cents. Postage: Four Cents.”

PastDessopptitlepageThe entire content has a pleasing typeface and layout, no typos, is well-organized with cross-references, and has a very useful index at the end. The content is by the California Home Economics Association, Southern Section, but who is responsible for the printing of this 1921 cookbook? I find “Press of Clyde Browne” and “Cover Design by Stanley Edwards” on the back cover:

pressofClydeBrownClyde Browne, was a self-identified printer, according to a 2014 article in KCETLink. From the KCETLink web site: “. . . Southern California bohemians, whose ideals and aesthetics were inspired by the Arts and Crafts movement, valuing craftsmanship, beauty, nature, and community. Settling along the Arroyo Seco, between Pasadena and Highland Park, these inhabitants created what Kevin Starr calls the ‘Arroyoan ideal: the spiritualization of daily life through an aestheticism tied to crafts and local materials,’ that is ‘expressed primarily through the home.'” Clyde Browne also has a Wikipedia entry.
Sounds like Clyde was a Bohemian, a beatnik, a hippie, a New Age person. Someone who would be right at home in Boulder, Colorado.

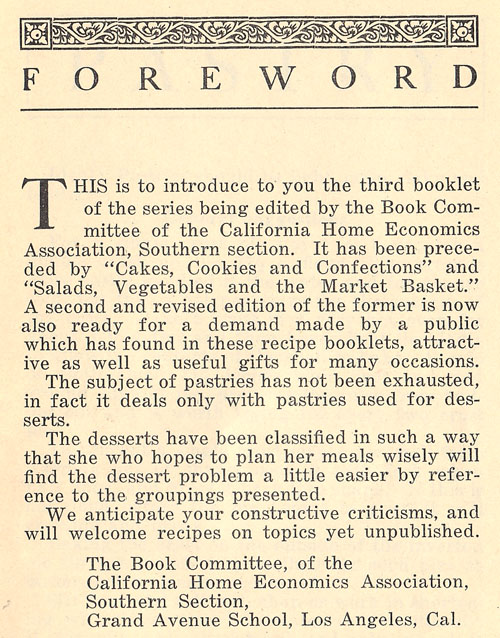
I continue paging through Pastries and Desserts. Here is the foreword:

PastriesDessertsforewordThis foreword tells us that the California Home Economics Association promoted these recipe booklets as “useful gifts for many occasions”. Furthermore, it tells us about the role of women in society in the early twentieth century: “The desserts have been classified in such a way that she who hopes to plan her meals wisely will find the dessert problem a little easier”. (Dessert problem, right.)

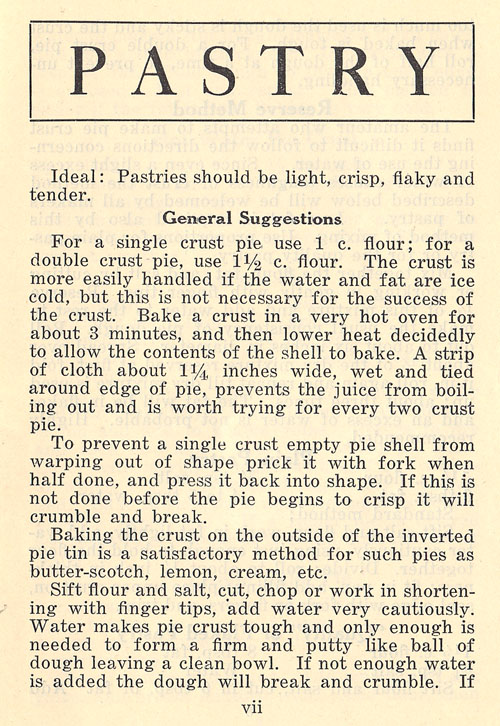
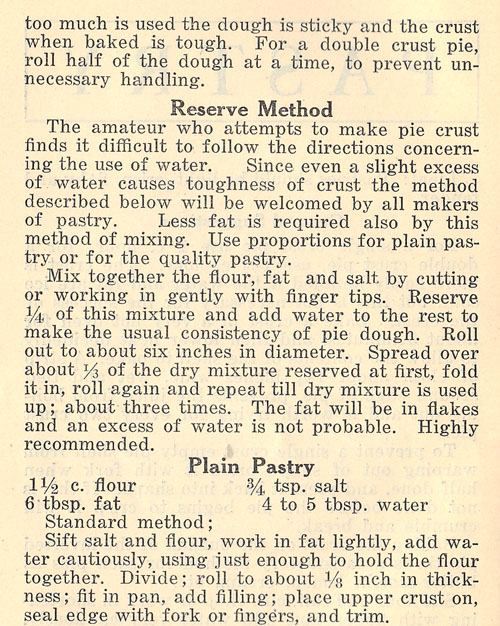
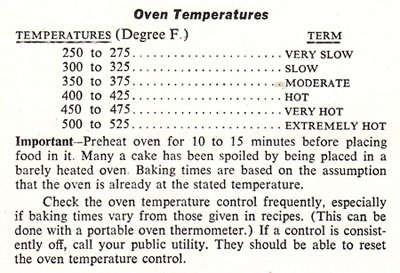
The first recipe in the booklet is for pie crust, below. These directions represent the style of writing throughout the booklet. I’ll let you read it and judge for yourself. (This is from the era before mixers, food processors, or even pastry cutters.) Note the directions for oven temperatures: “bake in a very hot oven for about 3 minutes, and then lower the heat decidedly”. Here is how to intrepret older oven temperature descriptions to degrees Fahrenheit.

pastrypastryNote that besides the instruction “hot oven for 3 minutes”, no time is given for baking the crust. This is true throughout this 1921 cookbook. The baking recipes just say “cook until done”. Some of the recipes for steamed puddings have a designated cooking time, but the desserts cooked on the stove top do not.
Pie recipes include: lemon chiffon, berry, southern tomato, rhubarb, raisin, custard, mock mincemeat, cottage cheese, banana cream, and more. Tarts can be adapted from any of the pie recipes.

Puddings are thickened with cornstarch, tapioca, and flour. Cereal desserts are made from rice, cornmeal, bread and cracker crumbs. There are custards, fruits (raw and stewed and baked), and rose apples using red clove candies. Fruits include cranberries, oranges, apples, bananas, berries, grapes, figs, melons, pineapple, peaches, prunes. Gelatine desserts are based on plain gelatin (not jello). Baked puddings include dumplings, cobblers, and roly poly. Steamed puddings include carrot, cherry cup, chocolate, fruit, gingerbread, Hazzard Delicious (butter, sugar, nuts, flour, baking powder, milk, eggs), persimmon, plum, and suet. There are rosettes, timbales and fritters. Frozen desserts include fruit ices: ice cream from milk, cream, sugar and eggs, simply frozen, not churned, with variations including chocolate, orange, pinneapple, caramel, coffee, fig, tutti frutti, grape nut, maple, peppermint, and ginger. Mousses (a standard recipe with suggestions for flavoring) and parfaits (frozen desserts made with eggs, syrup) are included. The last section is sauces for puddings (cooked without eggs, cooked with eggs, uncooked with eggs), and sauces for ice cream.

Very few recipes in this booklet include chocolate!

I decide to make Tapioca Cream for this blog. Our grandson will join us for dinner and I think this is a fairly nutritous dessert because it includes milk and eggs, is relatively low in sugar, and has no added fat.

Tapioca is a starch made from cassava root. In the US, it is mainly used as a thickener, but in triopical areas of Africa and Asia, cassava is a staple food. Cassava is low in nutrition: it has no protein or fiber, is low in calories (important in areas of the world where food energy is a plus), and has insignificant amounts of viatmins and minerals. In the US, tapioca is sold as “minute tapioca” (and has been sold that way since at least 1921). I’ve also tried pearl tapioca – big round lumps of tapioca.

Here is the Tapioca Cream recipe from page 26:

Tapioca Cream recipe

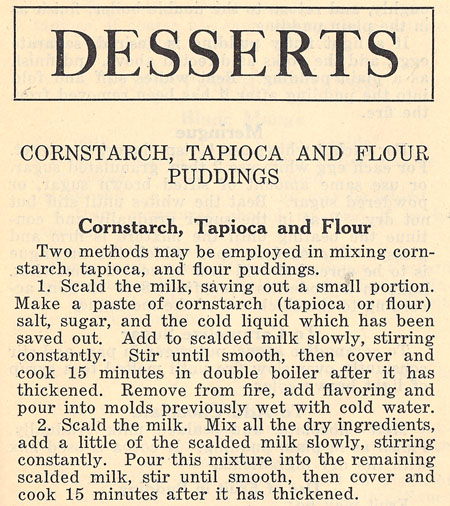
As you see, the mixing and cooking instructions are not given in the Tapioca Cream recipe. It says: “mix same as for cornstarch pudding”. Those instructions are six pages previous – page 19:

tapioca pudding instructions

I learned that you do not have to scald milk from my book Kitchen Science. Therefore, I will simply mix together the tapioca, sugar, salt, and milk. Shall I use a double boilier to heat this mixture? I suspect that in 1921, you needed to cook in a double boiler to control the stove top temperature – note that the recipe says “remove from fire”. “Fire” sounds harder to control than today’s stove top burners! So I won’t use that step, but simply cook it in a saucepan on the stove top. Also, I will beat the egg whites with 3 tablespoons sugar, according to the instructions on my current package of minute tapioca. The modern recipe calls for 2 tablespoons less sugar and leaves out the nuts.

Tapioca Cream Pudding
serves 3-6

  • 1/4 cup minute tapioca
  • 6 tablespoons sugar, divided
  • dash of salt
  • 2 cups milk
  • 1 egg yolk
  • 1 egg white
  • 1 teaspoon vanilla

Combine the tapioca, sugar, and salt in a cool pan, then add the milk and egg yolk. Let stand 5 minutes.

Heat the mixture to a full boil on medium heat, stirring constantly, then remove from heat. Let stand 20 minutes to cool.

Beat the egg white on high speed until soft peaks form. Gradually beat in 3 tablespoons sugar until stiff peaks form.

Fold the egg white mixture into the tapioca-milk mixture. Fold in the vanilla.

You can divide the pudding into single servings or not; you can serve warm or chilled.

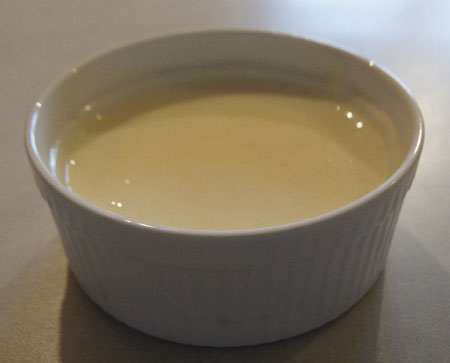
tapioca puddingI made only three custard cups, and it served three people! It was so good – I hadn’t made it in years and it’s a comfort food to me. I put some sliced strawberries on top and served it with cookies. My grandson liked to dip those cookies in the pudding!
Note: I used 3 tablespoons tapioca, as it stated on the package. But I would have liked it a little thicker, so I’d suggest the 4 tablespoons tapioca as written in Pastries and Desserts.

oven temperatures

Aside

Many older cookbooks refer to oven temperatures as very slow, slow, moderte, hot, very hot, and extremely hot. In my Encyclopedia of Cooking, Volume 11, I found this handy table that translates these terms into degrees fahrenheit.

oven temperatures

250 Cookbooks: Encyclopedia of Cookery, Volume 11

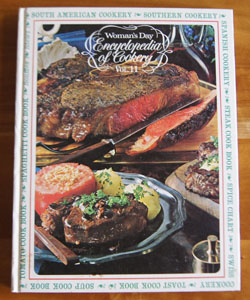
Cookbook #218: Encyclopedia of Cookery, Vol. 11, Sou-Ton, Woman’s Day, Fawcett Publications, NY, 1966.

Encyclopedia of Cookery Vol. 11

I have a set of twelve Encyclopedia of Cookery volumes and this is the eleventh of that set – I covered the first ten in previous posts. This volume covers curious and helpful information about foods from (sou)fles to (ton)gue.

Souffles. We do like my Cheese Souffle, and I always follow the recipe in my Joy of Cooking. I usually add ham to it too. I have been making this souffle for decades. The trick is to have everyone ready to eat as soon as it comes out of the oven – because souffles always fall quickly. And this fact is reiterated in the Encyclopedia of Cookery:

“When the cooked souffle is taken from the oven, it should be taken to the table and served at once. It is a rule of the kitchen that a souffle should be served immediately. If there is any waiting to be done, let it be by the guests.”

I love that: “a rule of the kitchen”! This volume of the Encyclopedia of Cookery has a lenghty and good explanation of how to make a basic entree souffle, suggesting many variations. And, it includes a recipe for Liqueur Souffle with suggested variations.

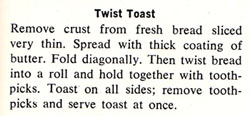
The Soup Cookbook is 8 big pages long. The last entry is a soup garnish called “Twist Toast”.
Twish ToastSour Cream in its simplest form is “unpasteurized heavy sweet cream that has been allowed to stand in a warm place until it has become sour”. Commercial sour cream is made from “sweet cream chemically treated with lactic-acid bacteria to produce a thick cream with a mild tangy flavor”. The South American Cook Book begins with an interesting essay by Jean Gormaz on the widely varied cooking of this continent of many climates. Vatapa, a fish stew from Brazil, illustrates the variety of ingredients in South American cookery.
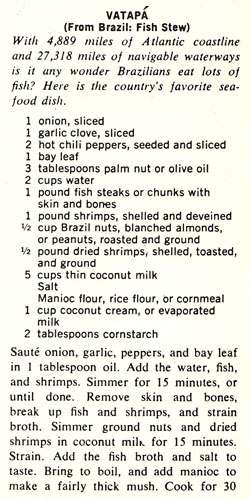
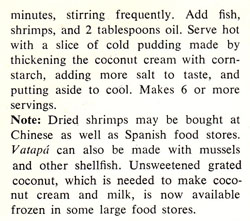
VatapaVatapaCook books called Southeast Asian Cookery, Southern Cookery, and Southwest Cookery follow each other with no short entries between. (This volume of the Encyclopedia of Cookery sure has a lot of cook books in it.) The Southwestern cook book  includes few dishes familiar to me, except chili sauce, tacos, and sopapillas. Carne Adobada is an example of a recipe I have never heard of before, and it takes days to make.
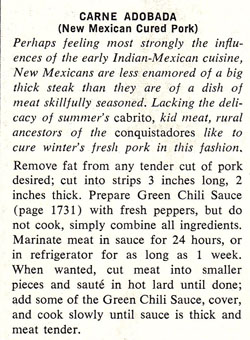
Carne Adobada

Finally, I come to a short, non-cookbook entry: Soybeans. “The soybean is one of the world’s oldest plants. It has been cultivated in China for over 4,000 years.” “Bean curds” are mentioned, but are not called tofu. Most of the recipes in this section include soy sauce as the “soybean” ingredient.

Spaghetti, Spanish Cookery, spare rib, spearmint, spice. The spice section is rather short, recipe-wise. It has a two-page illustrated chart, but only includes 12 spices. “Spices – Nature’s Flavor Magic” is an essay on the importance of spices in history.

A sprat is a small herring, often sold canned or smoked. A squab is a young pigeon that is not allowed to fly before it is eaten. Squirrels are found in the US and “occasionally eaten as food, particularly in some rural sections. The flesh of sqirrel is light red or pink in color and has a pleasing flavor.”

The section on steaks includes a charcoal broiled cookbook. It’s writtten by Philip S. Brown, and I like it. He comments in the first person throughout the recipes. I’d like to try his “Teriyaki”, made from marinated round steak strips woven back and forth on skewers and grilled.

Sterilize, stew, stir (entered as “stir, to”), stock. Stollen is a sweet, fruit-filled yeast bread baked in the form of a folded-over roll. That sounds like a recipe up my alley.

Strawberries are native to both the old and new world. The Encyclopedia of Cookery claims wild strawberries are the best – I’ve never had a wild strawberry! I have had small-farm grown fresh cultivated strawberries, though. I grew up in Southern California, where strawberry fields were abundant. Strawberry shortcake was an oft-made dessert at our home.

Strudel, stuffing, sturgeon, sucker (a fish), suet (hard fat from around the kidneys), sugar, sundae. A cookbook on Swedish Cookery. Sweetbread is “The thymus glands of lamb, veal, or young beef (under 1 year; the thymus disappears in mature beef). Sweetbreads consist of two parts: the heart sweetbread and the throat sweetbread.” According to the entry, sweetbreads are widely available year round fresh and frozen. I’ve never seen them in stores. Then again, I’ve never looked.

Sweet potatoes are the root of a perennial vine of the morning glory family. Sweet potatoes are not yams – yams are a completely different botanical species. Sweet potatoes are native to America. Many recipes are in the Sweet Potato Cook Book. Sweetsop refers to both a small tropical American tree and its sweet pulpy fruit, also called the sugar apple. Swiss Cookery is a collection of recipes authored by James A. Beard.

Syrup is a sweet, thick, sticky liiquid. It is made from a concentrated solution of sugar and water, and can be flavored with chocolate or the juice of a plant, for example, corn syrup, or from the concentrated juice of plants like sugar cane or maple trees. (It does not mention 100% maple syrup.) The taffy entry has a recipe for homemade taffy.

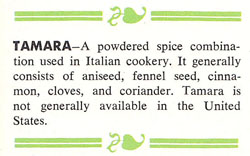
This entry is for my daughter:

tamara

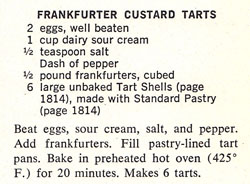
A tangelo is a hybrid of the tangerine and garpefruit. Tangerines are named after Tangiers, but originated in China. Tapioca is made by heating the starch of the manioc tuber. I find that manioc is also known as cassava and yuca. Tarts are filled pastries, often sweet, but also savory. Here is a recipe for Frankfurter custard tarts.

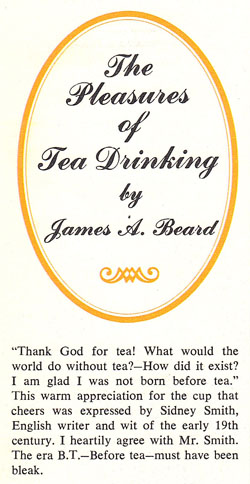
Frankfurter Custard TartsI would never make these, they do not sound tasty to me. And “taste” is an entry: “one of the senses of man”. Tea is honored with an essay by James Beard on “the pleasures of tea drinking”, and I like his era “B. T.” – before tea:
teaTetrazzini is a dish I discussed in All-Time Favorite Casserole Recipes. Thanksgiving includes an essay and many traditional recipes.

Toast again! Toast was really popular in the 1960s. The “Toast Cook Book” is 5 pages long. A tomato is a fruit native to South America, and the Tomato Cookbook gives lots of recipes for its use.

Tongue is the last entry. It is a “nourishing and appetizing food, good hot or cold”. I don’t think I’ve ever cooked or eaten it. But according to the Encyclopedia of Cookery, it is an “old favorite”. “Tongue Twisters” is a collection of recipes by Iris Brooks: “No, nothing to do with P. Piper and his produce, but new twists on that old favorite, tongue. Have it pickled or corned, smoked or fresh; canned or in jars, plain or in vinegar; beef, calf, pork, or lamb; but by all means, have it. Whether hot or cold, whole on the platter or in even pink slices, tongue is always a delight to the eye and a joy to the palate.”

Well. On that note, I end volume 11 of the Encyclopedia of Cookery.

Now, what to make for this blog? I decide on “Strawberry Shortcake”.

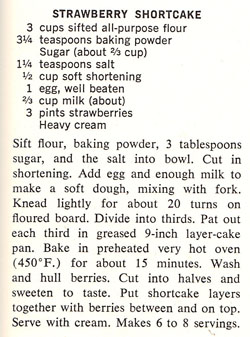
Strawberry Shortcake recipeWhy did I choose this recipe? I have been making strawberry shortcake for years. But I have always started with my mother’s basic biscuit recipe, and just added “a bit” of sugar. This is an actual “shortcake” recipe. Plus, I like the way the dough is rolled out into a big circle and baked in a cake pan. Saves a step in cutting out the biscuits. And finally, I had some strawberries in the refrigerator looking to be used!
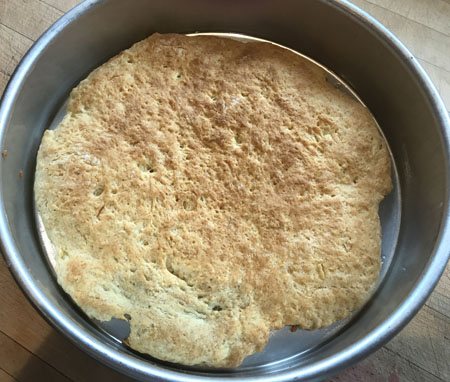
I made a one-third recipe for the two of us and had enough for dessert for two nights.

Strawberry Shortcake
serves 4

  • 1 cup flour
  • 1 teaspoon baking powder
  • 1/2 teaspoon salt
  • 1 tablespoon sugar
  • 1/6 cup vegetable shortening (2 2/3 tablespoons or 32 grams)
  • 1/2 egg (whisk one egg, put in a measuring cup, and use half)
  • 1/4 cup milk, about
  • strawberries
  • whipped cream

Stir together the flour, baking powder, salt, and sugar. Cut in the shortening. Mix the half egg and milk, then add to the flour mixture slowly, mixing with a fork, just until it makes a soft dough.

On a floured board, knead the dough lightly for about 20 turns. Roll or press into a 9-inch circle. Place in a lightly greased 9-inch cake pan.

Bake at 450˚ for about 15 minutes, until golden brown.

shortbreadMeanwhile, slice the strawberries and add a tablespoon or so of sugar. Stir and allow to macerate until you serve the shortcake.
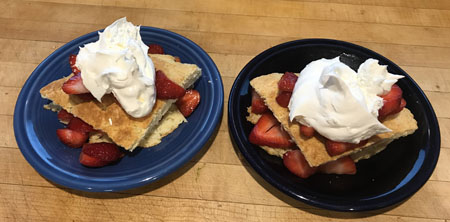
To serve, split the baked shortcake into two layers. For us two, I first cut the shortcake into two half circles, then quarter circles. I took two quarter circles and split each quarter into two layers.

Layer one shortbread, half the berries, another shortbread layer, the rest of the berries, and then put whipped cream (real or fake) on top.

Strawberry ShortcakeThis was excellent! I like the egg in the dough, and I like rolling it into one circle instead of biscuits. My dining partner said “yum, but not enough!” I take that as a thumbs up.
250 Cookbooks: Crockery Cookery

Cookbook #217: Crockery Cookery, Mable Hoffman, H. P. Books, Los Angeles, CA, 1975.

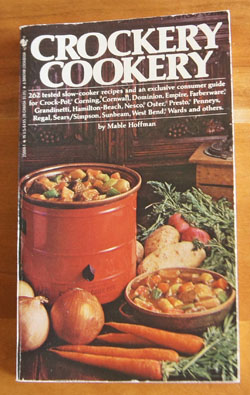
Crockery Cookery cookbookI just now realized: This paperback book has the same title and cover photo and publication date as my hardcover book Crockery Cookery. This paperback is from my own collection, while the hard back version was my mother’s. I didn’t mark or note any of the recipes in the paperback. The information on the use of different brands of crockpots is the same in both, but some of the recipes are different. And, the hardcover edition is better illustrated.
In all, I have eleven crockpot cookbooks in my database. See my first crockpot blog entry for a little on the history of crockpots.

Before I realized that this cookbook was a duplicate, I spent some time poring over the recipes. This time they struck me as “definitely severnties” in content. For better or worse! To me, seventies style foods can be both comfort foods and over-fatty over-packaged over-salted foods to avoid. Today I will take them as comfort foods. I choose to make “Hungarian Goulash”, with ketchup, Worcestershire sauce, brown sugar, mustard, paprika, and garlic and onion.

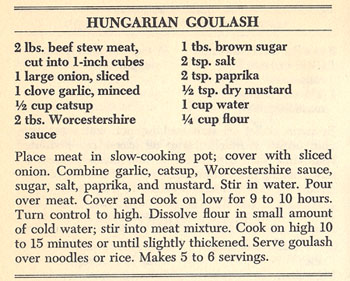
Hungarian Goulash recipeThe recipe calls for beef stew meat, but I have a quantity of pork loin in the freezer so I decide to use that instead of beef.
Hungarian Goulash
serves about 4

  • 2 pounds beef or pork stew meat (I used cut-up pork loin)
  • 1 large onion, sliced
  • 1 clove garlic, minced
  • 1/2 cup ketchup
  • 2 tablespoons Worcestershire sauce
  • 1 tablespoon brown sugar
  • 1 teaspoon salt
  • 2 teaspoons paprika
  • 1/2 teaspoon dry mustard
  • 1 cup water
  • 1/4 cup flour mixed into a small amount of water

Put the meat in a crockpot and then add the onion. In a bowl or measuring cup, combine the garlic, ketchup, Worcestershire sauce, sugar, salt, paprika, mustard, and 1 cup water. Stir to combine,then pour over the meat/onion mix in the crockpot.

Cover and cook on low from 9-10 hours, or on high for 4-5 hours, until the meat is very tender. Taste and add salt and pepper to your taste. Then, with the crockpot on high, add the 1/4 cup flour mixed with a small amount of water. Stir in, then cover and cook on high for 15 minutes, until the sauce is thickened.

Serve over noodles or rice.

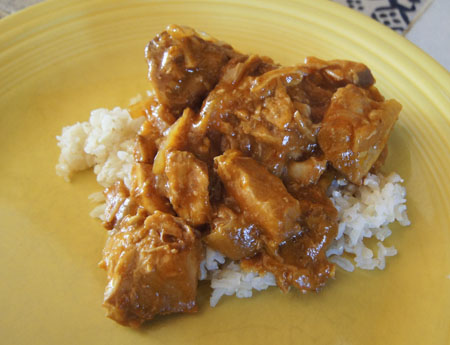
Hungarian GoulashThis was very good. I’d make it again!

I am going to recycle this paperback, though. The hardcover version is more pleasant to use, largely because of the color photographs.

250 Cookbooks: Handbook of the Nutritional Contents of Foods

Cookbook #216: Handbook of the Nutritional Contents of Foods, prepared by Bernice K. Watt and Annabel L. Merrill for the United States Department of Agriculture, Dover Publications, Inc., NY, 1975.

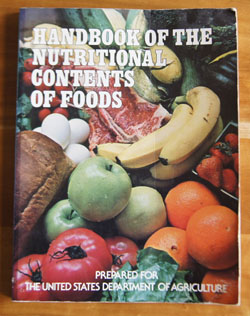
Handbook of the Nutritional Contents of FoodI bought the Handbook of the Nutritional Contents of Foods for myself new or used, I think sometime in the eighties. Around that time, I was developing a basic “eating plan” for myself, or maybe I should say “dieting plan”. You see, for years, I would diet strictly for months, eat sensibly for a short time, overindulge for weeks, then repeat the cycle. I drew up my first plan based on a diet given to me in the early seventies, before I left California. Later, The Calculating Cook influenced my diet plan, as well as The Glucose Revolution Pocket Guide to Losing Weight. Those books taught me how to judge food choices as good sources of protein and good or bad carbohydrates. Handbook of the Nutritional Contents of Foods gets down to the dark and dirty of the calories and nutrients in thousands of foods.
I went through a period of counting calories. And I don’t mean simply “counting calories”. I wrote down exactly what I ate each day and calculated the number of calories in each portion of food. At first, I measured portions with measuring cups; later I used a kitchen scale. When I discovered computer databases in the late eighties, I went crazy. I kept computer records of everything I ate, calculated the numbers of calories per day, and correlated it with my weight. I even graphed results. And, I rarely ate out when in a strict dieting phase because it could add an unknown number of calories.

This continued for a long time and the Handbook of the Nutritional Contents of Foods was my ultimate resource for years. This is a very serious, scientific type book that appeals to my scientific nature. More than just calories, I studied my diet to make sure I was getting enough of the nutrients considered essential. I found a page tucked into this book where I listed vitamins and good sources of each.

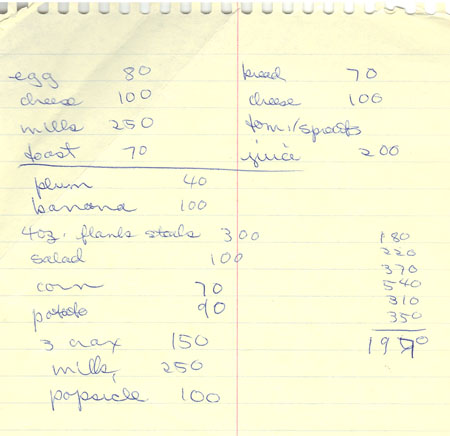
Here is another sheet of paper I found tucked into this book. It’s a calculation for the total calories I ate one day (and I found a mistake in my calculations):

calorie calculationOne thing I recall about looking up calories in this book is that it was difficult to find the calories in meats. I think maybe it was because I didn’t have a kitchen scale at the time, and would have to estimate the calories from the meat package label, using the amount sold (raw) and estimating the size of the portion I cut for myself.
Am I counting calories today? No! Life and food are too much fun, and I want to enjoy both. But, I do know to limit portions and usually do so.

Other books I own and have used to develop a sensible eating plan:

Handbook of the Nutritional Contents of Foods is available on Amazon as a used book: apparently it was never updated. Full text is available on Google books (the cover of the online book is a little different from the cover on my copy.)

The book contents

Handbook of the Nutritional Contents of Foods is a large book (8 3/4 x 12 inches) of 190 pages. It is almost only tables, as described below.

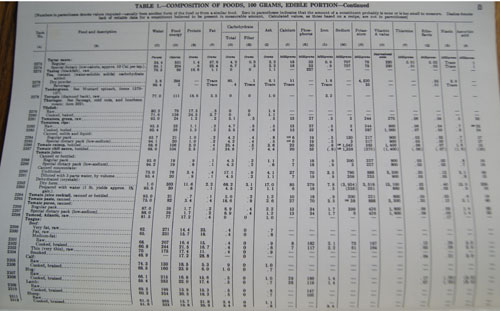
Table 1: Composition of Foods, 100 Grams, Edible Portion. This table gives values for: water content, food energy (calories), protein, fat, carbohydrate, ash, calcium, phosphus, iron, sodium, potassium, Vitamin A, thiamine (vitamin B1), riboflavin (vitamin B2), niacin (vitamin B3), and ascorbic acid (Vitamin C). For many foods, such as meats, values are given for both cooked and uncooked portions. Here’s a photo of a sample page, just to show you how it’s formatted. It’s hard to follow the values for a specific food without a ruler as a guide. Here is a photo of a sample page:

table page

Table 2: Nutrients in the Edible Portion of 1 pound of Food as Purchased. This table gives the same values as Table 1, but for packaged foods rather than standalone foods. This table is not very useful today, because offered backaged foods have changed in the last 41 years, and because we now have nutrient content labels on most packaged foods. This excerpt my own post on Calories and Carbohydrates discusses the introduction of nutrient labels:

“Food products were sold without a nutrition content label. Thus this book once provided a great service. Beginning May 8, 1994, food companies were required by law to begin using nutrient content labels on packaged foods, a label mandated for most food products under the provisions of the 1990 Nutrition Labeling and Education Act (NLEA), per the recommendations of the U.S. Food and Drug Administration.”

Table 3: Selected Fatty Acids in Foods. Useful if you are carefully watching your saturated and unsaturated fatty acid intake. Cooking olis are listed, but the focus is on the food product, be it a fish, meat, dairy product, vegetable, fruit, or bread product.

Table 4: Cholesterol Content of Foods. One page only.

Table 5: Magnesium Content of Food. Ten pages.

The final pages are notes, small tables of miscellaneous values, explanations of where the values for the book were found, and a bibliography.

Will I keep this book? Yes, but mostly for curiousity. The book is over forty years old, after all. And of course, the values are so, so much easier to look up online. I have a few favorite go-to sites for food values, but basically, all you have to do is type the name of a food into a search engine and the food value will pop up.

And what shall I cook for this blog?

There are no recipes in this book. But my last post, PastaMatic MX700, sparked my interest in buckwheat. I had always thought “buckwheat” to be related to “wheat”, but instead it is in the rhubarb family. It is a gluten free grain. I look up the entry in Handbook of the Nutritional Contents of Foods:

Buckwheat flour, dark: 333 cal, 11.7 protein, 2.5 g fat, 72.0 carbs1.6 fiber, ash 1.8, 33 mg calcium 347 phpsphorus, 2.8 iron, no sodium, 0 potassium, 0 A, .58 thiamine .15 riboflavin, 4.4 niacin, no vit c

As a comparison, I look up the values for all purpose white flour: 364 cal, 10.5 protein, 1.0 g fat, 76.1 g carbohydrate, .43 g ash, 16 calcium, 87 phosphorus, .8 iron, 2 sodium, 95 potassium, 0 A, .06 thiamine, .05 riboflavin, .9 niacin, 0 vitamin C.

The only noticeable difference is potassium. But a big difference between white flour and buckwheat flour is the glycemic index. Buckwheat’s GI value is 47, whole wheat flour is 51, and white flour is 66. Any value less than 55 is considered “low glycemic index”. (I found these values from a Google search engine search.) Also, buckwheat flour is gluten free. (Note: in general, when you eat the full grain, such as “groats”, the glycemic index is lower than the value for the flour from the same grain.)

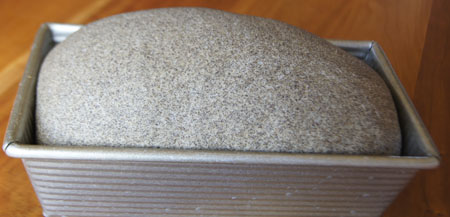
I made My Daily Bread, using 1 cup buckwheat flour, and making to 12 ounces with gluten flour and all-purpose unbleached flour. The buckwheat flour gave a lovely blue-purple-tinged to the loaf. It rose nicely:

risen buckwheat breadAnd it baked into a beautiful loaf. Here is a slice, showing the blue hue and the great texture:
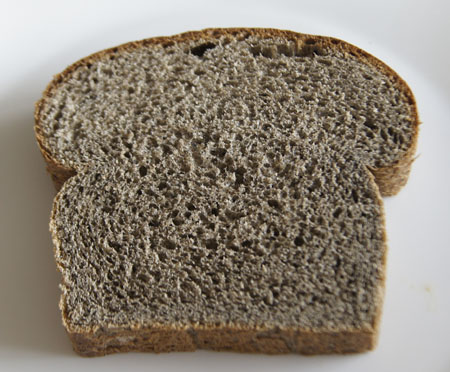
slice of buckwheat breadI sniffed the loaf like I always do. Pee-yoo, it stinks! Something about the smell really turns me away. I ate a big bite and it tasted like it smelled. Yuck.
I was able to eat a slice with a lot of Whole Foods peanut butter and my own homemade Colorado apricot jam. It was very filling and left me with no lingering stinky after effects. But buckwheat is not for me.

250 Cookbooks: PastaMatic MX700

Cookbook #215: PastaMatic MX700, Simac, distributed by Lello Appliances Corp., NJ, circa 1998.

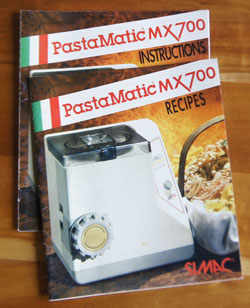
Pasta Matic MX700 cookbookMy Simac Pastamaker MX700 was a gift from my husband in 1998. I had been making my own pasta for  years, using a Kitchenaid mixer to mix the dough, and a manual Marcato pasta maker to roll the dough and form the noodles (see my post, the Pasta Cookbook). The Simac Pastamaker takes home pasta making to a whole new level. The dough is mixed right in the machine, then extruded through die sets into many different shapes: linguine, macaroni, capellini, small fettuccine, spaghetti, lasagne, and bucato.
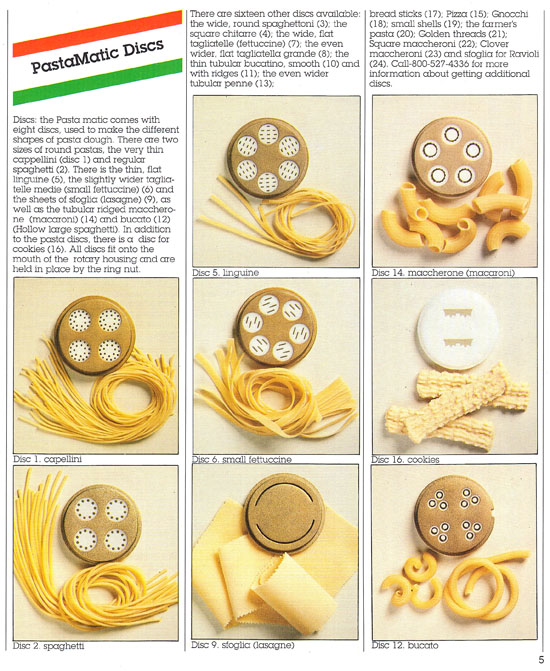
Simac discsIt’s a lot of fun! And time-consuming, yes. A decade or so ago I stored the Pastamaker down in the basement to make room for other things on my countertop. I don’t think I’ve used it since then. Now I have a great excuse to pull it back up, clean it, and make some great pasta. (I love retirement!)
The receipt for my PastaMaker says it cost $235, new, in 1998. Are they still for sale? Yes, but I am not sure the Simac is available new. Amazon lists the PastaMatic, but none are available right now, so I can’t tell if they are new or not. A used one is for sale on eBay for $106. Google lists them from $12 to $520. Chef Masterpiece has one for sale for $519.98 – sounds like it’s new, but it doesn’t say.

My guess is that a machine offered by Lello, the company that distributed the PastaMatic MX700 that I have, is the replacement for the Simac. This is the “Lello 2730 3000 Pro Pastamaster Pasta Maker”. It sells for $235 new (same price as mine 19 years ago!). Fabulous Pasta reviews this model. There is some competition for the Lello from extruding pasta makers by Phillips, Gourmia, Ronco, and Viante.

During my web searches, I found two useful sites.  On Pasta Recipes Made Easy, the author found a used Simac Pastamaker for $10 at a thrift shop (circa 2010). She gave the machine a favorable review, plus a link in case I ever lose my instruction booklet. On Toque Tips, I find instructions for using the Simac Pastamaker and a good article on making tomato sauce from fresh tomatoes.

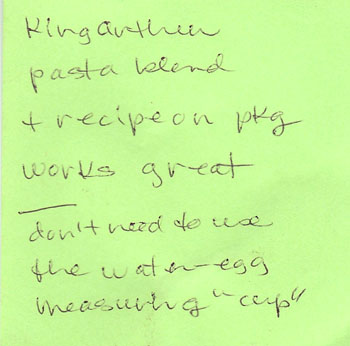
My PastaMatic MX700 cookbook is actually three separate pamphlets. One is recipes, one is instructions, and one is an instruction card. I have a nice note to myself on the front of the instructions:

pasta noteMy note tells me that I used King Arthur Flour “pasta blend” the last time I made make the dough in the Simac. The reference to the water-egg measuring “cup” means that I used the package instructions for measuring the proper ratio of flour to egg-plus-water. The “cup” was  shipped with Simac; it’s a specialized plastic measuring cup with levels marked for water and egg. BUT: these markings do not correlate with ounces, milliliters, or even cups. I never wrote down the exact capacity of that “measuring cup”. Each time I wanted to make pasta in the Simac, I had to locate this single-purpose utensil. I’m glad I wrote that note to myself! – now I know the proper ratio of wet to dry ingredients and can use a regular standard measuring cup.
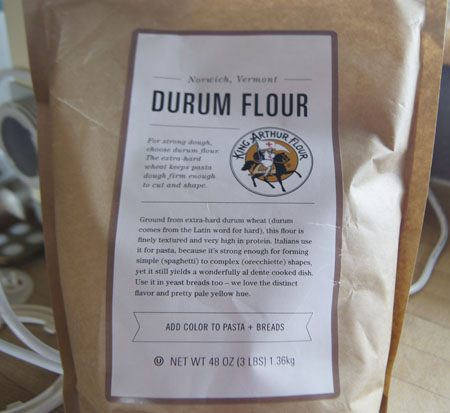
In my post Beard on Pasta , I used King Arthur Pasta Flour Blend to make my main-dish pasta (using my manual machine). Pasta Flour Blend is “a blend of golden semolina, durum flour, and King Arthur Unbleached All-Purpose Flour”.

Semolina is a durum wheat, but it is coarsely ground and not the best for pasta because it does not make a pasty dough. That’s why it is blended with other flours in recipes and in the Pastry Flour Blend. Myown  old-time basic pasta dough recipe is 3/4 unbleached flour and 1/4 semolina.

The recipes portion of PastaMatic MX700 includes:

  • egg pasta (eggs, water, bleached all-purpose flour)
  • water pasta (water, bleached all-purpose flour)
  • semolina pasta (eggs, water, 2 cups semolina flour, 1 1/4 cup bleached all-purpose flour)
  • spinach pasta (cooked spinach, eggs, bleached all-purpose flour)
  • watercress pasta (watercress instead of spinach)
  • tomato pasta (tomato paste, water, bleached all-purpose flour)
  • whole wheat pasta (water, whole wheat flour, bleached all-purpose flour)
  • egg white pasta (egg whites, bleached all-purpose flour)
  • egg yolk pasta (egg yolks, all-purpose flour)
  • buckwheat pasta (water, yeast, 1/4 pound buckwheat flour, 3/4 pound bleached all-purpose flour)
  • soba (water, eggs, salt, 2/3 pound buckwheat flour, 1/3 pound bleached all-purpose flour)

I’ve run across “buckwheat flour” in several of my previous posts on health food or vegetarian cookbooks. But until I looked it up, I never knew that buckwheat is not wheat at all. Wheat is a grass, and buckwheat is not a grass, instead, it is related to sorrel and rhubarb. It is high in nutrients and grinds to a coarse flour.

The above recipes for pasta specify “bleached all-purpose flour”. I thought this odd, until I learned that bleaching flour causes it to dry out faster, giving a more consistent water content from bag to bag. Simac wants the consumer to have the easiest time with their recipes, and this takes precidence over the healthy aspects of unbleached flour. Me, I am used to dealing with variations in the water content of flours, and I will stick with my unbleached all-purpose flour.

Which type of flour should I choose to make pasta for this blog? I decide to try durum wheat, so I ordered some from King Arthur Flour. I open the package to find a beautiful slightly yellow fine flour. I will use only this type of flour in my pasta.

Durum flour packageI carry the Pastamaker upstairs and find the dies (hidden in a pottery jar upstairs). Some of the dies are crusted with dried dough. Oh, I remember, it’s hard to get the dough out of the tiny slits and holes. Sometimes they clog during use, or the dough doesn’t feed properly through them. Hmmm. I better set aside an afternoon for my re-experiment with my Pastamaker.
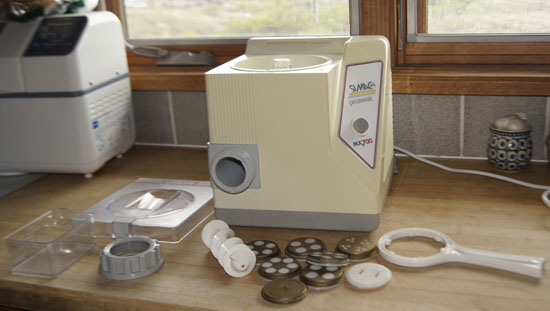
Simac PastamakerI decide to make macaroni, because I can make spaghetti and flat noodles any old time in my Marcato.
Note: Pasta made in the Simac Pastamaker is meant to be cooked right after it is formed, it directs me to do this right in the recipe booklet. When I make flat noodles or spaghetti using the manual Atlas pasta maker, I usually cook it, too, right away, but many (most?) people dry pasta before cooking.

I followed the recipe on the Pasta Magic KA Flour bag, substituting durum flour for the pasta magic mixture. This recipe has 4 eggs per 3 cups of flour; my old stand-by recipe has 2 eggs per 2 cups of flour.

Durum Pasta

  • 3 cups durum flour (16.4 ounces)
  • 4 eggs (I used jumbo yolk eggs and a couple had double yolks, this might have been too much egg)
  • 2-4 tablespoons flour
  • electric, extruding past machine
  • have ready a pot of boiling water

I debated whether or not to add salt or olive oil to the dough mixture. This time, I left both out.

Follow the manufacturer’s instructions for your pasta machine.

Put the flour in the bowl of the pasta machine and start the motor. Add the eggs slowly, then mix for 3 minutes. Simac says to check the dough at this point. You want the consistency to be walnut-sized lumps, but not sticky. The dough is too dry if it feels floury and is in small granules. The dough is too wet if it feels sticky in large smooth balls. Correct if necessary by adding up to a teaspoon of water or 3 tablespoons of flour. Let knead another 3 minutes, for a total of 6 minutes. (In another part of the Simac instructions, it says to knead for 8-10 minutes for any recipe.)

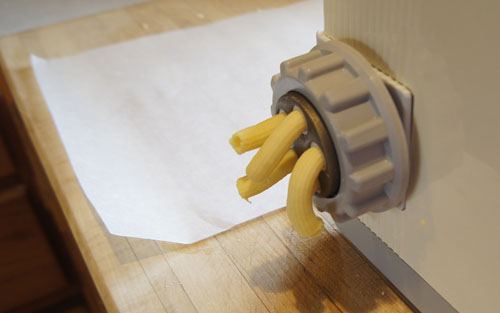
Switch your pasta machine to extrude. (At this point, I attach the wetted macaroni die.) As the pasta comes out of the die, use a sharp knife to cut it into your desired lengths.

extruding macaroniBoil for 30 seconds and check for al dente; boil another 30 seconds if necessary. In Colorado, though, I cooked my macaroni for 3-4 minutes and it was perfect.
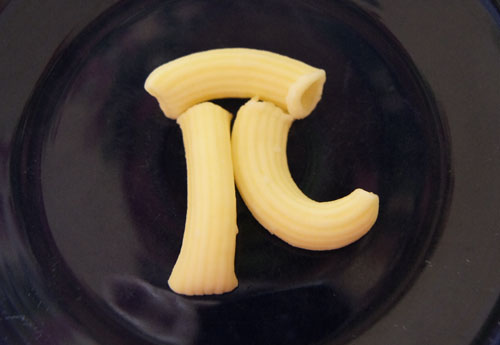
Okay, so now my report on how this actually worked for me today. First, my dough never formed walnut sized lumps. I carefully checked it, and it was neither grainy nor sticky, but it only formed large masses of dough. Thinking it too wet, I added more flour, to no avail. I added more water, to no avail. I was reluctant to keep the noisy machine running, plus it was hard to do so because a part on the lid of my pastmaker is broken, and I had to rubber-band it down to keep the dough lumps from opening the lid and turning the switch off.

This is nothing new, my memory tells me – this is what happens every time I have made pasta in the Simac. Now I remember why this machine is usually in the basement!

After 6-8 minutes, I decided to go ahead and extrude the dough. There is a small square hole in the bottom of the bowl that, when open, allows the dough to fall into the auger that feeds it up to and through the die. Well, I have to keep pushing the dough with the handle of a wooden spoon to get it into the hole, otherwise the mass of dough just passes over it, instead of dropping to the auger.

So I work, for probably half an hour, to get all the dough through the extruder. This means pressing down on the lid to make the motor run and extrude, then stopping it, taking off the lid and forcing a small chunk of dough into the hole, then restarting the machine. It was noisy, it took a long time.

But, my pasta was perfect. I absolutely love the durum wheat macaroni. It is firm, it is pale yellow, it is chewy, it is tasty. It is perfect.

cooked macaroni

I was so involved in making this lovely durum macaroni that time just fell away. And by the time all the macaroni was extruded and cooked, I had a big mess on my hands – the pasta maker and counter top all covered with dough bits, the stove wet with pasta cooking liquid runover. And I still had to pull the macaroni into a dinner dish, “Macaroni and Cheese with Wine”. This is a great recipe from my cookbook Pasta: macaroni, very sharp cheddar cheese, sweet white wine, butter, mustard, eggs, half-and-half, chopped green chiles, and bread crumbs (page 123). This dish needs to bake 40 minutes and then rest 10 minutes. I’ve gotta rush to get it done.

It wasn’t until the macaroni dish had finished cooking and I was serving our salads that I remembered I still had to heat up the big slice of ham that I had purchased for our main dish. And it wasn’t until after dinner that I remembered that I had not made a dessert!

Ah, but it was all worth it. My own homemade durum wheat in rich macaroni and cheese was a delight. Absolutely.

250 Cookbooks: Sunbeam Controlled Heat Automatic Frypan

Cookbook #213: Sunbeam Controlled Heat Automatic Frypan, Sunbeam Corporation, Chicago, Illinois,1953.

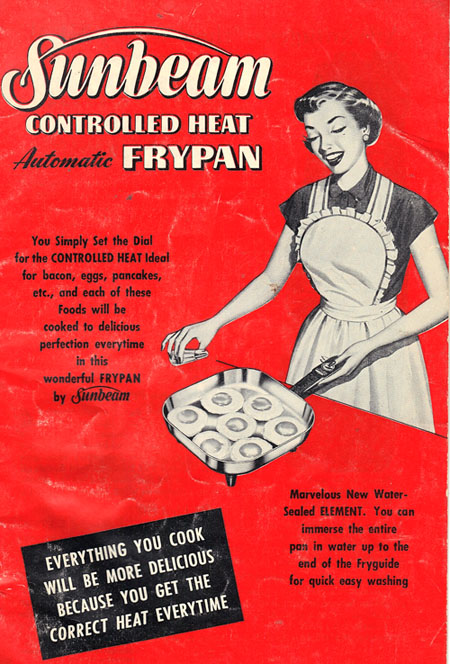
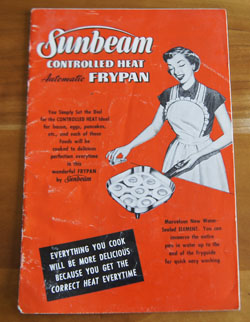
Sunbeam Controlled Heat Frypan cookbookI discussed electric fry pans in Hamilton Beach Automatic Heat Control Appliances, the recipe/instruction book for my fry pan. This booklet, Sunbeam Controlled Heat Automatic Frypan, was my mother’s. It must have come with her own fry pan – a Sunbeam model – in 1953. I wrote a note in my database: “I like the photo on the front”. Here is a close-up scan of the front cover:

Sunbeam Frypan

After 5 pages of instructions, there are about 12 pages of recipes. The first section is recipes for “Pan-broiling, Sauteing, Frying and Toasting Sandwiches”, including pan broiled steak, breaded steaks, meatballs, hash, lambburgers, salmon patties, omelet, fritters, corn fritters, potato patties, vegetables, and toasted (grilled) sandwiches.

The second section is recipes for using the fry pan with a lid. “Adjust dial to keep liquid just bubbling when light is on, a setting of about 200-240˚.” It includes recipes for pot roast, Swiss steak, stews, braised meat chops, veal rolls, chop suey, sukiyaki, meat balls, barbecued hamburger, chicken fricassee, scalloped potatoes, fried potatoes, hamburger macaroni casserole, fried chicken, baked beans, and frankfurter casserole.

All of the above recipes reflect the cooking of the mid-twentieth century. And in fact, many of these recipes are similar to what I cook today. But I fry in a good, heavy (shall I add expensive?) non-stick pan on the stove top, and I braise in good, heavy iron or enameled pots in the oven.

The next section is for baking cakes in the fry pan. No no no, that’s not for me. Packaged cake mixes, brownies, coffee cakes in the fry pan – and I really don’t think it would be easy to invert the fry pan and get these baked items out cleanly. I’ll stick to baking in the oven.

Other uses for the fry pan include popcorn, fudge, frying doughnuts, baked potatoes, cooking vegetables and cereal, heating baby foods, crisping crackers, defrosting, heating TV dinners (“frozen tray dinners”), baking frozen foods (including pizza), as a chafing dish, and for making white sauce. From this wide breadth of uses, it seems that a person could cook just about anything without a stove. This might work for staying in cabins, or for marginal housing arrangements. For us, we could use it in a power outage, since our backup generator gives us good but limited household power.

The back cover:

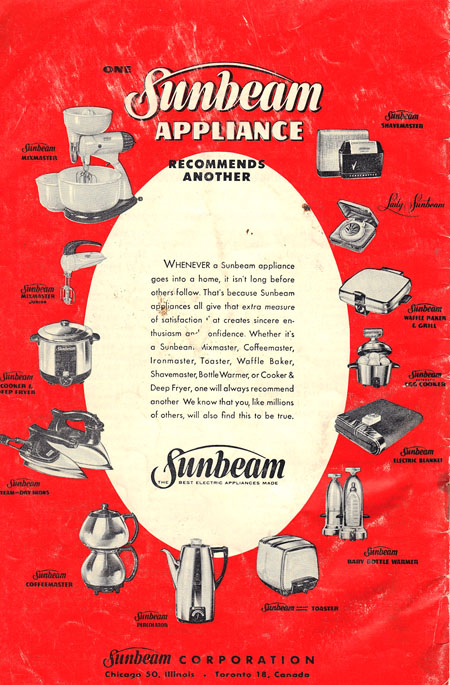
Sunbeam FrypanLook at all the Sunbeam appliances! Mixer (see my old Sunbeam mixer post), deep fryer (see my Sunbeam deep fat fryer post), irons, coffee pot, toaster, baby bottle warmer (interesting, since I just did a post on how to feed your baby), electric blanket, egg cooker, waffle maker, Lady Sunbeam razor, and shavemaster.
I am going to keep this cookbook. Not for the recipes, but for the nostalgia. Brings back memories.

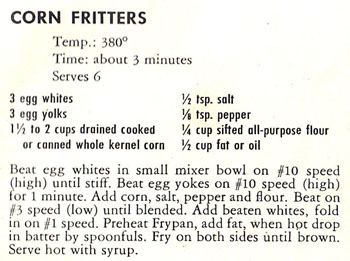
For this blog, I will make Corn Fritters.

Corn Fritters recipe

Hey, in the directions they spell egg yolks “yokes!” I almost didn’t catch that.

I am making these for just two, so will one-third the recipe. I am not about to get out the big frypan just to make a small batch of fritters! I choose a medium non-stick frypan. I know how big the frypan is, and 1/2 cup oil would cover the bottom, but not fill it to the depth of deep frying, so I adjust my amount of oil by that guideline. Instead of serving them with syrup, I’ll have them as a side dish with one of my favorites, Southwestern Chicken.

Corn Fritters
serves 2

  • 1 egg white
  • 1 egg yolk
  • 2/3 cup cooked corn (I used fresh corn)
  • 1 1/3 tablespoon flour
  • salt and pepper
  • vegetable oil

Beat the egg white until stiff. In a separate bowl, beat the egg yolk on high for about half a minute, then turn to low and add the flour and salt and pepper. Stir in the corn. Fold the egg white into the egg yolk mixture.

Heat a pan to medium hot. Add enough oil to nearly cover the bottom, maybe a couple tablespoons. (You could get by with less when using a good nonstick pan.)

Drop in the corn fritter batter by spoonfuls. Fry on both sides until golden brown.

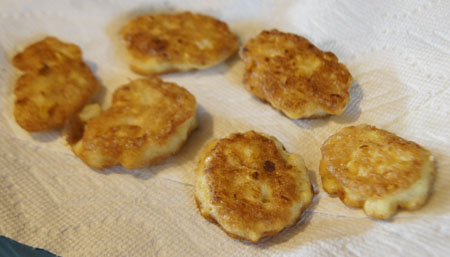
Corn Fritters I liked these! But, my dining partner wasn’t impressed. The Southwestern Chicken was enough for him. I think these would have been good with syrup, as suggested in the recipe. I would like them fried in less oil than I used. This is a good recipe for very easy corn fritters; I just need to figure out how to include them in a dinner – or breakfast – plan.