250 Cookbooks: New Pillsbury Family Cookbook

Cookbook #202: The New Pillsbury Family Cookbook, The Pillsbury Company, Minneapolis, Minnesota, 1973.
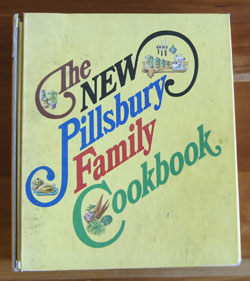
New Pillsbury Family CookbookThe New Pillsbury Family Cookbook is one of my three most-used reference cookbooks, alongside McCall’s Cook Book (1963) and the Joy of Cooking (1964). I always reference this book when cooking a good roast, especially a rib eye roast. I also use the fruit pie baking guide. This book is well-used, but entirely readable! It’s great for basic quick bread recipes too. If I want advice on how to cook or bake anything, this is one of the three I consult. Or, if I want to compare recipes.

The tone is straightforward, no “bossiness” like Joy of Cooking. The writing style is not “chummy” either. I am very comfortable with this book and its recipes – I grew up with this type of cooking, and began cooking this way, and still do, a lot of the time. Sure I often cook more twenty-first century, exploring new ingredients and methods, but our day-to-day meals are usually pretty twentieth century. We rarely eat dinner out, and that means I’ve had to come up with meal ideas zillions of times to keep things from getting boring. The New Pillsbury Family Cookbook? I won’t let go of it!

I search the web, and discover that others must also like this cookbook. It’s labelled a “classic cookbook” and also “vintage”. Hey, I resemble that remark! (I bought it when I was only 23.) This is a five-ring loose-leaf binder cookbook. I find that it was also published as a hard-bound book (408 pages, just like mine) and is now selling for as much as $74 when in mint condition (VintageCookbook.com). Guess I’m not the only one who likes classic American cookbooks.

Pillsbury is currently a brand name used by both General Mills (Minneapolis-based) and the J.M. Smucker Company (Orrville, Ohio-based). (Wikipedia.) Pillsbury has a current website with lots of recipes. Note that Pillsbury is also the name on many of the “Bake-Off” booklets that I have covered in this blog.

One thing about this book has always made me smile: cake, candy, and pie sections come before meats and main dishes. Vegetables are last. I like cake first too! . . .  but just now I realize . . . the chapters are in alphabetical order. Geesh, that takes some of the fun out of it!

As I flip through the pages, I note several recipes I’d like to try. I like the “batter” breads in the yeast bread section, like English Muffin Bread and Dilly Casserole Bread. These are no-knead breads, and although not held overnight like the current no-knead breads I make, they give a hole-filled texture, kind of like a crunch, to the finished breads. I note an apple cake that has 2 cups of fresh apples and only 3/4 cup of flour. The Carrot Cake has honey in it, and less oil than the current very good but also very high calorie version that is my standard. It also suggests using whole wheat flour instead of all-purpose flour, and gives directions for baking at high altitude (5200 feet). I made notes on the Brownies and Pumpkin Bars recipes. If I make a pecan pie, I consult this book – and have post-it notes on that page. If I forget the proportions for a graham cracker crust, or want to make a pie crust from vanilla wafers or other cookies, directions are in a nice table on page 147. And page 149 is indespensible to me: a table of how to bake different sizes and kinds of fruit pies.

Once again . . . I really do like this reference book. But let’s go on.

Pages 206-207 hold my post-it notes and magazine clippings for cooking prime rib roasts. These expensive, large roasts go on sale every holiday season, and I usually buy them to cook New Years Eve. Often with “roasted potatoes”, a delightful way to cook potatoes that my daughter and I first enjoyed in England in 2002. Today, I find a recipe for “Citrus Simmered Steak”, thick round steak that is simmered for a couple hours on the stove top. I decide to make this recipe for this blog, since I bought just such a steak yesterday on sale. Sounds like a nice, different mix of seasonings:
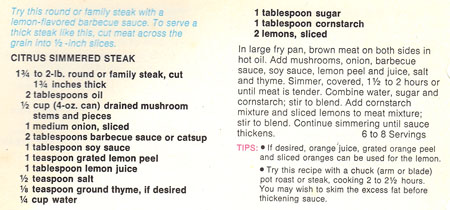
Citrus Simmered Steak recipeThe poultry and game chapter shows signs of “well-use”, but I haven’t marked any recipes. Today I do, though! “Golden Oven-Fried Chicken” is coated with cornflakes, almonds, and Parmesan cheese. Now, I’ve made cornflake-coated chicken for years, but almonds and cheese? No. I will make this recipe soon. (271)

The last chapters chapters show little signs of use. Seafood and outdoor cooking, salads and sauces, vegetables. I find a few basic recipes for mayonnaise, waldorf salad, tomato aspic, salad dressings, and a good selection of sauces, like mornay sauce, veloute sauce, hollandise sauce, cocktail sauce, and barbecue sauce.

Okay, time to cook! The recipe from The New Pillsbury Family Cookbook for “Citrus Simmered Steak” is above; below is my version.

Citrus Simmered Steak is simmered for a couple hours on the stove top, so I decided to pull out my big old cast iron pot. Lately I’ve been using the LeCreuset for braising; it’s nice that it goes from stove tip to oven. But I haven’t used the cast iron pot in ages, and thought I’d re-familiarize myself with the benefits of this pot. I suggest any covered, large pot you have, but the heavier the better.

Citrus Simmered Steak
serves about 4

  • 1 3/4-2 pounds round steak, at least 1-inch thick (often, this cut of round steak is called “London broil” in our supermarkets)
  • 2 tablespoons oil (approximate)
  • 1/2 teaspoon salt (or to taste)
  • pepper
  • 1 small can mushrooms, stems and pieces, drained (these days, “small” mushroom cans are 7 oz.), or use fresh, sliced mushrooms
  • 1 medium onion, chopped or sliced
  • 2 tablespoons ketchup
  • 1 tablespoon soy sauce
  • 1 teaspoon grated lemon peel
  • 1 tablespoon lemon juice
  • 1/4 teaspoon dried thyme
  • 1 tablespoon sugar
  • 1 tablespoon cornstarch
  • 1/4 cup water
  • 1 thinly sliced and seeded lemon

Heat the oil in a large pot on the stove top. Salt and pepper the meat, then cut it into large chunks that will fit into the pot. Brown the meat on both sides. Add mushrooms, onion, ketchup, soy sauce, lemon peel and lemon juice, and thyme. Simmer, covered, for about 2 hours, or until the meat is very tender. Check and stiir occasionally and add a little water if it looks like the mixture is drying out.

When the meat is done, remove it from the pan and set aside. Combine the sugar and cornstarch, then mix in the 1/4 cup water. Add this mixture to the pan and stir into the drippings, heating until bubbly and thick. Add more water if you think it’s too thick. Add the sliced lemon to this gravy, and then add the meat back in. Simmer a few minutes for the flavors to blend.

Slice the steak across the grain (yes, it’s kind of messy to do this). I served the steak-sauce mixture over store-bought gnocchi (because I like them!), but it would also be good over mashed potatoes, rice, or pasta.
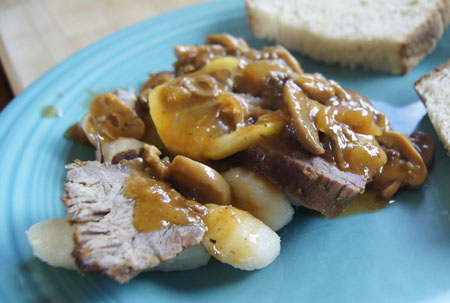
Citrus Simmered SteakThis was tasty and flavorful I left most of the lemons off my husband’s serving because I wasn’t sure he’d like them. The Swiss/round steak was a bit like, well, like “round steak”. I always find this cut of meat rather chewy and flavorless, no matter how I cook it. With the sauce and the long cooking, though, it did make a good week night meal. I scraped the sauce off the leftover meat, sliced it thinly, and it made a yummy sandwich with tomatoes, lettuce, and ketchup. The last bit of leftover meat went into tacos.

Of course, I am keeping this cookbook!

250 Cookbooks: Seal-A-Meal I

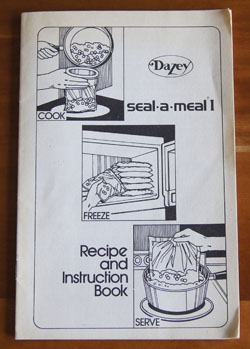
Cookbook #195: Seal-A-Meal I, Recipe and Instruction Book, Dazey Products Company, 1976.

Seal-A-Meal cookbook

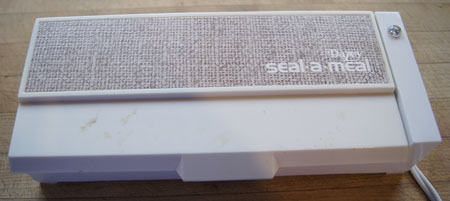
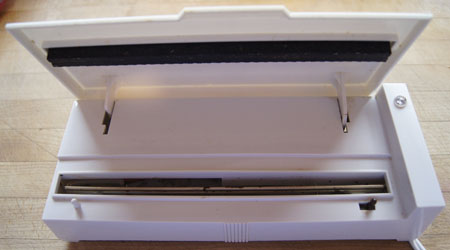
I bought a “seal-a-meal” by Dazey sometime way back in the late 1970s or early 1980s. I still have it! And it still works. It’s an inexpensive little unit, with a heating bar and a way to hold and press bags over the bar.

seal a mealseal a mealNote the two pegs in the above photo, the white one on the left and the black one on the right. Special bags, or “pouches”, were sold that had holes along the side to latch on to the bags. I have a small roll of this type of this bag material – as you can see in the photo below. See the little round hole in the bottom right corner of the photo?
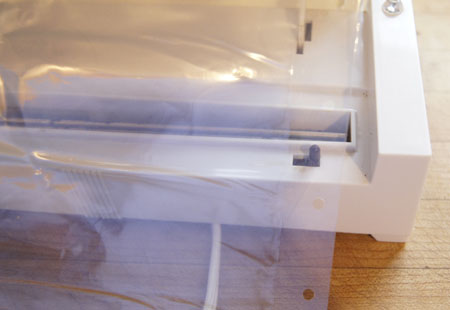
seal a meal

I searched and searched, but to my knowledge, this type of bag (with holes along the sides) is no longer sold. The Seal-a-Meal® brand now owned by Sunbeam Products (doing business as Jarden Consumer Solutions). The bag sealer units of today use vacuum to remove the air from the bag filled with food, and then heat seal them. Both approaches result in an air-tight, sealed bag, a bag that can be put in a freezer or in boiling water.

There are zillions of reasons to have food or other things in an air-tight bag, or pouch. “Ideas, ideas, ideas” on pages 12-15 of Seal-A-Meal I suggest pouch-sealing food such as tomatoes, vegetables, fruits, eggs, dough for rolls, coffee, even sandwiches. Sportsmen can seal survival kits and fishing gear. Mothers of babies and toddlers can freeze formula and baby foods, and put anything that children shouldn’t touch in seal-a-meal bags. Picknickers can mix up martinis, seal in pouches, and put in the cooler. Seamstresses can store delicate laces and sequins. Teenagers can make water pillows. One can store polished silver in sealed bags.

I contribute this idea: buy meat or fish on sale and seal in the seal-a-meal then freeze; this prevents freezer burn.

How have I used my seal-a-meal? Mostly for short backpacking or car camping trips. I’d make a batch of chile or spaghetti sauce, pouch-seal and freeze it. The meal would go into one of the adult backpacks, while we watched our kids scamper up the trail. The frozen meal acted like an ice block to keep items like cheese cool in the pack. After we reached our campground and set up camp, we’d heat the pouch of food over a camp stove. And enjoy a great meal, with the wind blowing softly in the pine trees, the stars coming out over the Rocky Mountains.

backpacking

My Seal-A-Meal I booklet includes a handful of recipes for cooking foods directly in the bag, like poached eggs and or “Fussless Fudge Sauce”. Another handful of recipes are for main dishes like stew, spaghetti sauce, and chile: you prepare ahead (or prepare a double recipe) and freeze in a seal-a-meal bag for later.

For this blog, I decide to cook a batch of stew meat to “demonstrate” the seal-a-meal process. For a change, I am not going to give you a formal recipe for my stew. Unlike this blog, much of my cooking is done sans recipe. Here goes:

Stew Meat Base

Cut up a chuck cross rib roast – one or two inch chunks – about 3 or 4 pounds of meat (or use pre-packaged stew meat). Toss away any big chunks of fat. Turn on an electric pressure cooker to “brown”, then add about half the meat. Oil in the pan is optional. I found that the first half of the meat I put in the pan browned well and most of the liquid evaporated –  I should have removed it and browned the other half, but I looked at the clock and was running late, so I just tossed in the rest of the meat. In a few minutes, the splattering pile of meat still had a lot of liquid in it, but what the heck, time is ticking. Add a roughly chopped onion and carrot, and maybe 4 chopped garlic cloves. And some salt and pepper. Open a bottle of red wine and pour in a good dollop. Add maybe a cup of water. Cover and seal the pressure cooker, set to “high pressure” for 22 minutes, then let the pressure come down on its own. Well, I let it come down until it was time to leave, when I released the pressure totally and unplugged the unit. I came back maybe 6 hours later. And it was perfect!

This made enough cooked stew meat for 3 meals for 2 people. I divided it in thirds, and put one portion in a pan on the stove top. I mushed up the cooked carrots and onions with a fork: they are there just for flavor. I added chopped carrots, celery, and potatoes, more water, and cooked until veggies were done. Then I thickened with a little cornstarch mixed in a bit of water. It was one of the best stews I have ever made!

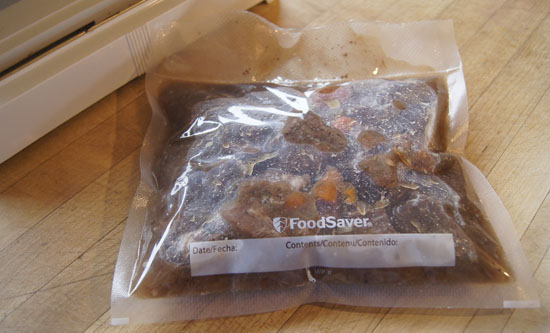
I took the other two portions of stew meat base and pouch-sealed. I used two recently-purchased vacuum style seal-a-meal bags and filled each with stew. (I lost the EZ fill gadget that makes it easy to fill bags without getting food on the sides of the upper portion of the bag so there was a bit of food on the edge I wanted to seal – I forged ahead anyway.)

I heated the seal-a-meal unit for 3 minutes, placed the top of the bag on the hot bar, pressed out most of the air, closed the top, and said “one seal-a-meal, two seal-a-meal, three seal-a-meal, four seal-a-meal”, then it was sealed. It sizzled a bit because there was a bit of food in the sealing area, but it still formed an air-tight seal.

seal a meal stewThe filled bags are now in my freezer, ready for a couple quick meals.
Comments on food storage, 2017 style

As I used my seal-a-meal this week, I did find the it to be a good method to seal foods for storage. The frozen pouches take up little space in the freezer (compared to a plastic lidded container). The drawback is the time involved (maybe 5 minutes to find and heat the unit and to fill the bag) and the messiness of filling a bag with a wet food like a stew.

Since the advent of seal-a-meal units in the 1970s, plastic bags with nearly air-tight “zip” type seals entered the American marketplace (Hefty and Ziplock brands). Although I wouldn’t freeze something like stew in these bags, I do use them for fresh meats that I’ve bought in bulk; cooked hamburger and sausage; tomatoes, fruits, nuts . . . I use these ziplock-style bags all the time. The advantage over seal-a-meal is that they are quick and easy to fill. Also, I often re-use these bags by rinsing with water.

For leftovers like pasta sauce and chile, I use reuseable, lidded solid plastic containers like Tupperware® or Rubbermaid®. Most of my Tupperware is ancient (they don’t make it now as well as they used to!). Recently, Rubbermaid has come out with a line of “easy find lid” containers that I like a lot because many of the lids are interchangeable between container sizes and the lids are easy to find and the containers stackable. I like them too because they are reusable and thus better for the environment.

And nerdy me, I keep a list of what’s currently in my freezers in Evernote, accessible from my computer, iPhone, and iPad. I have two freezers, one with the refrigerator and one huge one down in the basement. We are 6 miles from the nearest town, and 20 miles from a big supermarket, and I hate to run out of something and have to drive out to a store. Plus I can take advantage of sales. Plus when I was working, I could cook for a whole week on Sundays and store the meals in the freezer.

250 Cookbooks: Mexican Cookery for American Homes

Cookbook #194: Mexican Cookery for American Homes, Gebhardt’s, San Antonio, 1935.

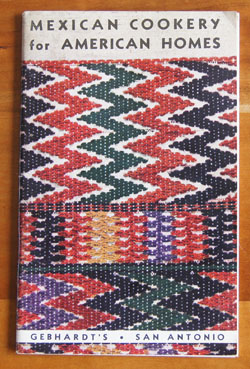
Mexican Cookery for American Homes cookbook

I am not sure how I acquired this cookbook, maybe it was Grandmother’s, or maybe it came from the Ruth C. Vandenhoudt house. One recipe – Chili Meat Loaf – has a handwritten note, but I’m not sure whose writing it is.

Mexican Cookery for American Homes was produced by the manufacturer of a chile powder: Gebhardt. Almost every recipe calls for either Gebhardt’s chili powder or Gebhardt’s canned chili.

An earlier version (c1923) of Mexican Cookery for American Homes is available in full text on the Hathi Trust web site. An even earlier version is now available as a reprint. The back cover of this 2005 reprint, compiled by Andrew F. Smith, a teacher of culinery history, reads:

“The Gebhardt Chili Powder Company was founded by William Gebhardt, a German, who migrated about 1885 to New Braunfels, Texas. Gebhardt opened a café, which served chilis imported from Mexico. To preserve them, he dried and crushed them into powder. He began bottling his powder, and in 1890, he opened a factory to San Antonio. Six years later he trademarked the name “Gebhardt’s Eagle Brand Chili Powder.” The powder became an important ingredient to such an extent that recipes in Texas cookbooks specifically recommended its use. When Gebhardt began marketing chili powder to a wider audience beyond Texas, he ran into a very serious problem-consumers not familiar with Tex-Mex cookery had little idea what to do with it. To help cooks understand Tex-Mex cookery, Gebhardt produced a small 32-page cookery pamphlet. This cookbooklet was originally published about 1908. As such, it was the first English-language booklet published in the United States that focused on Mexican-American cookery. It proved so successful that new editions of it were regularly published through the 1950s. In 1911, Gebhardt sold his company to his brothers-in-law, who expanded their product line to include beans and tamales. During the 1920s, they introduced to the tourist trade Gebhardt’s Original Mexican Dinner Package, consisting of cans of chili con carne, Mexican Style Beans, shuck-wrapped Tamales, Deviled Chili Meat, and a bottle of Chili Powder-all for one dollar. By the 1930s, Gebhardt products were sold throughout the United States and Mexico. The company survived until 1960 when it was purchased by Beatrice Foods, which in turn was acquired by ConAgra in 1990.” (From Amazon description accessed 2017.)

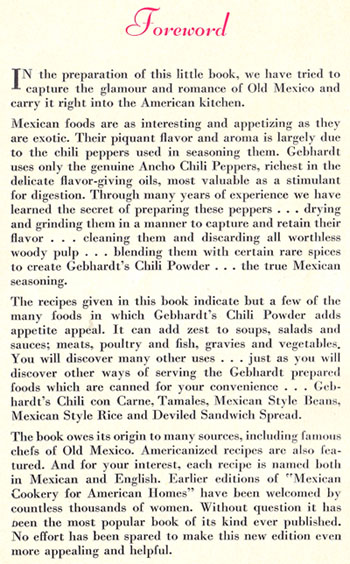
My 1935 edition of Mexican Cookery for American Homes reflects the culture of America at the time – women were the home cooks. I’ve addressed the issue of women-in-the-kitchen many times in this blog, most recently in this post. The foreword (below) to Mexican Cookery for American Homes states in the last paragraph: “Earlier editions of ‘Mexican Cookery for American Homes’ have been welcomed by countless thousands of women.”

MexCookery page 6

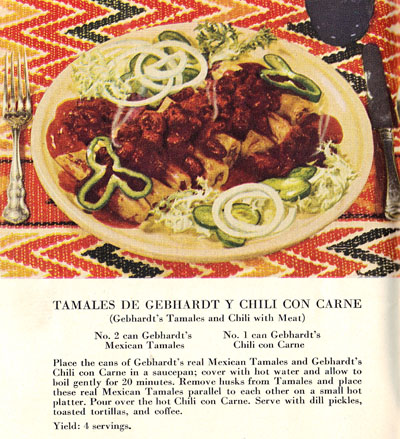
I found a post about Mexican Cookery for American Homes on a website by another affectionado of old cookbooks, Wendi. The blog is called “Resurrected Recipes, this is your grandma’s cooking“. Wendi has the same version of Mexican Cookery for American Homes that I do. I like her discussion of the recipes, recipes quite different from the Mexican foods we have today, or even the recipes in the 1950-60s era of cookbooks. She calls some of them silly! Like this recipe for “Gebhardt’s Tamales and Chili with Meat”:

MexCookery page 8

Yup, you put two cans – unopened – in boiling water for 20 minutes! Silly indeed.

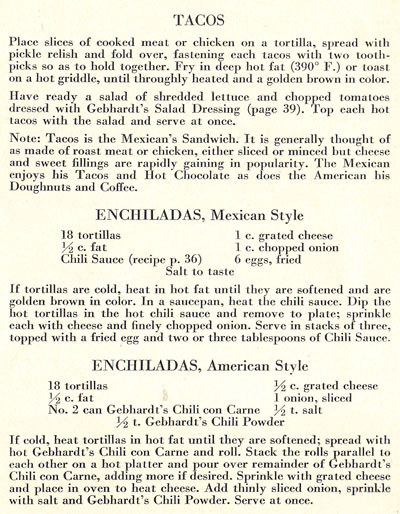
I decide to make “Enchiladas, Mexican Style for this blog”. It’s the middle recipe in the scan below – I included the other recipes for curiousity’s sake.

MexCookery page 10

Note that the Mexican style of enchilada is served on flat – not rolled – tortillas. And, you put fried eggs on top. Another twist! I’ve put poached eggs on tortillas and beans to make Huevos Rancheros and we’ve always like them.

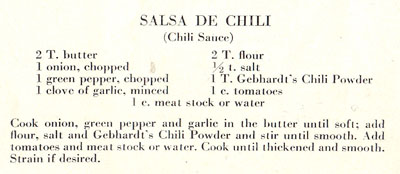
This enchilada recipe calls for Chili Sauce on page 36:

MexCookery page 36

I’ll make these pretty much as the recipe reads. Except, I do not want to fry the tortillas, instead I’ll soften them in the microwave. I don’t have Gebhardt’s chili powder, but I have some great chili powder from Savory Seasonings.

Enchiladas with Eggs
serves 2 for dinner

  • 1 small onion, diced
  • 1/4 bell pepper, diced
  • 1 clove garlic, minced
  • 2 tablespoons flour
  • 1 tablespoon hot chili powder
  • 1/2 teaspoon salt
  • 1 cup chopped tomaotes (fresh or canned)
  • 1 cup beef stock (or water)
  • 6 corn tortillas
  • 1/2 to 1 cup grated cheese (I used cheddar cheese)
  • a few diced onions, if desired
  • 1-2 eggs, fried or poached

To make the sauce, cook the diced onion, bell pepper, and garlic in a little oil until soft. Combine the flour, chili powder, and salt, then add to the cooked onion mixture and stir until smooth. Slowly stir in the tomatoes and beef stock (or water) and simmer about 20 minutes.

On each plate, layer 3 tortillas with a little sauce and cheese between each layer. Microwave on high until the cheese and sauce are bubbly – probably less than a minute. Top with fried egg(s) and serve.

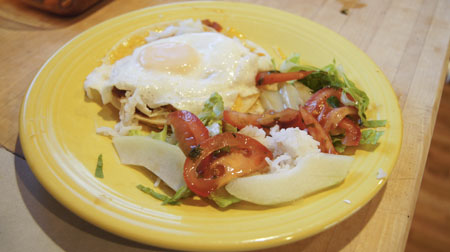
Enchiladas with Eggs

I served these enchiladas with a little lettuce, rice, tomatoes in a balsamic vinaigrette, and chayote. (More on chayote below.) This meal was a success! I really enjoyed the mixture of egg, tortillas, cheese and seasonings – a different taste for dinner. Hubby said he’d prefer it with refried beans, more like traditional huevos rancheros. Maybe next time.

Chayote

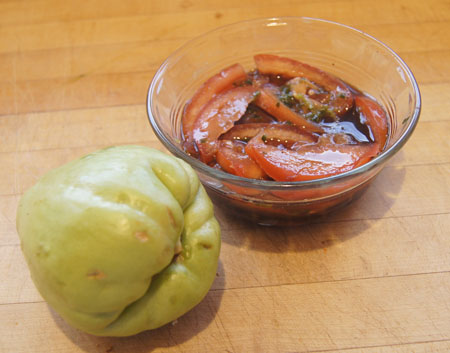
Chayote is a member of the gourd (squash) family, as I learned when I read my 1928 Salads, Vegetables and the Market Basket. Chayote is common in Latin American cooking, but is not listed in Mexican Cookery for American Homes. Last week I was at my favorite Asian Seafood Market and found a chayote in the fresh produce area. I brought it home because it looked so interesting! I served it with a mixture of tomatoes and balsamic vinegar:

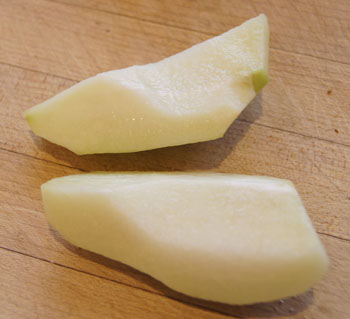
chayote and tomato vinaigretteHere’s the sliced, peeled chayote. It tastes like something between an apple and a pear, crunchy and interesting. cut chayoteMy tomato vinaigrette is a modification of a recipe for “Spicy Balsamic Tomato Salad” that I found on allrecipes.com.
  • 2 tomatoes, cut into thin wedges
  • 1 tablespoon balsamic vinegar
  • 1 tablespoons rice vinegar
  •  basil to taste, dried or fresh
  • 1/4 teaspoon ground ginger
  • salt to taste
  • chayote, peeled and sliced

Combine tomatoes and vinegar and seasonings. Let sit, stirring every 15, until flavors combine, about 1 hour. Combine with sliced chayote and serve.

250 Cookbooks: Electric Fondue Cook Book

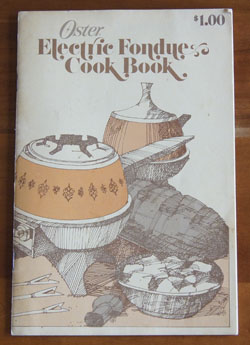
Cookbook #191: Electric Fondue Cook Book, Oster Corporation, Milwaukee, WI, 1976.

Electric Fondue Cookbook cookbookThat lovely decade when my husband and I were in our twenties . . . many memories. Among those memories are certain yummy and often fattening foods. Like fondues. Our party friends with us, the fondue pot filled with a beer-cheese-spice mixture, big, slurpy, cheesy mouthfuls scooped up by homemade tortilla chips. Back in the day. It was fun.
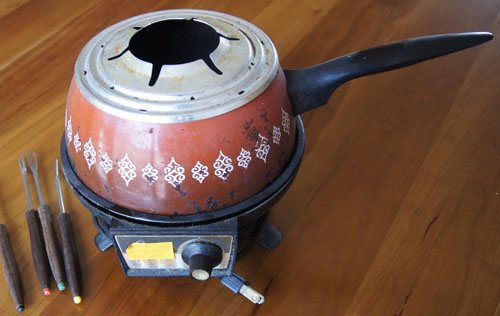
That’s when the Electric Fondue Cook Book came into my collection. Our electric fondue pot – and we still have it! – was a gift from a friends-couple. The cover says the book cost $1.00, but actually it came with the appliance.

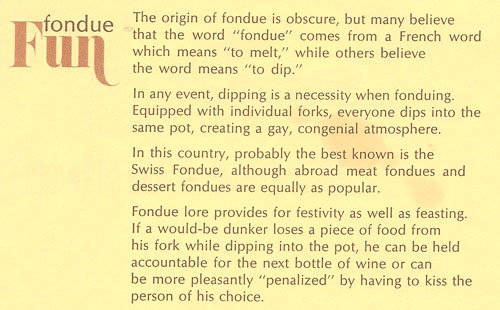
From the introduction:

fondue fun

I’ve made cheese fondues, and maybe Oriental hot pot fondues. I like dessert fondues, but only when other people make them (!). Beef fondue? Made it zillions of times. That’s the kind where diners cook their own beef cubes in hot oil in the fondue pot and dip the cooked meat in sauces. To this day, it’s still one of our favorite meals. It makes us take more time at dinner, eat slowly, enjoy the food and each others company.

The Electric Fondue Cook Book is short, but has useful, relevant instructions and recipes. The first chapter covers Classic Swiss fondue. Cheese fondue ingredients are garlic, white wine, kirsch, and Swiss cheese; dippers can be bread chunks, meats (ham, meat balls, shrimp), or vegetables (potato cubes, celery, green peppers, cherry tomatoes). Chili con queso, American, and pizza fondue recipes are variations on the cheese fondue theme.

Meat fondues “make cooking as much fun as eating”. The cooking liquid is either oil (Fondue Bourguignonne) or a broth (Fondue Orientale). Since hot oil presents special cautions, I appreciate re-reading the instructions in the Electric Fondue Cook Book. The cooking oil can be strained and saved for re-use; to clarify re-used oil, put a few pieces of raw, peeled potato into the heating oil. One of the most important things to remember with hot oil fondues is the safety of the guests, especially when serving directly on the dinner table. Since the pot is electric, there is a cord running to an outlet (and perhaps also an extension cord). We always wrap an extension cord around the leg of the table and even secure it under the leg, then attach the fondue pot. That way, if someone trips over the extension cord, it won’t also knock over the very hot oil in the pot. Gotta watch out for those rowdy little kids around the table.

The next chapter is “Sauces”, a good collection of dipping sauces for both hot oil and hot broth fondues. Dessert fondues include chocolate (bittersweeet, sweet, chocolate chip, mocha), butterscotch, and caramel-rum. Dippers can be fruits (pineapple, strawberries, apples, dates, etc.), marshmallows, angel food cake, cream puffs, doughnuts, or large types of nuts.

(I have a couple other books that also cover fondues: Encyclopedia of Cooking Vol. 5 and Encyclopedia of Cooking Vol. 3.)

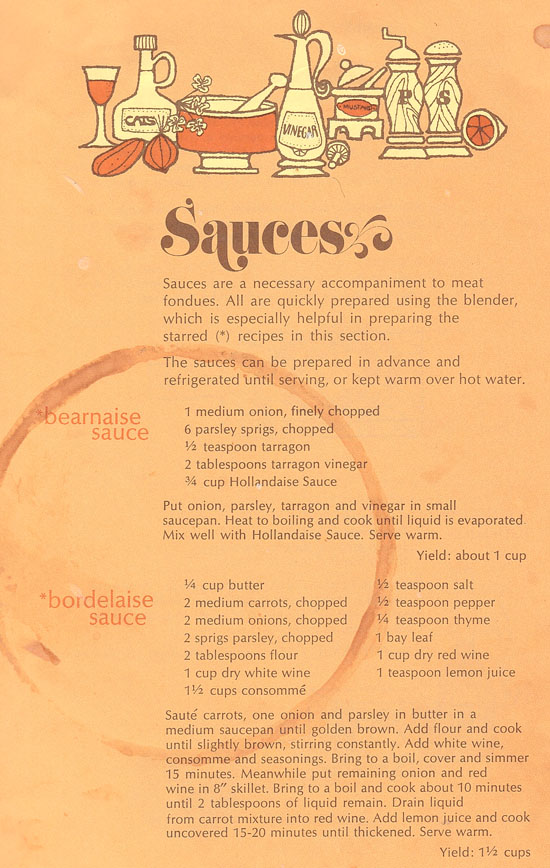
I decide to make Bearnaise Sauce for beef fondue for this blog. I scanned in the whole page that has this recipe to show you how well-used it is!

fondue recipes

This recipe calls for “hollandaise sauce”. Most of us know that this is a classic sauce made by skillfully emusifying melted butter, egg yolks, and lemon juice. The problems are, the sauce has to be made just before use – it does not hold together long. For instance, you can’t make eggs benedict by preparing the sauce the night before. (I can make hollandaise – I became extra good at it when I took a class on “Sauces” at Escoffier Boulder.) The other problem is that recipes for hollandaise make a lot of sauce because you need enough hot butter to cook the egg yolks. I only need a small amount of hollandaise, as I only need enough bernaise sauce for two people.

Hollandaise sauce in a jar is available (as per a google search), but I could not find it in any of my local markets. So, I default to my old quick and easy (cheater’s?) recipe for “blender hollandaise” from the Joy of Cooking. The authors claim that this hollandaise can be held in the refrigerator or even frozen and then warmed up in a bowl of hot water just before use.

The bearnaise sauce calls for “tarragon vinegar”. In the past, I know I never looked for this specific vinegar in a market (and I’m not sure how available these oils were in the 1970s). Luckily, I learned how to make herbal vinegars when I covered Michael Chiarello’s Flavored Oils and Vinegars. Briefly, you put in a blender equal amounts of herb and vinegar, and then strain. It’s ready to use right away.

Results

I made this recipe (full recipe hollandaise, half recipe bearnaise) but it did not turn out good enough to re-copy into this blog.

Issues:

I made the tarragon vinegar, and while it’s a petty color, it really isn’t worth the extra effort when I only need 2 tablespoons for this recipe. Instead, I highly advise fresh tarragon in the onion mixture if you want to make bernaise sauce.

I used 1/2 onion for my half-recipe, but this is still too much onion. I advise a couple tablespoons of chopped onion, or use a shallot instead.

My hollandaise was okay, but I used unsalted butter and I should have added a lot more salt.

When I added the hollandaise to the onion mixture directly in the hot onion cooking pan, the eggs “cooked” and the sauce lost its velvetiness.

Suggestion: Next time I make bernaise sauce, I’ll use my tried and true bernaise sauce recipe instead of trying to shortcut! I doubt I’ll make it for fondue though (unless we have guests).

Note: For beef fondue, we usually dip our cooked beef chunks in a simple homemade sauce, like a red sauce (tomato sauce, horseradish, worcestershire) or a creamy sauce (sour cream, worcestershire, ketchup).

Photos

We did enjoy our meal, inspite of the less-than-perfect bernaise sauce. Here is our forty year old fondue pot:

fondue potHere is my chunky bernaise sauce:

sauce bernaise

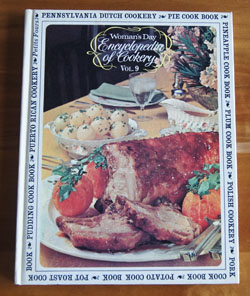
250 Cookbooks: Encyclopedia of Cookery, Volume 9

Cookbook #189: Encyclopedia of Cookery, Vol. 9, Pec-Pur, Woman’s Day, Fawcett Publications, NY, 1966.

Encyclopedia of Cooking Vol. 9I have a set of twelve Encyclopedia of Cookery volumes and this is the ninth of that set – I covered the first eight in previous posts. I’ve enjoyed all of them so far! This volume covers curious and helpful information about foods from pec(tin) to pur(ée).

Pectin is an ingredient I use when making jams – it helps them thicken. I learn that it comes from the cell walls of citrus, apples, and sugar beets. “Pennsylvania Dutch Cookery” actually derives from Deutsch, meaning German. Penuche, a favorite candy my mother used to make, is made from brown sugar. “Pepper” has two listings: pepper (capsicum) is hot peppers; pepper (piper nigrum) is our familiar black peppercorns. Pfeffernusse is an old fashioned spicy traditional Christmas cookie. It has German origins, and I remember one of my older relatives giving these to us at Christmas when I was a kid. They were hard, spicy little cookies, and I liked them, but have yet to find a recipe that is like the ones I had. Phillipine Cookery includes many recipes, piccalilli is a pickle relish made with green tomatoes, bell peppers, onions, sugar, vinegar, pickling spices, and often cabbage.

James Beard wrote a nostalgic section on picnics: “My family upbringing imbued me with a passion for picnics. We lived in western Oregon, a green countryside whose mountains, streams, and beaches provided perfect setting for outdoor dining.” I like his recipe for Pungent French Rolls made with red onions, green peppers, cucumbers, anchovies, tomatoes, olives, parsley, capers, and his recipe for Italian Rice Salad made with rice, pimientos, peppers, onions, basil, olives, chicken, and anchovies.

The Pie Cookbook includes recipes for meat, vegetable, and dessert pies. Mother made a note on the Black Bottom Pie recipe, a delicious chocolate pie I remember from childhood. If I ever need to know how to carve a suckling pig, all I have to do is open this cookbook. Pineapples are native to South America – and I love pineapples. Most of the pineapple recipes call for canned pineapple. I’d like to try Pineapple Oatmeal Cookies, and choose a chicken/pineapple main dish for this blog. Here is a guide for selecting fresh pineapple:

picking pineapplesPimientos are red bell peppers. It is interesting that red bell peppers are actually green bell peppers that have reached a further state of maturity. The pimiento variety of bell peppers are heart-shaped and very sweet. You can find them canned in the markets, often in small glass jars. I usually substitute fresh red bell peppers for pimientos in recipes.
The Plum Cookbook has a recipe for Plum Dumplings with these ingredients: fresh plums, sugar cubes, butter, flour, riced cooked potatoes, and eggs. How much sugar in a sugar cube? Google tells me “One sugar cube, which is equivalent to one teaspoon of sugar, weighs approximately 4 grams.

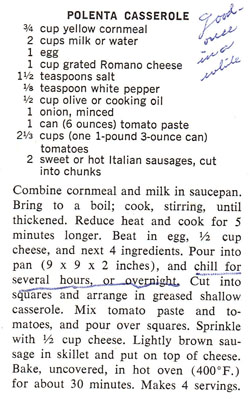
I like polenta and have several good recipes using it. It’s basically a type of cornmeal used in Italian cooking. But I was surprised that my mother knew about and used polenta! Here is the recipe with her note: “good – once in a while”.

polenta casserole

Polish and Polynesian cookeries. I’d like to try Opini, a Polynesian ceviche made with scallops. Popcorn, popovers, poppy seed. The poppy seed filling interests me because we once had a landlord (and friend) who raved about this filling for pastries. A “porgy” is a fish.

As I read the Pork Cookbook and Portugese Cookery sections, I reflect on how it seems that older recipes and foreign country recipes include lots of fish, game, whole pigs, organ meats, tongue, pigs feet.

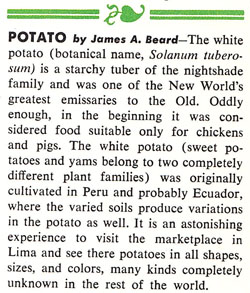
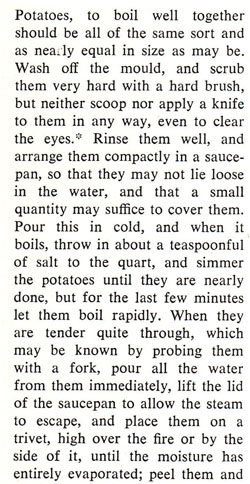
James Beard writes on the white potato. They originated in South America, probably Peru or Ecuador:James Beard on potatoesFrom the same article by Beard: “Eliza Acton, in her magnificent book of Modern Cookery, published in London in 1848, quotes the following ‘genuine Irish receipt’ for boiling potatoes”:
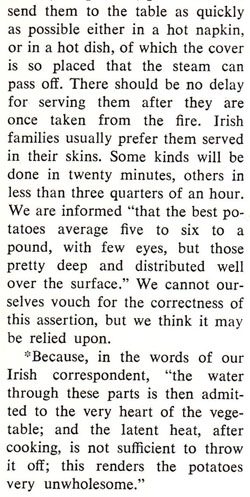
cooking potatoes

cooking potatoes


From the potato section of recipes, I’d like to try Pommes Anna, potato chocolate cake, and potato waffles.

Pot Roast is defined as “a term applied to larger cuts of meat which are cooked by braising, that is cooked slowly in a small amount of liquid or in steam. The meat may or may not be browned in a little fat before it is braised.” Poundcake is “a compact, fine-grained, easily sliced cake which, as its name suggests, traditionally contained a pound of sugar, a pound of butter, a pound of eggs, a pound of flour, a flavoring such as vanilla and no chemical leavening agent. Pralines are any confection made of nuts and sugar, although it originally was made with burnt almonds. Pressure cookers cook foods fast because the food is cooked with moisture (water) under pressure, and by increasing the pressure in the container, water’s boiling point increases and foods cook faster. Soft pretzels date back to the Middle Ages, while the hard pretzel is relatively new.

Prosciutto, prunes (lots of recipes, but none interest me), and a pudding cookbook. Puerto Rican Cookery, puff paste, pumpkin, including an interesting essay by Esther E. Wood entitled “Pumpkins and Philosophy”. Pumpkin pie spice is a blend of cinnamon, cloves, and ginger. This volume has lots of recipes for punch, either with or without alcohol. And lastly, purée, a mixture made by pressing a raw or cooked food through a sieve or food mill, or by whirling it in a blender so that it is smooth and thick.

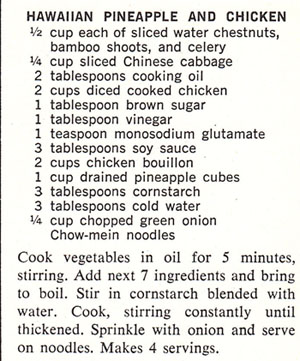
I choose to make “Hawaiian Pineapple and Chicken” for this blog:

Hawaiian Pineapple Chicken recipe

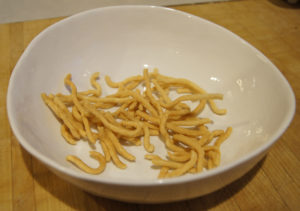
This is similar to sweet and sour chicken, as it has sugar and vinegar in it. I decide to keep some of the ingredients and change other ingredients. For instance, I like canned water chestnuts for their crunchiness and flavor, so I will keep them. But I think canned bamboo shoots are tasteless and soggy, so I will leave them out. I decide to use boneless chicken breasts because I don’t have any cooked chicken. Definitely I’ll leave out the monosodium glutamate (Accent®). I want to use fresh instead of canned pineapple. Chow mein noodles? I generally think of these as the crunchy kind of noodle that doesn’t need cooking, and I have a bag of these on hand, so I will use them.

chow mein noodles

Below is my version of the recipe.

Chicken with Fresh Pineapple
serves 2

  • 1 boneless chicken breast, about 10 ounces, cut into chunks
  • 1/4-1/2 cup sliced celery
  • 1/4-1/2 cup bell pepper, cut into chunks or diced
  • 1 cup sliced Napa cabbage (or use Chinese cabbage, bok choy, or regular cabbage)
  • 1/4-1/2 cup sliced water chestnuts
  • 1 tablespoon brown sugar
  • 1 tablespoon vinegar (rice, red wine, white wine, apple cider, or white vinegar, your choice)
  • 3 tablespoons soy sauce
  • 1/2 to 1 cup chicken stock (or water)
  • 3 tablespoons cornstarch
  • 3 tablespoons water
  • 1 cup fresh pineapple, cut in chunks
  • 1/4 cup sliced green onions

Cook the chicken in a little hot oil until browned; add the celery and bell pepper and cook until the vegetables soften. Add the cabbage and water chestnuts and stir a couple minutes. Add the brown sugar, vinegar, soy sauce, and 1/2 cup chicken stock; bring to a boil. Combine the corn starch and water in a small bowl, then stir into the chicken-vegetable mixture. Add more chicken stock if it is too thick.

Add the pineapple and cook until the pineapple is hot, then serve over chow mein noodles and garnish with green onions.

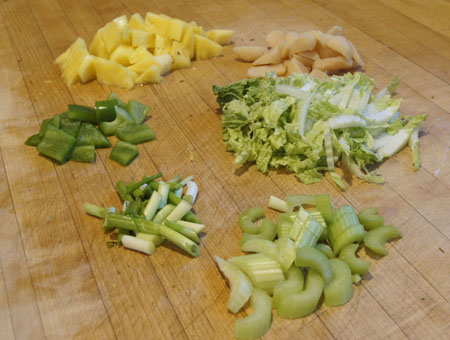
Here are my ingredients, all but the chicken. Note that the tan chunks above the cabbage are water chestnuts. Usually they are white; I bought these at Whole Foods and they were darker and had excellent flavor.

Pineapple Chicken ingredients

Frying the chicken and celery and peppers:

pineapplechickenThe completed dish:

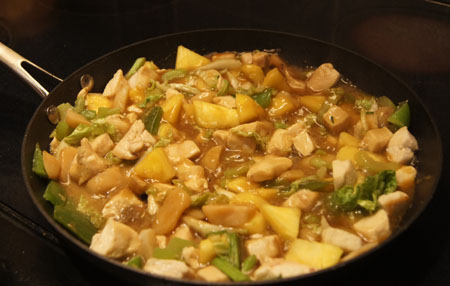
Pineapple ChickenThis was excellent, worth making again! It’s fast and easy, and I like the fresh pineapple in it. I liked it over crunchy chow mein noodles, but any Oriental noodle or rice would also work well with this dish.
250 Cookbooks: Presto Pressure Cooker Recipe Book

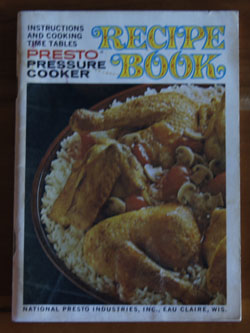
Cookbook #185: Presto Pressure Cooker Recipe Book, National Presto Industries, Eau Claire, WI, 1970.

Presto Pressure Cooker Recipe Book cookbook

I saved this little booklet from way back in the early 1970s, when I got my first pressure cooker, a Presto. That cooker lasted until the late 1990s. It still semi-worked, but the gasket leaked and I don’t think I could find a new one. So I bought a Fagor pressure cooker, as I described in another blog post, Fagor Pressure Cookers. That pressure cooker also failed because of gasket issues. Currently, I own only an electric pressure cooker. It is a dream!

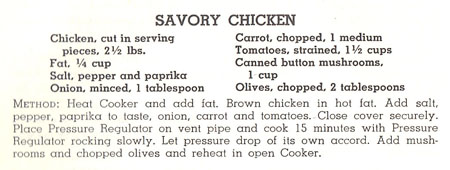
I looked carefully through the Presto Pressure Cooker Recipe Book to see if there are enough good recipes in it to warrant keeping it. Only one – Savory Chicken – catches my eye. So I will recycle the booklet.

I’ll get to that recipe later. As I write this, I have already made the recipe, and it was delicious! In fact, I was so impressed with my electric pressure cooker, that I have to rave about it a little. I cooked the chicken (10 minutes) and meat for a stew (16 minutes) sequentially one afternoon, for a total prep/cook time of maybe 45 minutes. Each recipe made enough for two meals. Each tasted great. Amazing.

I recently covered two methods of braising meats: slow cookers (crockpots) and clay pots. I also often braise meats in a covered range-top to oven casserole (like a LeCrueset). Each has its advantages and disadvantages. Braising in general includes:

  • a browning step in an open pan
  • a covered baking/heating step
  • a final heating step in an open pot to reduce the gravy

Slow cookers generally require a separate pan for the browning step. Most slow cooker recipes take 6-8 hours to cook, which can be good (you can be gone) or bad (often some ingredients in the dish are overcooked). Gravy reduction can be done right in the pot. If the slow cooker has a removable crock, it can be pretty easy to clean, especially if it fits in the dishwasher.

Clay pots do not allow browning/gravy reduction in the pot (but meats cooked in them brown anyway!). Cooking time is about an hour. I find taking the very hot clay pot out of the oven difficult. Gravy must be thickened in a different pan. The pot takes an overnight soak to clean.

LeCruesets allow stove top browning/gravy reduction and are easy to get out of the oven and to clean. Most recipes take a few hours in the oven (and smell delicious all the time!).

Electric pressure cookers are about the best in all of the braising steps. The unit is shaped like a slow cooker, with a light weight non-stick insert (easy to clean). You brown the meats right in the unit using a “browning” setting. Then, you add all the ingredients, seal the unit with the lid, and set the timer to however long you want to cook on high (or low) pressure. It heats up, hisses briefly, then settles into the  cooking time with just a tiny bit of hissing. Pressure is released slowly or quickly with the release knob. If the meat isn’t done enough, or if you want to add another ingredient like potatoes that need a short cooking time, the unit quickly gets back up to pressure. After the pressure cycle you take off the lid and set to the browning cycle to reduce the pan juices. Cook times are short! 15 minutes to cook stew meat! Clean-up is very easy, a quick wash in soapy water is all the insert needs.

(A note about the older style stove top pressure cookers. They allow browning and gravy reduction directly in the pan, and cooking/cleaning steps are short. But, the little pressure regulator/rocker hisses loudly during the cook time. To release the pressure, the heavy hot pot must be taken to the sink and run under cold water. And if the meat is not yet done or you want to add potatoes, it takes a long time to for the pressure cooker to heat up again.)

I found a great website with a lot of recipes for electric pressure cookers: Pressure Cooking Today. I love the author’s statement on the main page – Today’s pressure cookers aren’t the scary pressure cookers your mom used.” That’s exactly how I felt about my manual pressure cookers!

Here is the recipe for Savory Chicken, as printed in Presto Pressure Cooker Recipe Book.

Savory Chicken recipe

The version of this recipe, below, is my adaptaion of Savory Chicken for my electric pressure cooker.

Savory Chicken
serves about 4

  • 1 chicken cut into serving pieces (or buy already cut up)
  • 2 tablespoons olive oil
  • 1 teaspoon paprika
  • 1 small onion, chopped
  • 1 carrot, chopped
  • 1 14-ounce can diced tomatoes
  • salt and pepper to taste
  • 1 small can chopped or whole button mushrooms
  • half of a small can of chopped olives (use the entire can if you want)

Heat the oil in a pressure cooker set to “brown”. Add the chicken pieces and brown all sides. Add the paprika, onion, carrot, tomatoes, and salt and pepper. Cover and seal the pressure cooker. Set to high pressure, 10 minutes. Start the cycle.

Quick-release the pressure regulator. Open the pot and remove the lid. Add the mushrooms and olives. Again set to “brown” and reduce the pan juices to your desired thickness. (I needed the pressure cooker for another recipe, so I did this last step on the stove top.)

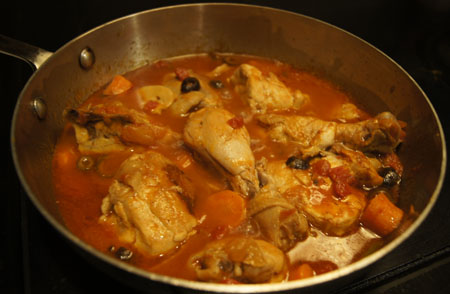
Savory ChickenThis tasted great! I served it over rice, but noodles would work well too. The chicken was juicy and tender and very flavorful.
250 Cookbooks: Extra-Special Crockery Pot Recipes

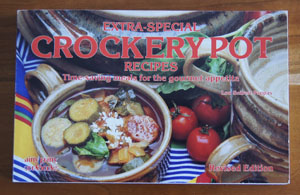
Cookbook #183: Extra-Special Crockery Pot Recipes, Lou Seibert Pappas, Bristol Publishing Enterprises, San Leandro, CA, 1975. A Nitty Gritty Cookbook.

Extra Special Crockery Pot Recipes cookbookI have 10 crock pot/slow cooker cookbooks! Crazy. I discussed the history of crock pots in a previous post: The Electric Slow Cooker Cookbook.
Extra-Special Crockery Pot Recipes is similar in design and layout to The Bread Machine Cookbook II, another “Nitty Gritty Cookbook”. These books are all about recipes – cleanly laid out and easy to follow.

I find lots of different ideas to try in Extra-Special Crockery Pot Recipes. The soups chapter includes the basics (French onion soup) and the slightly exotic (Caldo Xochitl). Next is salads. Salads in a slow cooker? At first I thought: cooked salads? But no, the recipes are for regular lettuce-type salads including leftover slow-cooked chicken or beef. I am often looking for “main dish salad” recipes in the hot summertime.

I’m not tempted by any of the recipes in the fish chapter – fish generally needs only a brief cooking. The poultry chapter includes the basics (poached chicken) and the unusual (Chicken and Cherries Jubilee). “Meats and Casseroles” has lots of ideas. It’s the longest chapter in the book, and I like a lot of the recipes: a wide range from the basic (Meat Balls Stroganoff) to the unusual (Choucroute Garni).

“Breads and Cakes”? Why bake bread in a slow cooker? “There are sometimes occasions when you may prefer not to heat the oven or perhaps you are at a location without an oven, when having a crockery pot makes baking possible.” I remember our relatively recent family reunion in California where the oven in the rental did not work, so we cooked a cake in the barbecue. But hey – we could have looked for a crock pot instead!
The fruits chapter gives recipes for cooked fresh fruit to be used in desserts or for breakfast. “Preserves” has a recipe for apple butter (already made it!) as well as orange marmalade and apricot pineapple jam and a couple chutneys. Beverages? Hot Spiced Cider, Swedish Glugg, and Hot Mulled Wine.

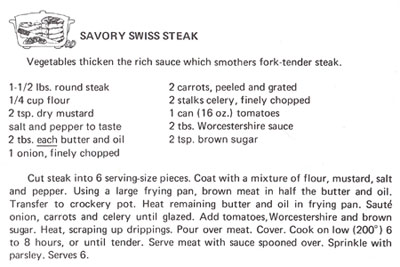
I decide to make Savory Swiss Steak for this blog. Wikipedia says “Swiss steak is meat, usually beef, prepared by means of rolling or pounding, and then braising in a cooking pot of stewed tomatoes, mushroom sauce, or some other sauce, either on a stove or in an oven.” That’s a pretty broad definition – and the recipe in Extra-Special Crockery Pot Recipes definitely falls within it. (I have made Swiss Steak for this blog before, but it was not a slow-cooked version.)

Savory Swiss Steak recipe

Round steak is a very lean meat (nice when you don’t want a fatty gravy) but it can be flavorless or tough. Hopefully this recipe makes it tender and tasty! I think I’ve tried this recipe before, since this page was marked when I pulled the book off the shelf.

Slow Cooker Swiss Steak
serves about 4

  • 1 1/2 pounds round steak
  • 1/4 cup flour
  • 2 teaspoons dry mustard
  • salt and pepper to taste
  • 2 tablespoons butter (or less)
  • 2 tablespoons oil (or less)
  • 1 onion, chopped
  • 2 carrots, chopped
  • 2 stalks celery, chopped
  • 1 16-ounce can diced tomatoes
  • 2 tablespoons Worchestershire sauce
  • 2 teaspoons brown sugar
  • fresh parsley (optional)

Cut the round steak into about 6 pieces. Mix the flour, dry mustard, and salt and pepper. Heat a frying pan and add half of the butter and oil. Dredge the steak in the flour mixture, then fry in the hot butter/oil until browned. (You might need to do this in a couple batches, it depends on the size of your frying pan.)

Remove the meat from the fying pan and put it in the crock pot. Put the rest of the butter and oil in the hot (now empty) frying pan, then add the onion, carrots, and celery. Cook until the vegetables are “glazed” or softened. Add the tomatoes, Worchestershire, and brown sugar; heat, scrapping up the fond. Transfer the entire mixture to the crock pot.

Cover and cook on low about 6 hours, or until the beef is tender. Serve over noodles, mashed potatoes, or rice, with some fresh parsley sprinkled on top (if you have it).

Swiss SteakThis was excellent! I will make it again. Very tasty and the meat was very tender. There was enough for two meals for the two of us (I froze half for later use).
250 Cookbooks: Original Schlemmertopf Recipes

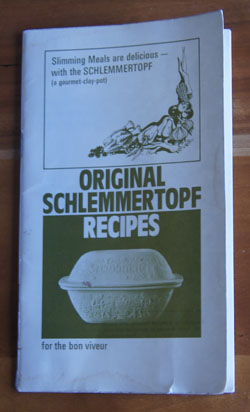
Cookbook #181: Original Schlemmertopf Recipes, Scheurich-Keramik, publication date not given.

Original Schlemmertopf Recipes cookbookA “Schlemmertopf” is a covered clay baking pot. I received my first clay pot as a gift sometime in the 70s. I wrote a lot of background material in Römertopf Cooking is Fun, so I won’t repeat that information here.
Original Schlemmertopf Recipes is the instruction/recipe booklet that came with my first clay pot (the one that broke long ago). Even though there is no publication date given, this booklet is obviously decades old. (I have a newer instruction/recipe booklet that came with my second clay pot.)

Both Romertopf and Schlemmertopf brands of clay pots are currently available. Each is made in Germany. A search for “which clay pot is best” pulled up a few sites that discuss clay pots and where to buy them, like the Kitchn site, but no reviews. Romertopf has a website, but Schlemmertopf does not seem to have one.

Originally, I used a Schlemmertopf for making stews and braising meats, as I discussed in Römertopf Cooking is Fun. In the 2000s, I bought a Schlemmertopf to replace my broken one, but I bought it mainly for baking crusty no-knead bread. The yummy pot roast that I cooked for  Römertopf Cooking is Fun was the first time I had used my new one for something other than bread.

Clay pots are a bit different to use than other types of covered cooking pans or casseroles. Never, ever can you use a clay pot on the range top, like when you want to brown meat or saute vegetables, or to make a gravy after the baking process. Before you start, you soak the pot in cold water, then you put the pot (with your food inside) into a cold oven (clay pots don’t do well with quick thermal change). Once in the oven, you can turn the temperature way up, even to 475˚. After cooking, removing the hot, heavy, covered pot from the oven can be difficult (and these pots break easily). If you want to make a sauce or gravy, you have to pour out the pan juices into a stove-top pan. Cleaning the pot usually requires an overnight soak in soapy water (no dishwasher for clay pots!).

So why use a clay pot? Because the results are juicy, well-browned, tastily braised meats.You don’t have to brown the meat before starting. The recipes cook faster than a slow cooker or even a typical oven braising. If you don’t make a gravy, it is a one-step process, just put the food in the clay pot and bake.

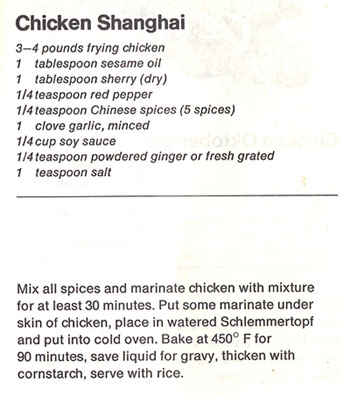
Since the pot roast that I cooked for Römertopf Cooking is Fun was such a success, I am looking forward to cooking another braised meat recipe from Original Schlemmertopf Recipes! I choose “Chicken Shanghai”, because I have a whole chicken in the freezer.

Chicken Shanghai recipe

I often roast a whole chicken in an open roasting pan; it will be interesting to compare/contrast the different cooking methods.

Chicken Shanghai
serves 3-4

  • 1 whole chicken, 3-4 pounds
  • 1 teaspoon sesame oil (more if you like the flavor a lot)
  • 1 tablespoon dry sherry
  • 1/4 teaspoon red pepper (or use a little hot chili oil)
  • 1/2 teaspoon Chinese 5 spice powder
  • 1 clove garlic, minced
  • 1/4 cup soy sauce
  • 1/4 teaspoon powdered ginger (or use freshly grated ginger)
  • 1-2 tablespoons cornstarch
  • cooked rice

Mix the marinade ingredients (everything except the chicken, cornstarch, and rice). Put the chicken in a bowl and add the marinade to it, rubbing some under the skin. Let stand at least 30 minutes, turning occasionally.

While the chicken marinates, soak the top and bottom of a clay pot in cold water. (Note: if the bottom of your clay pot is glazed, it does not need to be soaked in cold water.)

(Leave your oven off!)

Pour the water out of the soaked clay pot and wipe it with a towel. Add the chicken and its marinade in the pot, cover, place in a COLD oven and turn the oven to 450˚. Bake for 90 minutes.

Carefully remove the clay pot from the oven and uncover. When cool enough to handle, remove the chicken to a plate and cover to keep warm. Pour the clay pot pan juices into a sauce pan and add 1-2 tablespoons cornstarch mixed with a little water. Boil this sauce until it thickens.

Slice the chicken and serve over rice with the sauce.

Shanghai Chicken

Comments

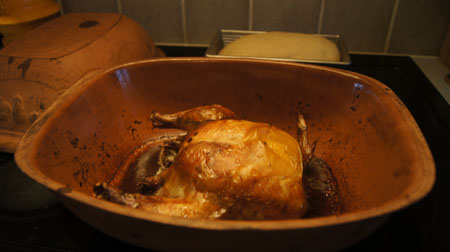
This chicken was extra-nicely browned! And unlike my other roast chicken recipes, the clay pot cooking method caused no oven splatter, since it is roasted covered. The meat was very juicy and moist. And the flavor was great, of both the meat and the sauce. We both loved it. I did think the sauce a bit salty (and I even left the added salt out of the recipe) and fatty; next time I might use a gravy separator before thickening.

I definitely will roast more chickens using a clay pot. I have a few of my own recipes I can adapt, or can look for others online, like this one using lemony thyme, sage and oregano. I am glad I have re-discovered clay pot baking – it definitely adds variety to my repertoire.

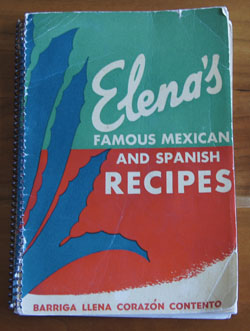
250 Cookbooks: Elena’s Famous Mexican and Spanish Recipes

Cookbook #179: Elena’s Famous Mexican and Spanish Recipes, Elena Zelayeta, Dettners Printing House, San Franscisco.

Elena's Famous Mexican and Spanish Recipes cookbook

Driving out of Boulder last week, I noticed a new Mexican grocery store. I wanted to go in! I love discovering small stores with interesting ethnic products. I used to get the best corn tortillas from a store in almost the same location. Makes me hungry for Mexican food. Time to pull another Mexican cookbook off my shelf!

And I have only one that I have not yet covered: Elena’s Famous Mexican and Spanish Recipes. I covered another of her cookbooks, Elena’s Secrets of Mexican Cooking, in one of my earliest posts. That book was published in 1958, and this one in 1944. Inside the back cover is the price it originally sold for: $1.50 from May Co. I think I bought it from a used book or junk store, way back when we lived in Boulder. But I am not sure. It could have been my mother-in-law’s – there is some writing in this book that might be hers.

The introduction to Elena’s Famous Mexican and Spanish Recipes is written by Elena’s friend Katherine Kerry, while the introduction to the (later) 1958 book is written by Helen Evans Brown. Her friends just loved her! If you read my other blog entry, you will learn that Elena lost her sight as an adult, but blindness didn’t stop her from cooking. That amazes me so much! Katherine Kerry writes of her friend’s book:

“This book of her own much-used recipes is just one expression of Elena’s love of people, her knowledge of how to make them happy. Each recipe is a shining star of courage, faith and hope, plus a full measure of gastronomic enjoyment for you who use them.”

“Elena is a bouncing ball of pep, gaiety, kindliness and heart – a heart so big it encompasses all she meets.”

Some of the recipes in Elena’s 1944 book were carried through to the later book – “because no book on Mexican cuisine could possibly be without them”.

The first chapter of Elena’s Famous Mexican and Spanish Recipes is “Sopas – Soups”. I learn that there are two types of soup in Mexico: wet and dry. Wet soups are liquid (plus meats and vegetables) and served at the beginning of the meal, dry soups are served next. Dry soups are rice or vermicelli cooked in soup stock, the stock being entirely absorbed in cooking, in effect making them more like our idea of seasoned cooked rice.

“Eggs, Glorified ways of serving them”, the next chapter, has at least one recipe I’d like to try: “Rice Nests with Egg”. In this recipe, bacon is wrapped around a small pile of cooked rice and secured with a toothpick, then topped with a raw egg and baked in the oven. I like this recipe for a couple reasons. One, it sounds good! And two, it illustrates Elena’s Mexican dishes. They are often simple home cooking, and barely our typical ideas of “Mexican” cooking.

Some of the salad recipes look very good, like an avocado salad with pineapple, oranges, fresh mint, lettuce and French dressing. Chiles Rellenos – green chiles stuffed with cheese, dipped in egg batter, deep fried, and served in a spiced tomato sauce – are in the vegetable chapter. I have made them Elena’s way for years! She suggests frying them the day before serving, an idea that might me prepare these delights more often. (Much easier than frying while your guests are there.) Fish, poultry, meats and beans each has its own chapter. (Some of the meats, like tripe, kidneys, rabbit, and pigs feet, I guarantee I’ll never cook.)

“Tortillas, Tacos, Tostadas, Enchiladas and other things made with masa” is the title of another chapter. Elena talks about treating a pan with “hydrated lime” when one makes homemade tortillas. Hydrated lime is not made from limes, instead, it is calcium hydroxide, and is used to help the masa bind together. All of her recipes that include masa (a type of cornmeal) call for purchasing it fresh from a Mexican store. I’m not sure this type of masa is still available, and I ran into problems when I tried making a tamale casserole using the bagged masa that is currently sold in US supermarkets. But in general, her recipes call for store bought tortillas, so it’s not a huge problem. She also mentions an item I’d like to find called “raspadas”, thin tortillas specially made for tostadas.

And last but not least, desserts! Flan, rum and macaroon pudding, Mexican bread and rice puddings, banana pudding, cookies (Little Drunkards sound interesting!), and turnovers are among the sweet recipes in this chapter.

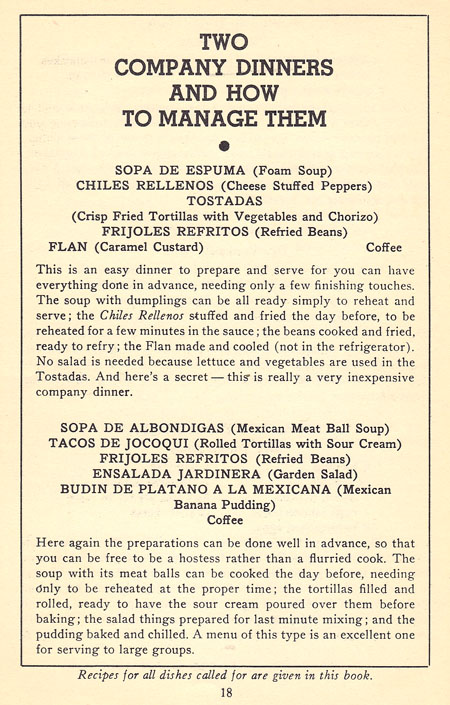
Elena’s Famous Mexican and Spanish Recipes includes several pages of menus for Mexican meals. Below is a great example:

Mexican menus

I do like this cookbook and definitely will keep it. Lots of good recipes, information on historical Mexican cooking, and written by an interesting woman.

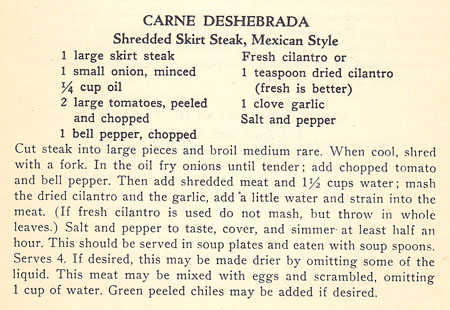
For this blog, I decide to make Carne Deshebrada, or Shredded Skirt Steak, Mexican Style:

Shredded Skirt Steak recipe

Usually when I make “shredded beef”, I braise a roast for a long time until it falls apart easily when shredded with a fork. In this recipe, the skirt steak is broiled just to medium rare – sounds like an interesting variation. I found it hard to “shred with a fork”, so I went back and forth using a fork and a sharp knife to shred/chop instead of following the directions. I couldn’t find a green bell pepper, so I used a red one. I like lots of fresh cilantro and garlic so I increased the amounts. And I added the green chiles as suggested. I preferred not to serve this “in soup plates and eaten with soup spoons”. Instead, I kept the meat a little drier by adding less water, and served the mixture in a corn tortilla with grated cheese and salsa.

Shredded Skirt Steak
serves 4

  • 1 skirt steak, about 1 1/2 pounds
  • 1 onion, chopped
  • 2 large tomatoes, peeled and chopped
  • 1 green (or red) bell pepper, chopped
  • 1 teaspoon chile powder (optional)
  • fresh cilantro, 1/4 cup chopped (or to taste)
  • 2 cloves garlic
  • 1 small can chopped green chiles

Cut the steak into several pieces and broil in an oven just until medium rare. Cool, then shred with a fork and a sharp knife.

Fry the chopped onions in a little oil until tender. Add the tomatoes, bell pepper, chile powder, cilantro, garlic, chiles, the shredded meat, and about 1/2 cup water. Salt and pepper to taste. Simmer about a half hour, adding a bit more water if needed to keep the mixture moist. Serve wrapped in tortillas with cheese and salsa.

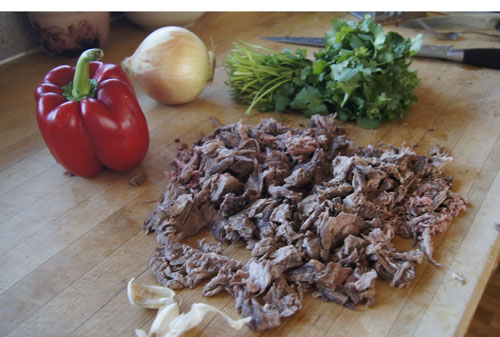
Below is a photo of the skirt steak after I cooked and “shredded” it.

shredded skirt steak ingredientsAnd here is the pan of shredded beef and vegetables, ready to be served.
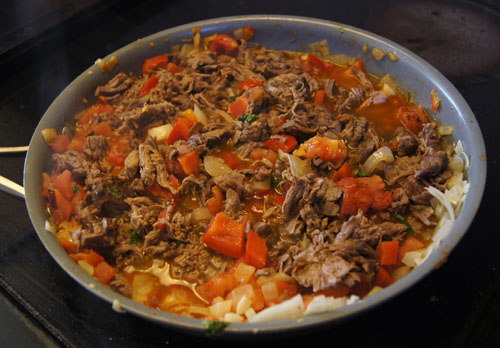
Shredded Skirt Steak

And how did it turn out? Wonderful! The skirt steak was so, so flavorful! A different experience than my braised style shredded beef. I used “Tortillaland” corn tortillas, half-cooked tortillas that heat up on a dry grill into soft but sturdy tacos. These tortillas were strong enough to stay together, even packed with shredded beef and fixings.

I made another meal using the leftovers by mounding the mixture and some grated cheese in thin flour tortillas, rolling them up, then browning in a big fry pan in a little oil just until all sides were browned. Then, I cut into bite-sized pieces and served with salsa and sour cream. Yum again.

250 Cookbooks: Cover and Bake

Cookbook #177: Cover and Bake, by the editors of Cook’s Illustrated, a Best Recipe Classic, America’s Test Kitchen, Brookline, MA, 2004.

Cover and Bake cookbook

I discovered my first Cook’s Illustrated magazine sometime in the early 2000s. This magazine has no ads – what a treat! I clipped and saved several recipes, then I subscribed to Cook’s Illustrated online. (It’s the only cooking magazine I subscribe to.) I ordered this book, Cover and Bake, and I use it a lot.

Christopher Kimball founded the enterprise that includes Cook’s Illustrated and America’s Test Kitchen, where they develop the recipes in their publications. This “Kitchen” is located in Brookline Massachusetts, and is where the TV show “America’s Test Kitchen” is filmed. Most of my friends who are into cooking love this show!

Cook’s Illustrated recipes always include a lengthy discussion. In their test kitchen, they try each recipe many different ways, and report on their findings. This appeals to my scientific side! Plus, when I follow the directions, the recipes always come out excellent. For instance, their recipe for pie crust taught me how to finally make a tender, easy-to-roll crust. I often browse the site for new ideas, or how to cook . . . anything! I also use their reviews of kitchen equipment to help decide on a new purchase.

The chapters in Cover and Bake are: Assemble and Bake (casseroles), Pot Pies and More, Oven Braises and Stews, Skillet Casseroles, Savory Side Dishes, Breakfast and Brunch, and Slow-Cooker Favorites. My favorite chapters are the pot pies and oven braises and the slow-cooker recipes. I have so many notes in this cookbook!

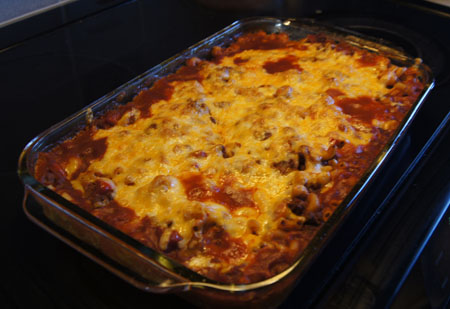
It will be easy to find a recipe to cook for this blog. I start flipping through the pages. What catches my eye is “Chili Mac”, from the first chapter, Assemble and Bake. I haven’t made many of the casseroles in this book, and it’s time to try one.

Chili Mac is an American comfort food, although I’ve never made it before. It even has its own Wikipedia entry. Briefly, it’s made with meat-bean chili, noodles, and topped with cheese. Sounds good to me!

Because of copyright issues, I am not scanning in this recipe. It’s a relatively recent publication, and the editors are still actively publishing. The original recipe is on pages 80-81 of the Cover and Bake. Page 80 is a two-column discussion of how they got this recipe “perfect”! Page 81 gives the recipe in 1 1/2 columns. This is the typical layout of Cook’s Illustrated recipes: not a fast food publication! I changed their recipe a bit (my adaptation is below).

Chili Mac: adapted from Cover and Bake, America’s Test Kitchen
makes a 9×13-inch casserole, enough to serve 8, depending on appetites

  • 8 ounces elbow macaroni
  • 3/4 cup reserved macaroni-cooking-water
  • 1 1/2 pounds hamburger (I used 90% lean)
  • 2 onions, chopped
  • 1 red bell pepper, chopped
  • 2 tablespoons finely minced garlic (4-8 cloves)
  • 2 tablespoons hot chili powder
  • 1 tablespoon ground cumin
  • 1 14.5-ounce can diced tomaotes
  • 1 28-ounce can tomato sauce
  • 1 tablespoon brown sugar
  • 8 ounces grated cheese, preferably “colby Jack” or a mixture of cheddar and Jack cheese

Cook the macaroni in salted boiling water until al dente. At my altitude of 5300 feet, this took about 10 minutes; it would take less time at sea level. (It’s important not to boil the macaroni too long, as it will continue to cook when the casserole is baked.) Before draining the pasta, reserve 3/4 cup of the pasta water; this will be used later when the casserole is assembled.

As the macaroni cools, cook the hamburger in a large pan or pot, salting to taste. (The original recipe recommends cooking the hamburger in a little oil; it’s up to you.) When the meat is cooked, drain it in a colander to remove (and discard) the fat. Set the meat aside.

Add a little oil to the now-empty pan and cook the onions, red bell pepper, garlic, chili powder, and cumin, stirring, until the vegetables soften and begin to turn brown (about 10 minutes). Add the diced tomaotes, tomato sauce, brown sugar, the 3/4 cup reserved pasta water, and the drained hamburger. Simmer 20 minutes.

Stir the cooked macaroni into the pot and season to taste with salt and pepper. Pour the mixture into a 9×13-inch rectangular casserole and sprinkle with the grated cheese. Bake at 400˚ for 15 minutes, or until the cheese is melted.

Chili MacOh yes, this was good! Yum!

I will definitely keep this cookbook. (And tucked inside is the little Rival Crock-Pot Cookbook that I mentioned in an earlier post.) With fall coming on, I am sure I’ll be back to Cover and Bake soon, looking for warm and hearty meal ideas.